
Unlocking Seamless Data Integration in the Cloud with Azure Data Factory
Introduction
In today’s data-driven world, managing and transforming data from various sources is a very cumbersome task for organizations. Azure Data Factory (ADF) stands out as an extensive and robust ETL and cloud-based data integration service that helps enable businesses to streamline their complex data-driven workflows timely and with ease. Azure Data Factory provides a scalable and flexible platform that is designed to meet your data integration needs, whether you’re orchestrating your ETL processes, automating data movement between on-premise and cloud, or transforming raw data into meaningful insight.
Let’s understand core ADF concepts:
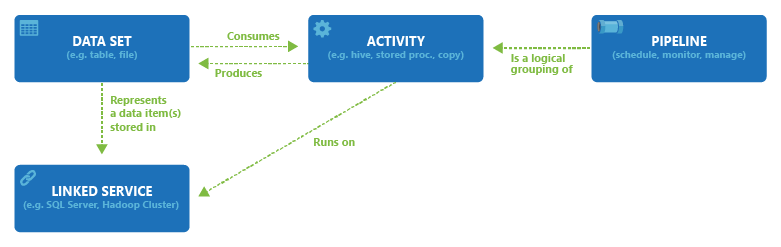
Azure Data Factory Components
- Pipelines: It is a logical grouping of activities.
- Activities: Each activity performs a task. An activity could be a data movement e.g. taking an ingestion, pulling data into the cloud, and performing a transformation on it. There are different types of activities:
- Data Movement: For example a copy activity. It moves data between sources and sinks so that we can perform operations on the data.
- Data Transformation: These are external activities where computation is done outside ADF on a data store.
For example, a stored procedure that is executed on a Database, Azure Functions, Spark, etc. - Control: Native to ADF. For eg., Web-calls, validate pipelines, etc.
- Data Sets represent data from any data store. Data sets get consumed by an activity in a pipeline as shown in the above figure.
- Linked Services: These are the connection strings needed to connect to the data sets
- Integration Runtime: It provides the compute that allows ADF to run the pipelines.
Use Case Scenario
Now, let’s try to understand the workings of ADF with the help of a use case. Suppose we have a storage account in which users upload all sorts of data, such as CSVs, images, HTML or text files, etc. We want only the images from the first storage account, for this, we’ll copy the images from the source storage account to the destination storage account. We have to use wildcards in the pipeline to select only images. This is a simple task when you just have to use a single wildcard. You can straightaway just use the Copy Activity and achieve it. But here we have to move all images be it JPEG or PNG, which means we’re dealing with multiple wildcards.
Prerequisites
- Blank Azure Data Factory
- Two storage accounts (source, destination). In our example, sourceadfaccount is the source storage account and destinationadfaccount is the destination storage account.
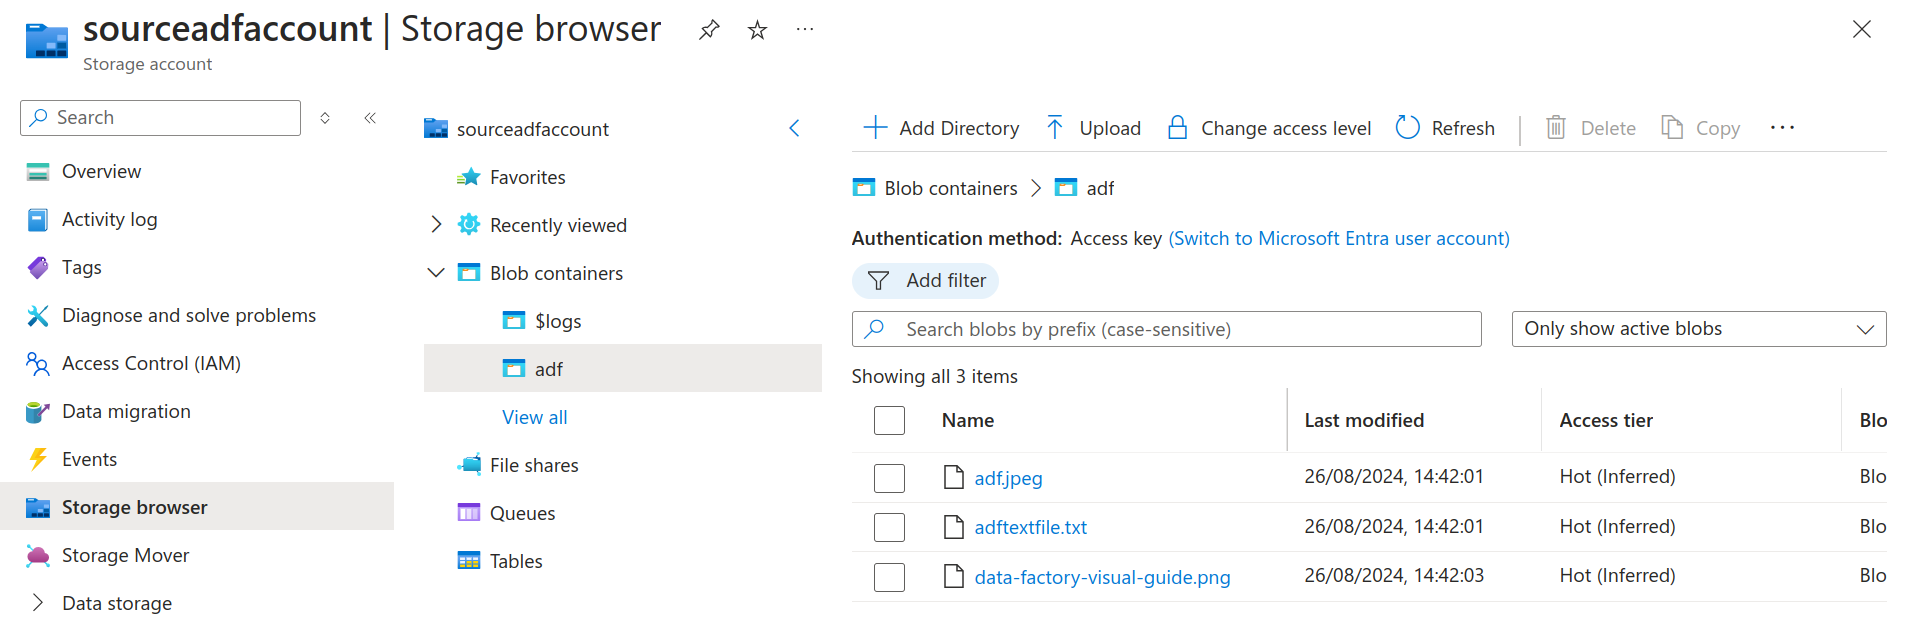
Source Storage Account
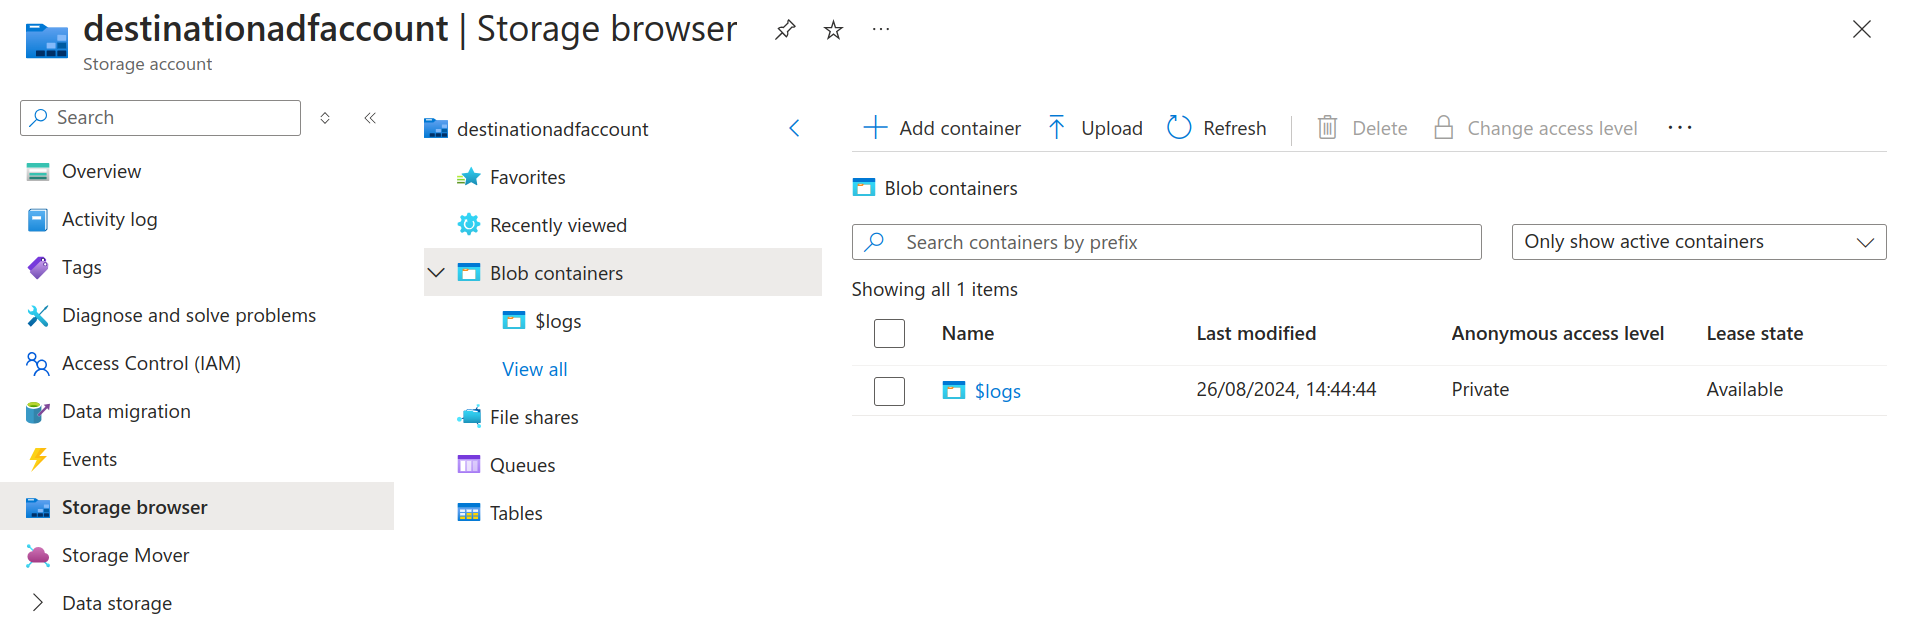
Destination Storage Account contents before running the pipeline
- Contributor access over the subscription.
Solution
- Go to your ADF Studio by clicking on the Launch Studio button.
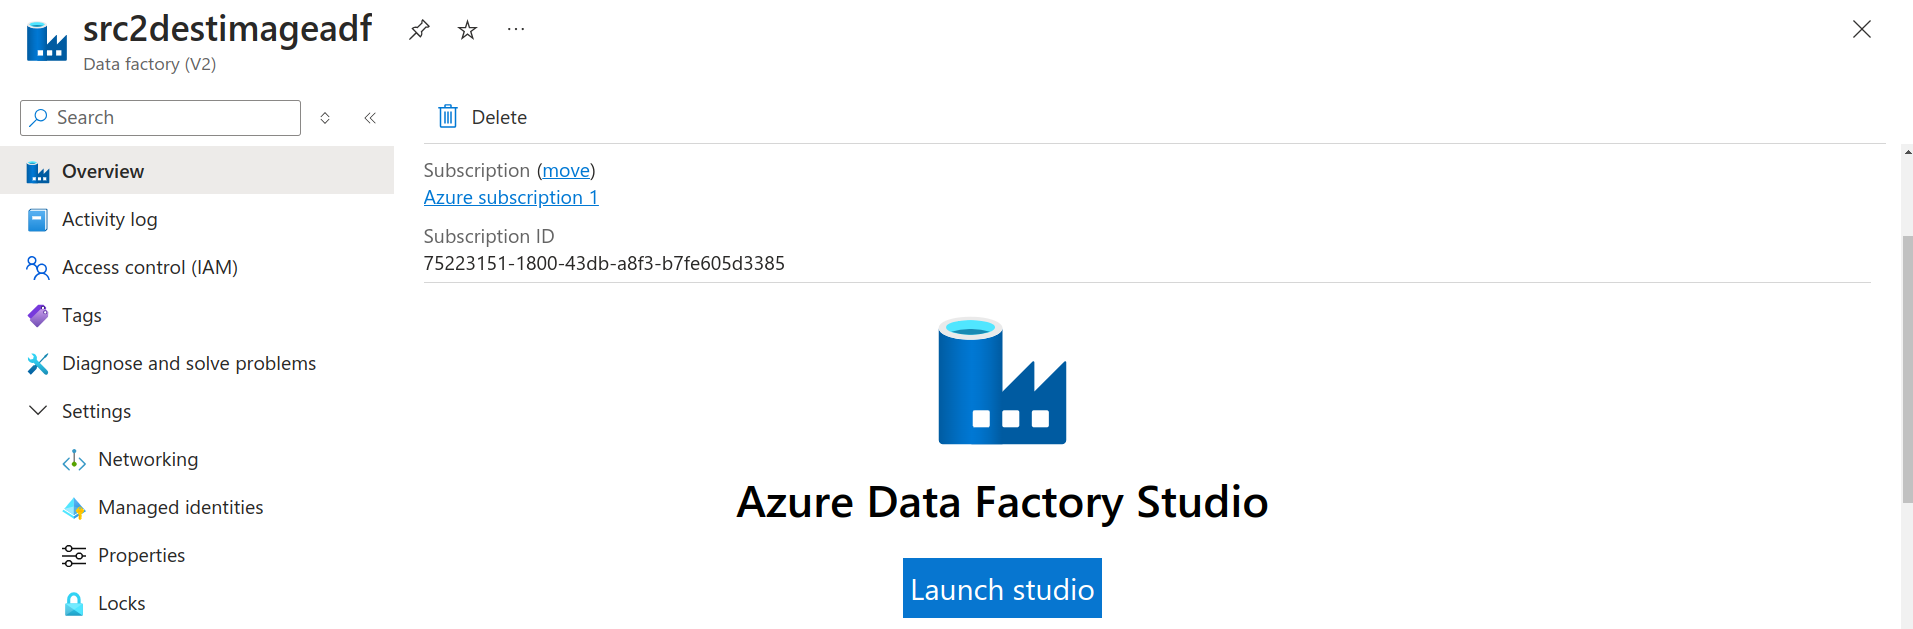
Azure Data Factory Launch Studio
- Now we need to connect to our source and destination storage accounts, which means we need to create two linked services. For this, click on Manage in the left-hand side menu and select Linked Services. Click on + and then select “Azure Blob Storage” as the Data store.
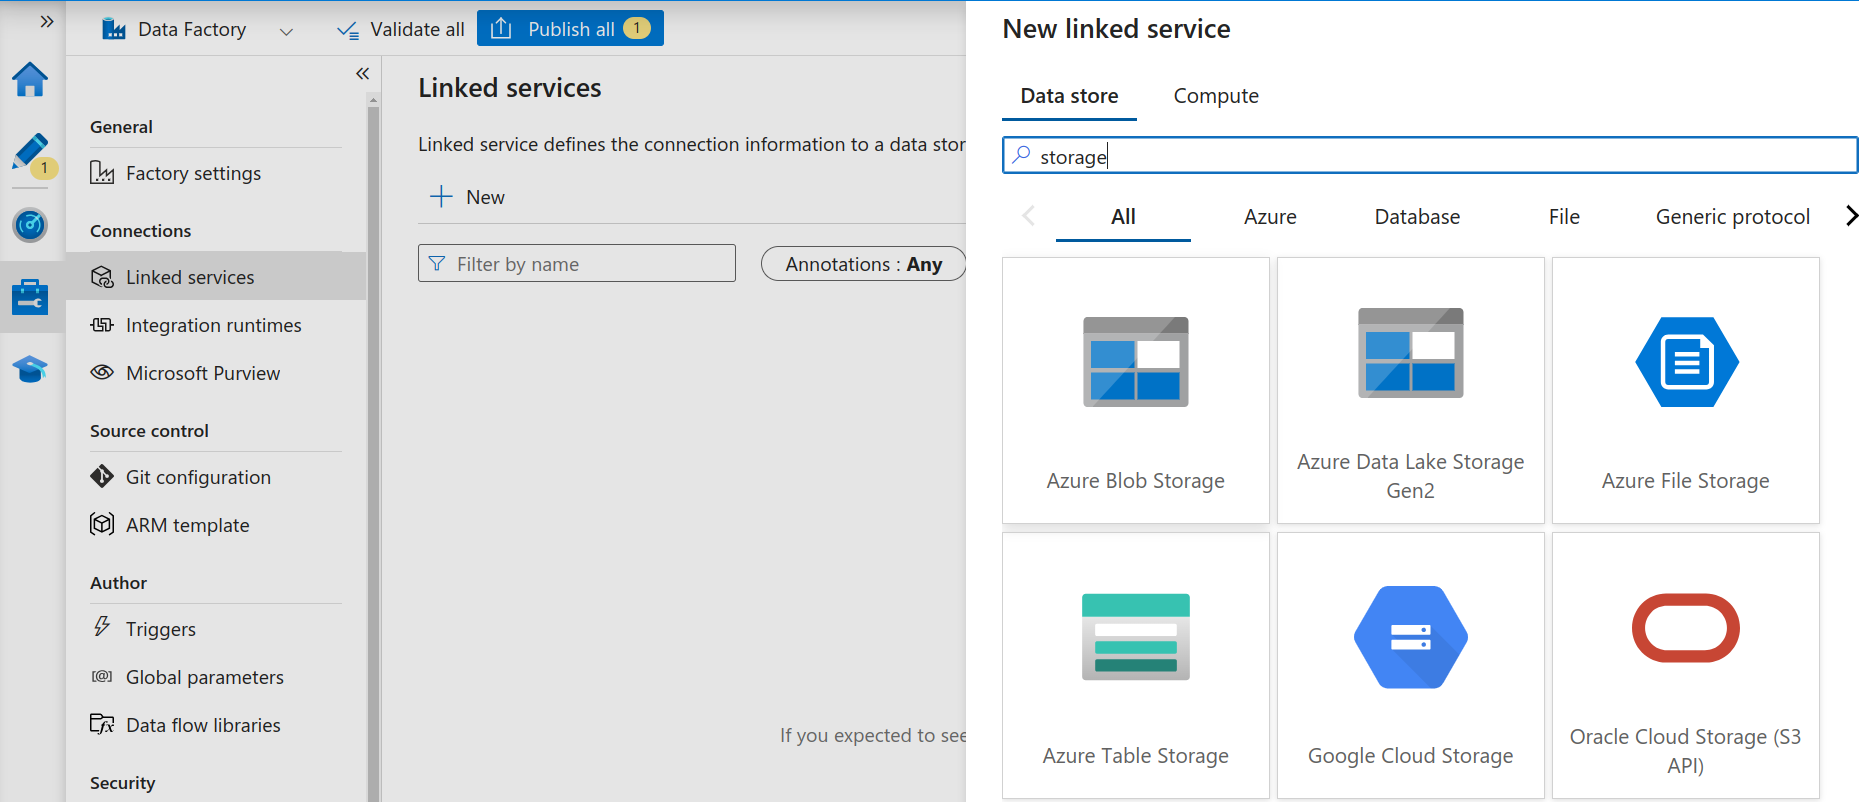
Add a new Linked Service
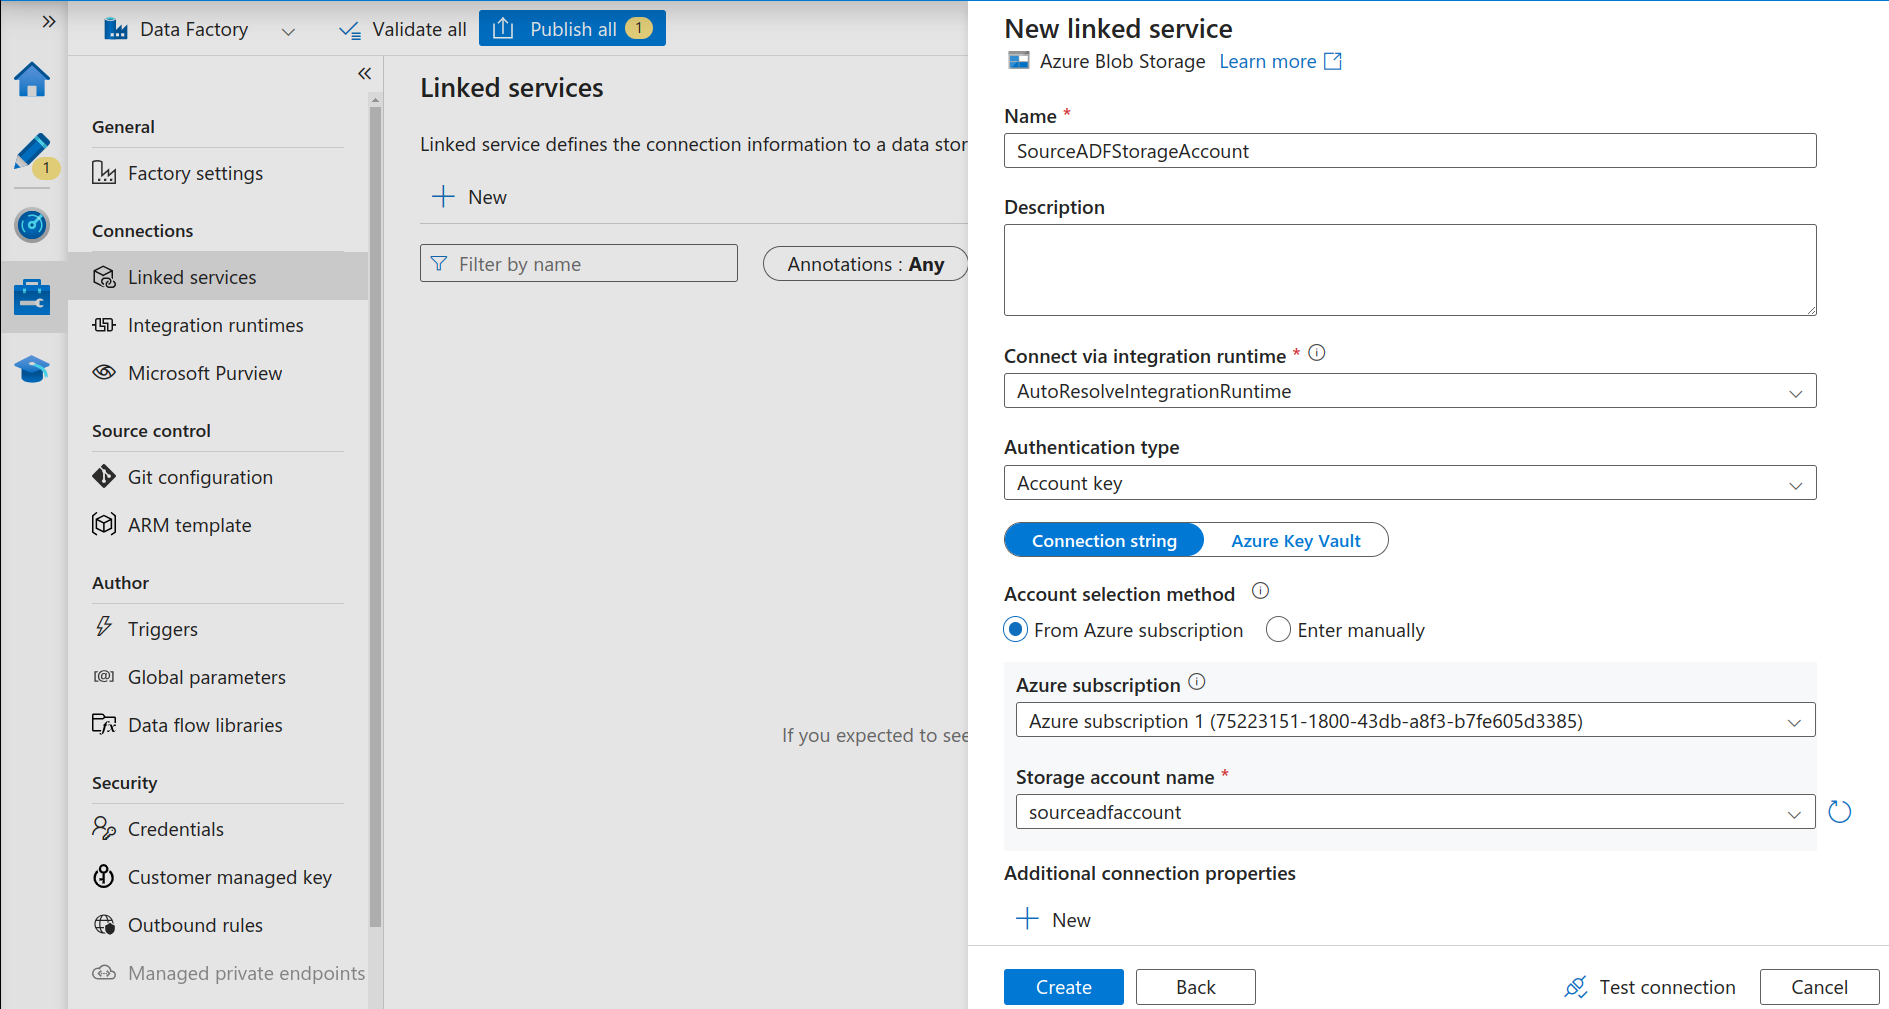
Fill in all the information for the source storage account and test the connection. Once successful, repeat the steps for the destination storage account.
Choose Azure Blob Storage Data Store as the Linked Service
- Next, we have to create the two datasets, sourceimg and destimg. For this, select the Author menu item on the left side. Click on the + button and select Dataset. Now, again select the data storage as Blob Storage and because our image files are of type binary, we’ll be selecting binary format.
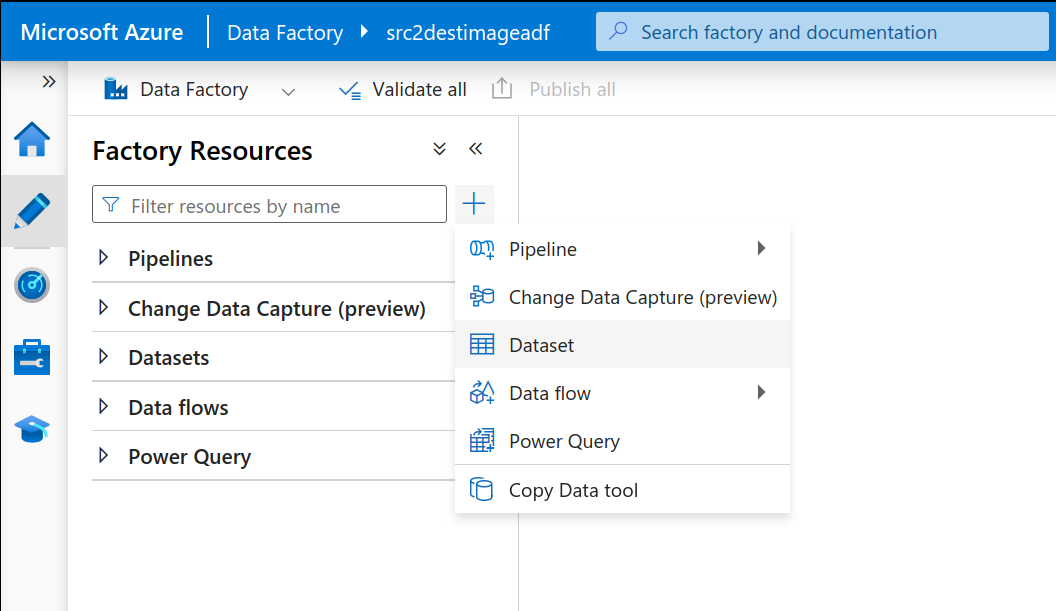
Add a new Data Set
Select source linked service, browse the file path, and click on OK.
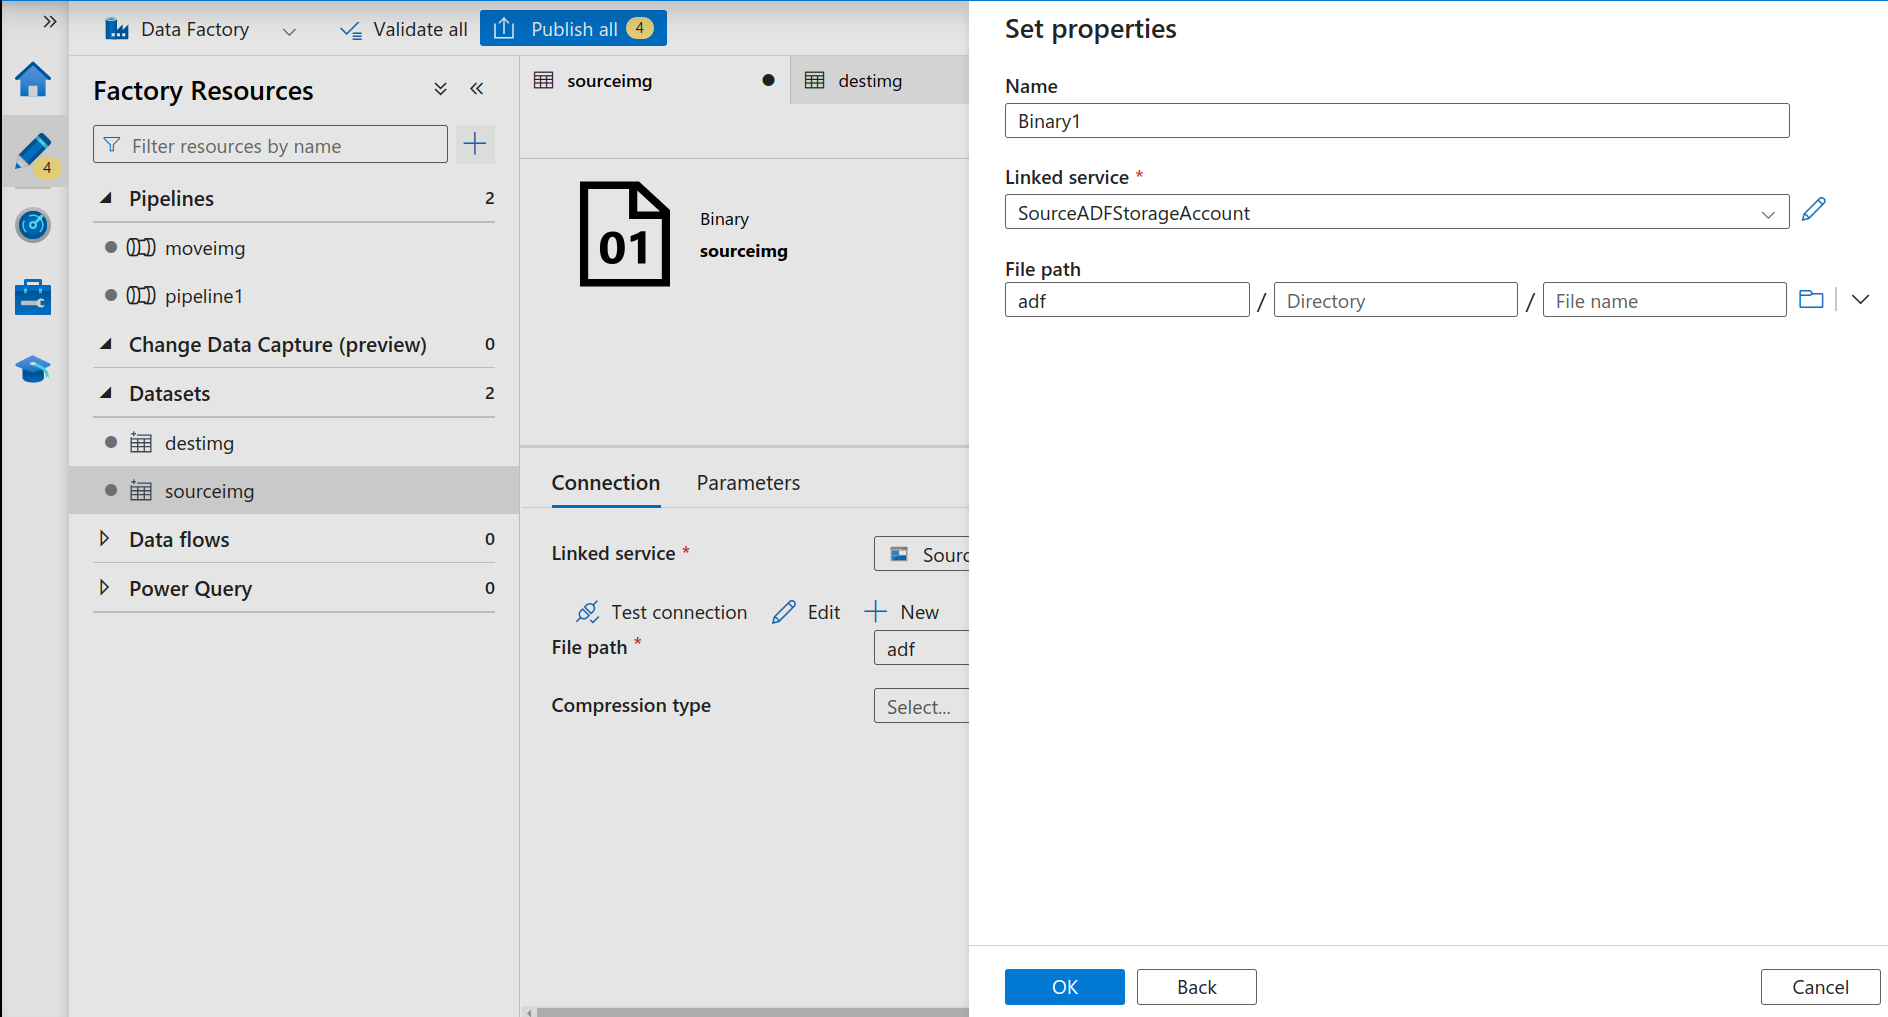
Add Source Data Set
Repeat the same steps for the destination dataset.
- Now, we’ll start with creating our pipeline. Click on the + button again in the Author Tab and this time select Pipeline.
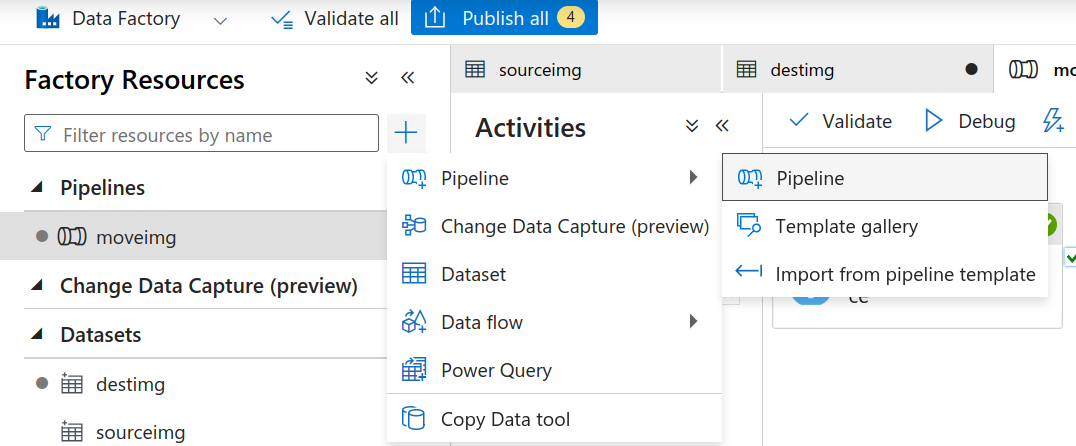
Create a new pipeline
- The first task for us is to traverse our source storage account and get all the files that need to be scanned. For this we’ll be using the “Get Metadata” activity.
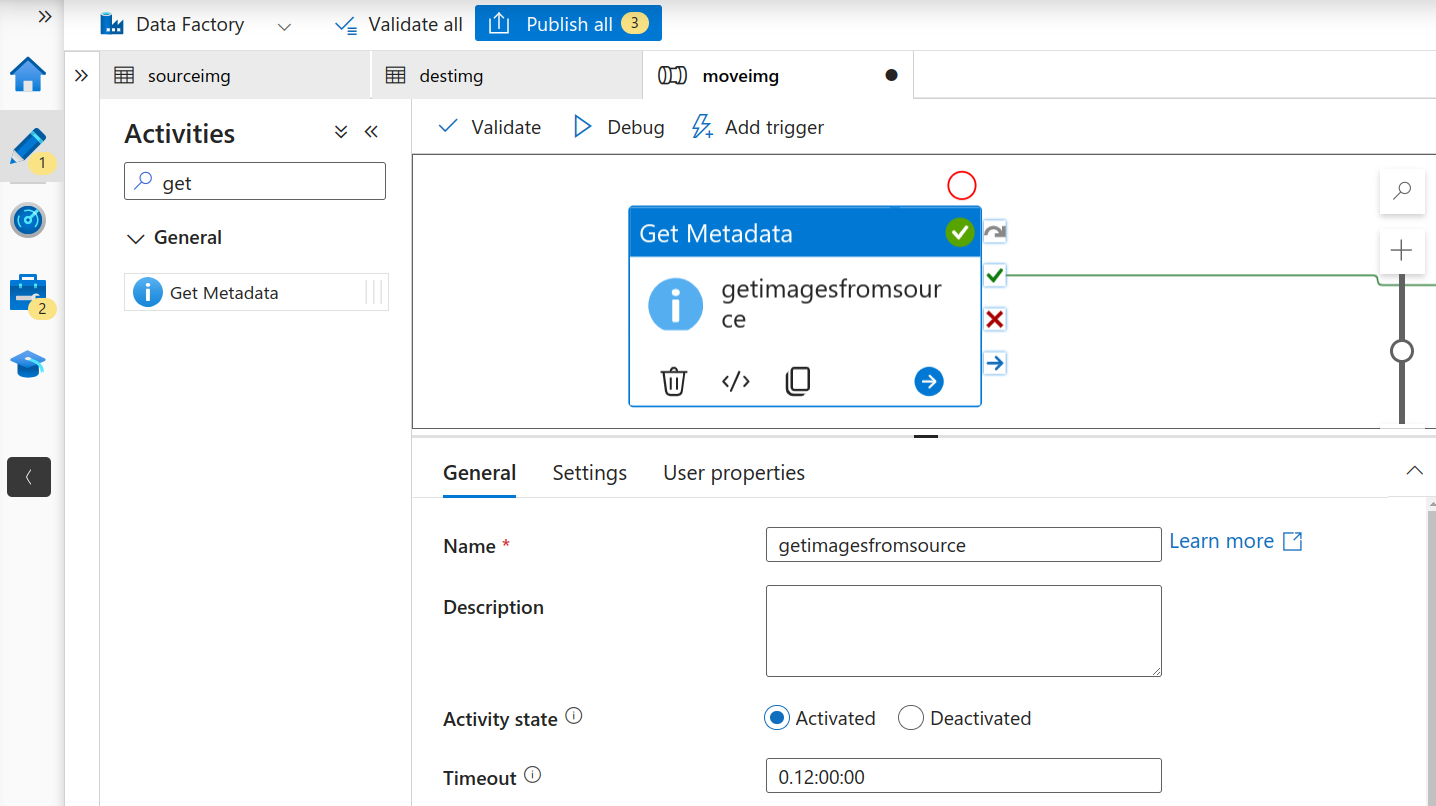
Get Metadata Activity
Go to settings and add “Child Items” as an argument. This returns a list of sub-folders and files in the given folder. Returned value is a list of the name and type of each child item.
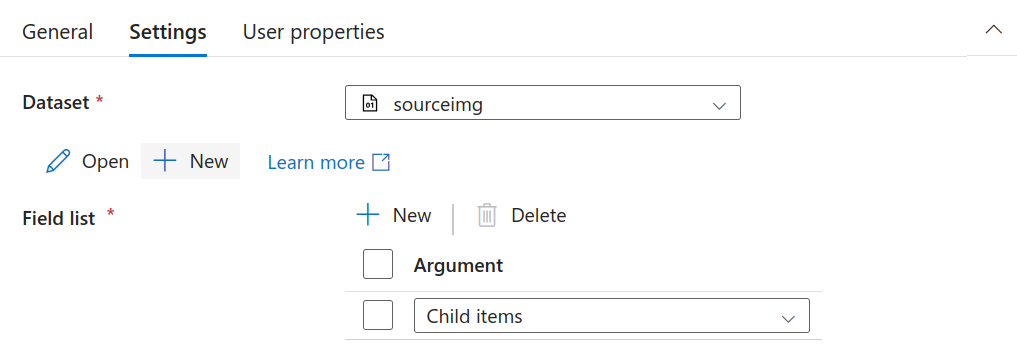
Modify Activity Settings
- Now we have all the files from the source and next we need to filter out the image files (jpeg + png). For this task, we’ll be using the ADF “Filter” activity.
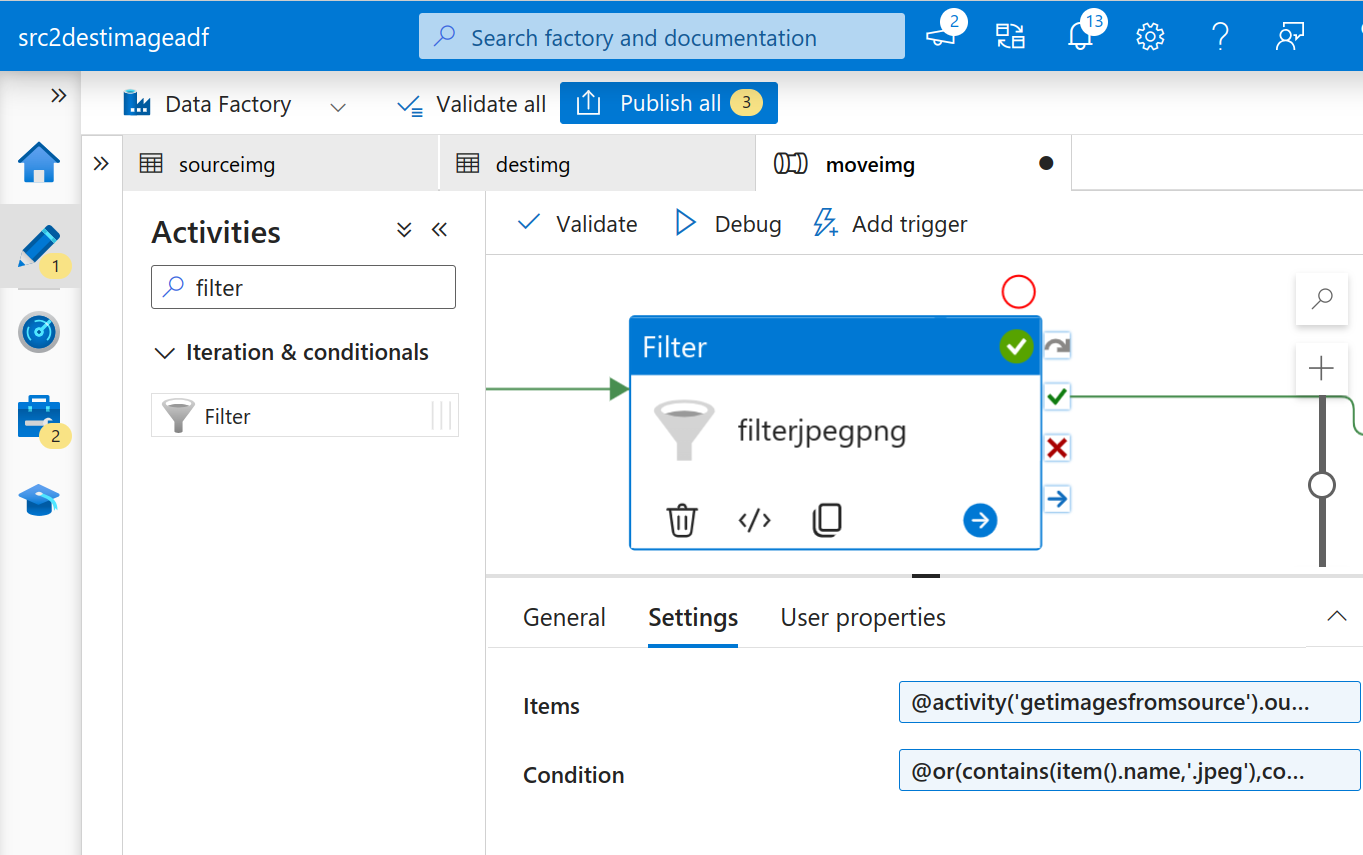
Filter Activity
Use the following expressions for items and conditions respectively:
Items: This gets the output files from the previous activity@activity('getimagesfromsource').output.childItemsConditions: This is used to filter out the jpeg and png files from the output we received from the last activity.
@or(contains(item().name,'.jpeg'),contains(item().name,'.png'))
- The filter activity will give us the desired filtered image files. Next, we need to iterate the output to copy these to the destination storage account. For this task we’ll be using the “For Each” activity.Under the settings, for the items click on “Add dynamic content” and select the filter activity’s output value.
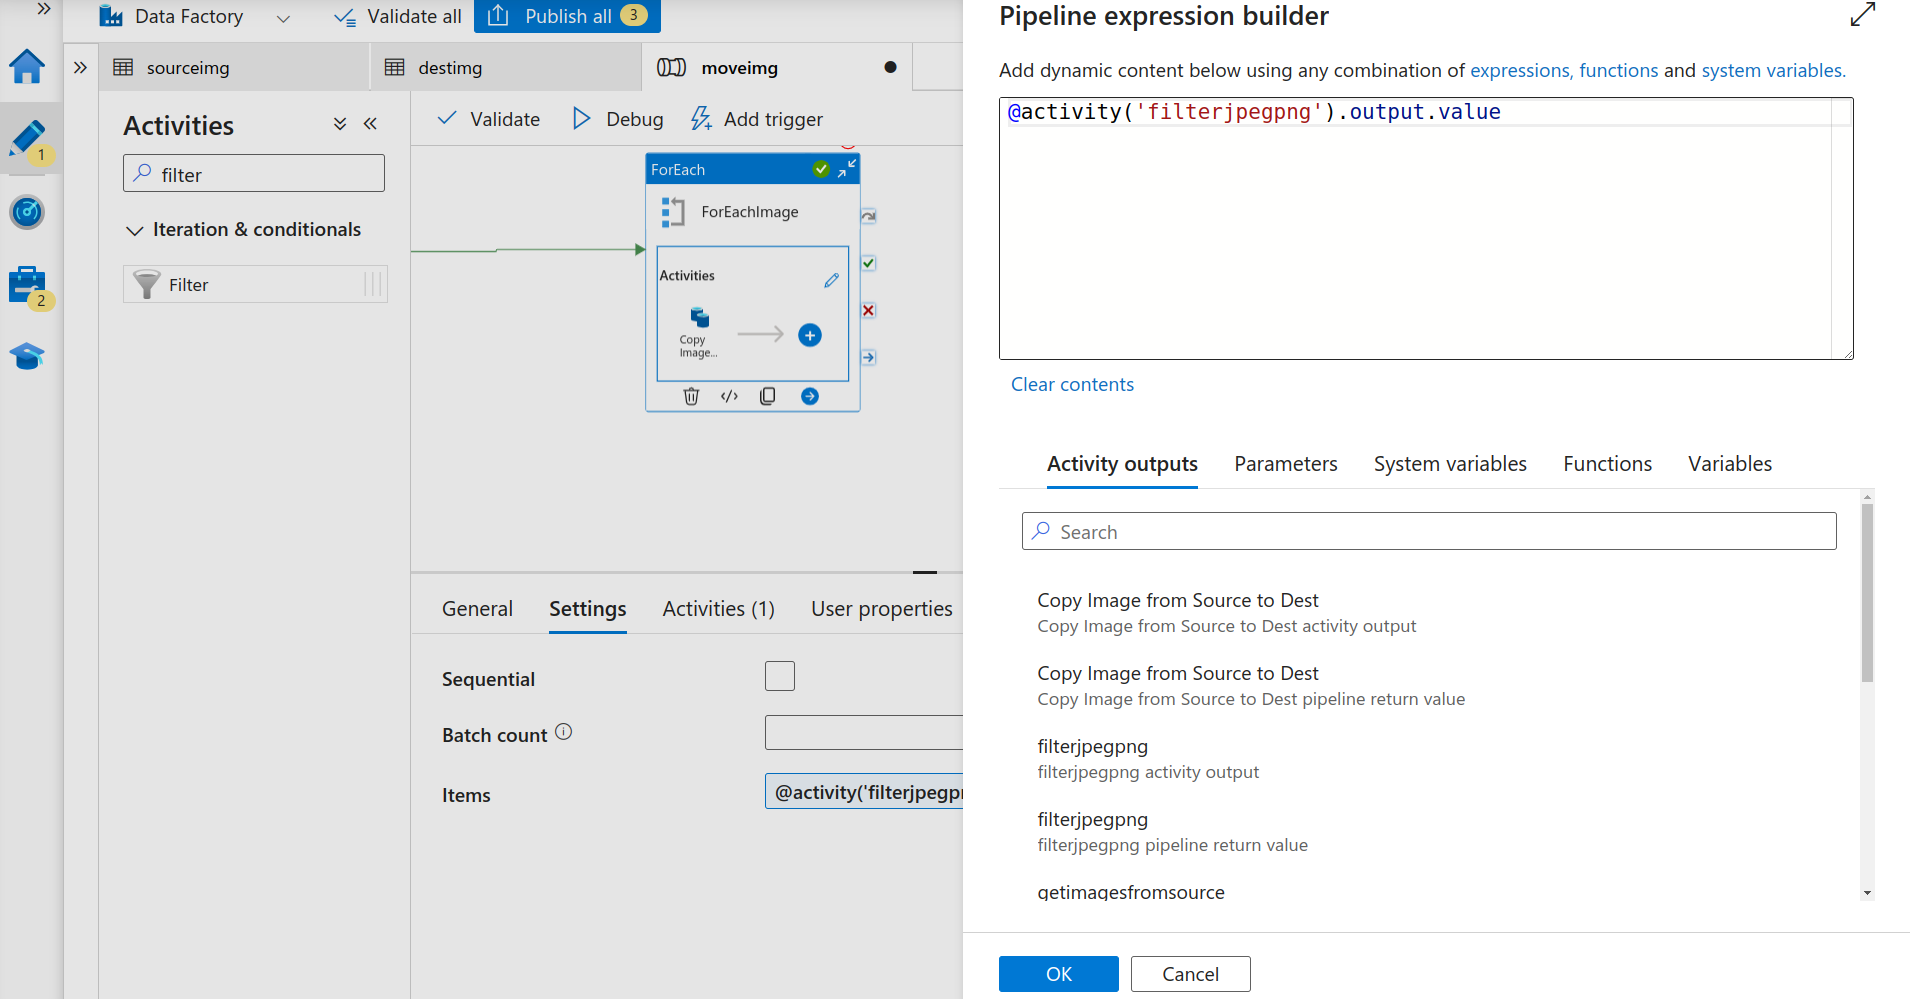
For Each Activity
Now go to the “Activities” tab for the “For Each” activity and add the “Copy” Activity.
- In the “Copy” Activity choose the source as the sourceimg dataset. In the File path type, select “Wildcard file path” and for the filename add “@item().name”.
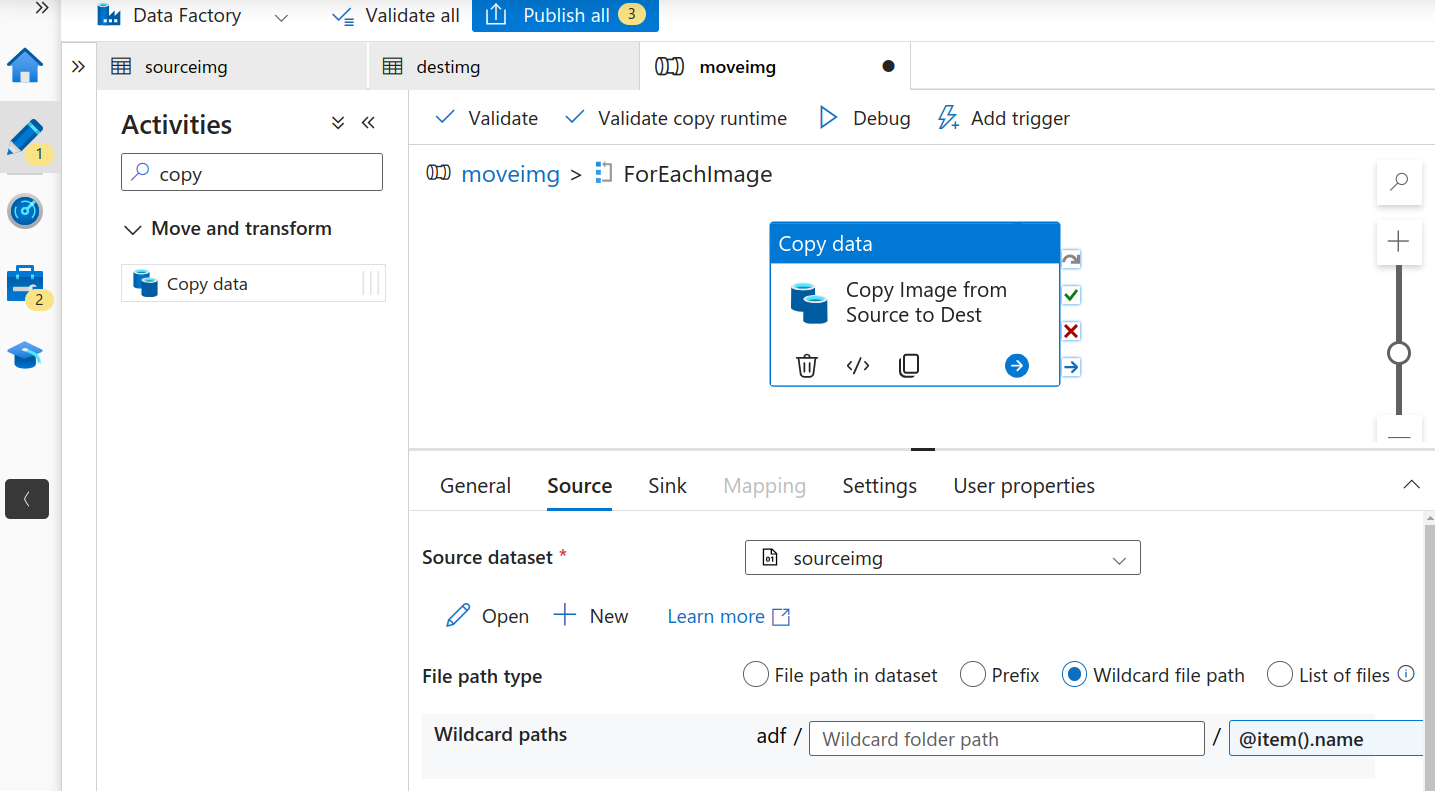
Copy image source
For the sink, add the destimg dataset.
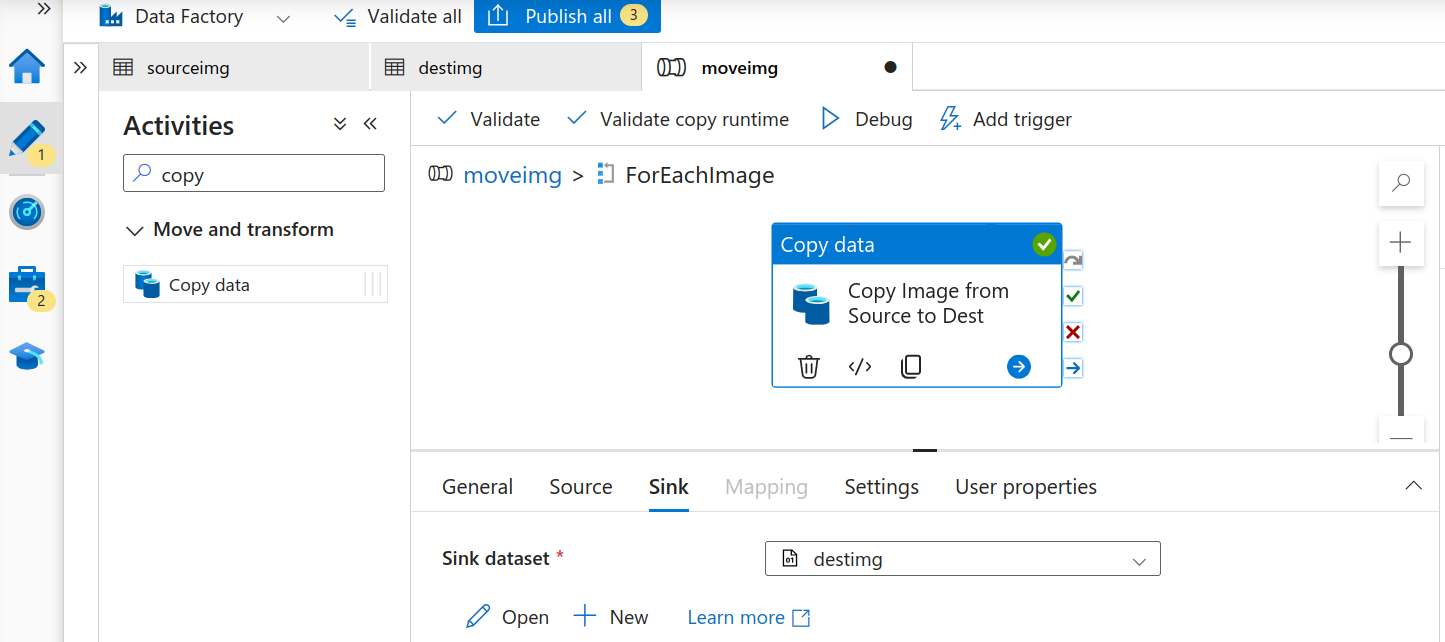
Copy image destination
- Go back to the main pipeline. Make sure you have connected all the activities. It will look something like this:
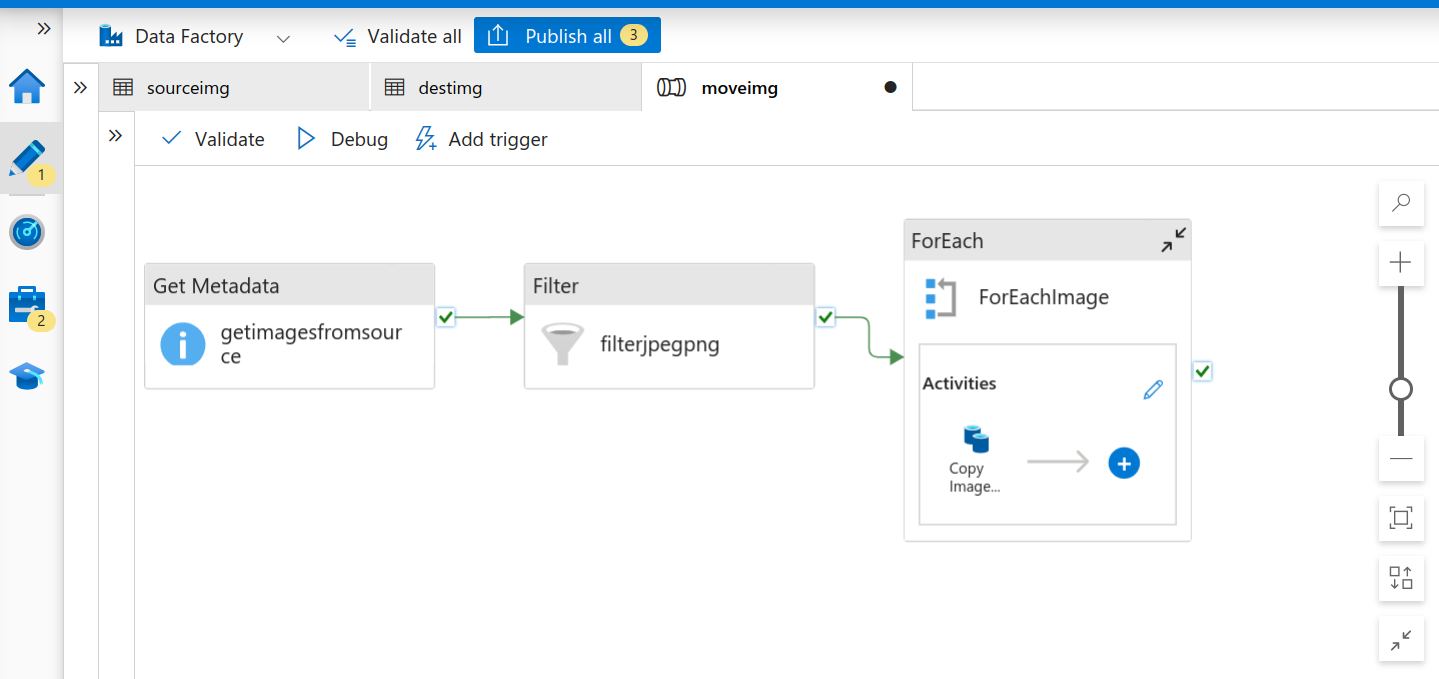
Final Data Pipeline
- Next, we have to “Trigger” the pipeline. For that, you need to validate and publish your pipeline. You can also choose to trigger it now or anytime manually.
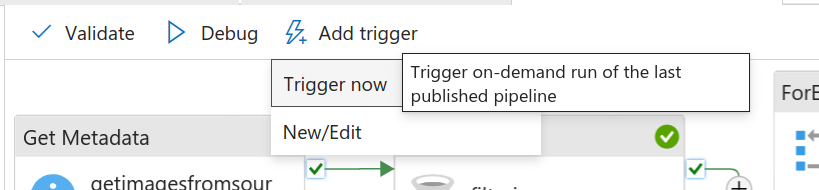
Trigger Now
Click on “New/Edit”. Here you can choose to run the pipeline based on a schedule or various events:
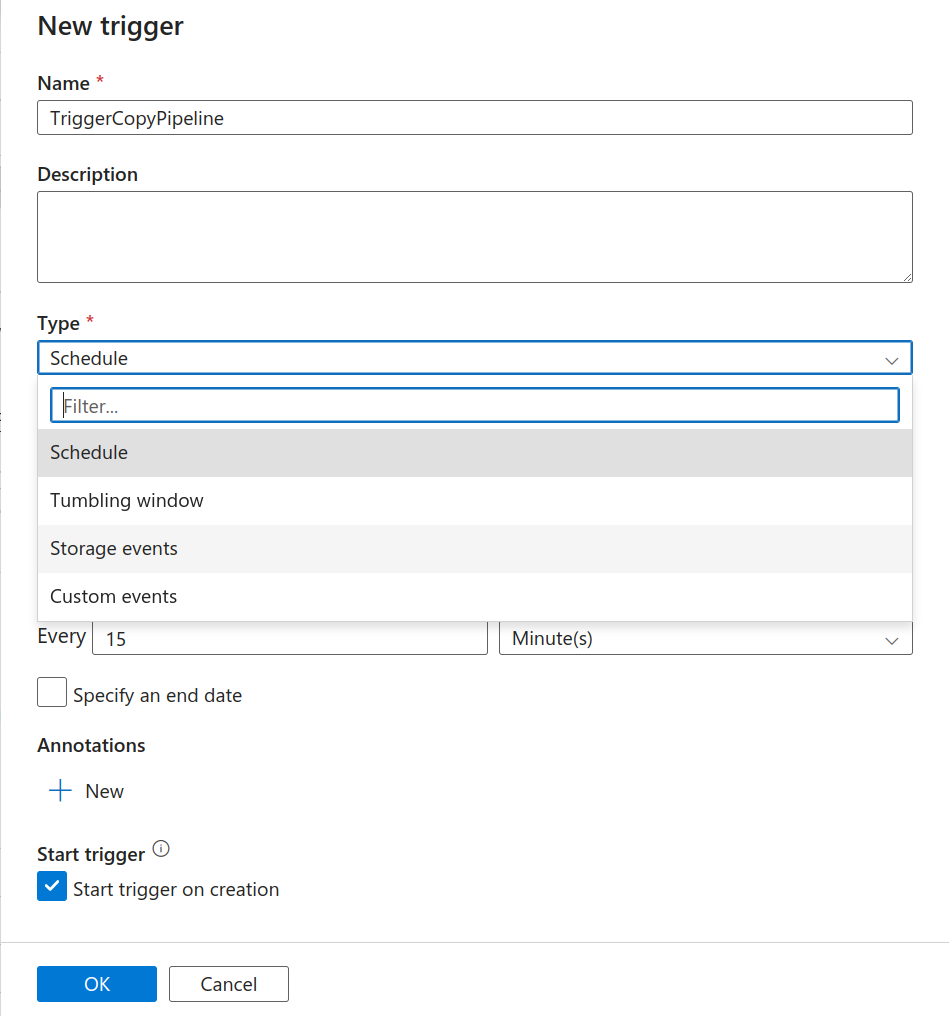
Create a New Trigger
We’ll be choosing to trigger the pipeline now, as we already have the data. You can see the logs and output from the activity runs window at the bottom of the screen.
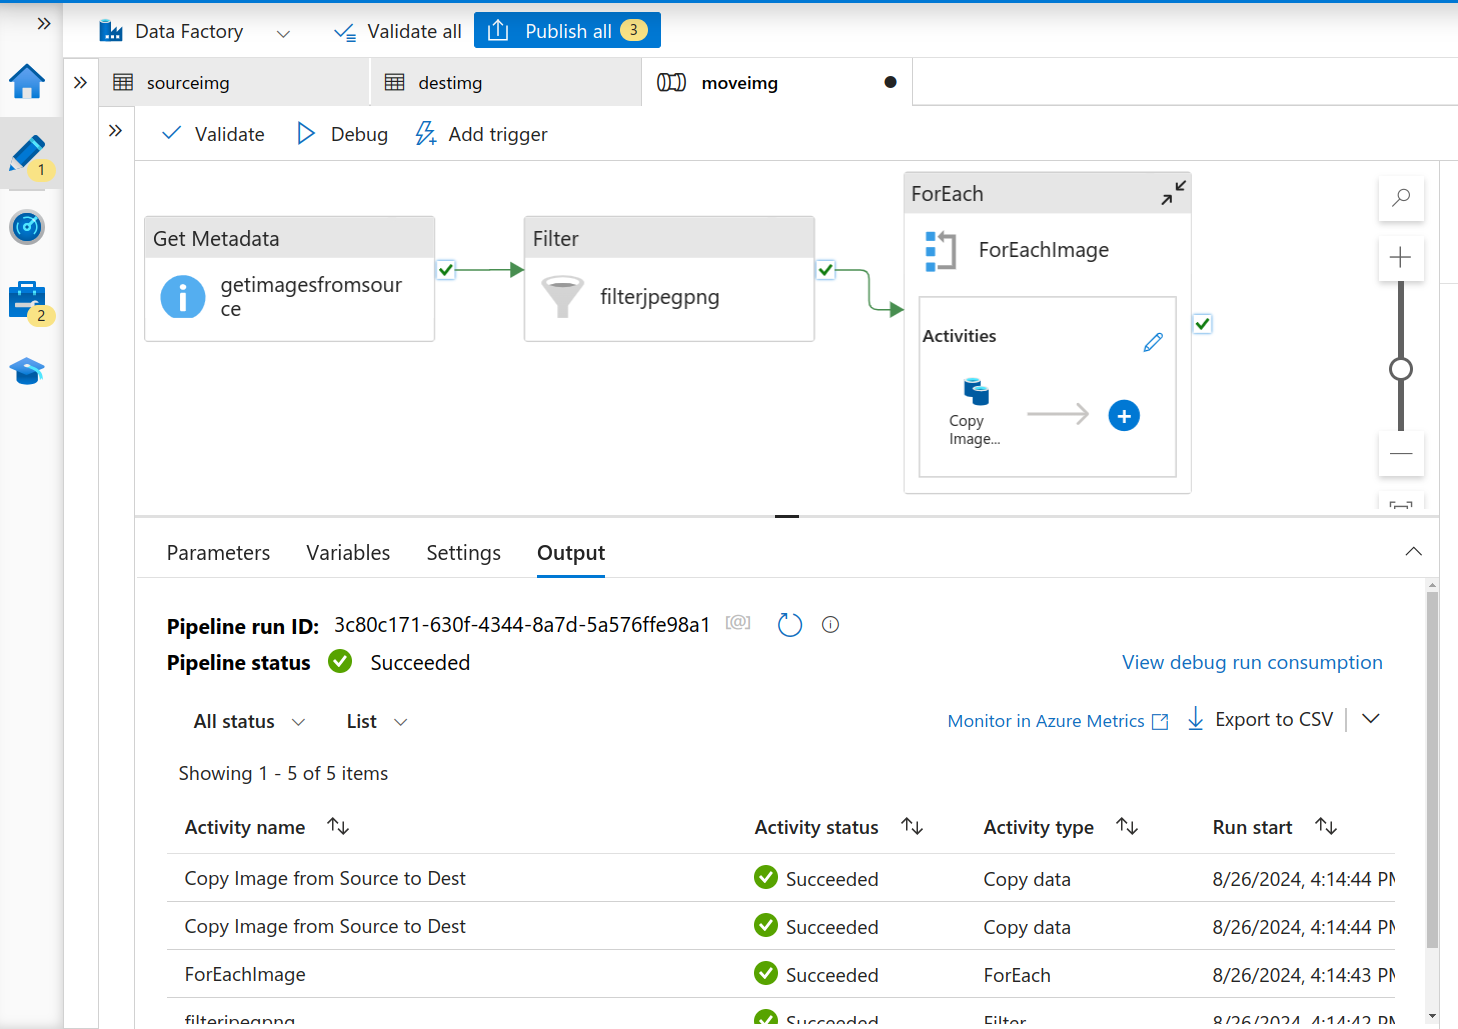
Activity Runs
Destination Storage account contents after running the pipeline:
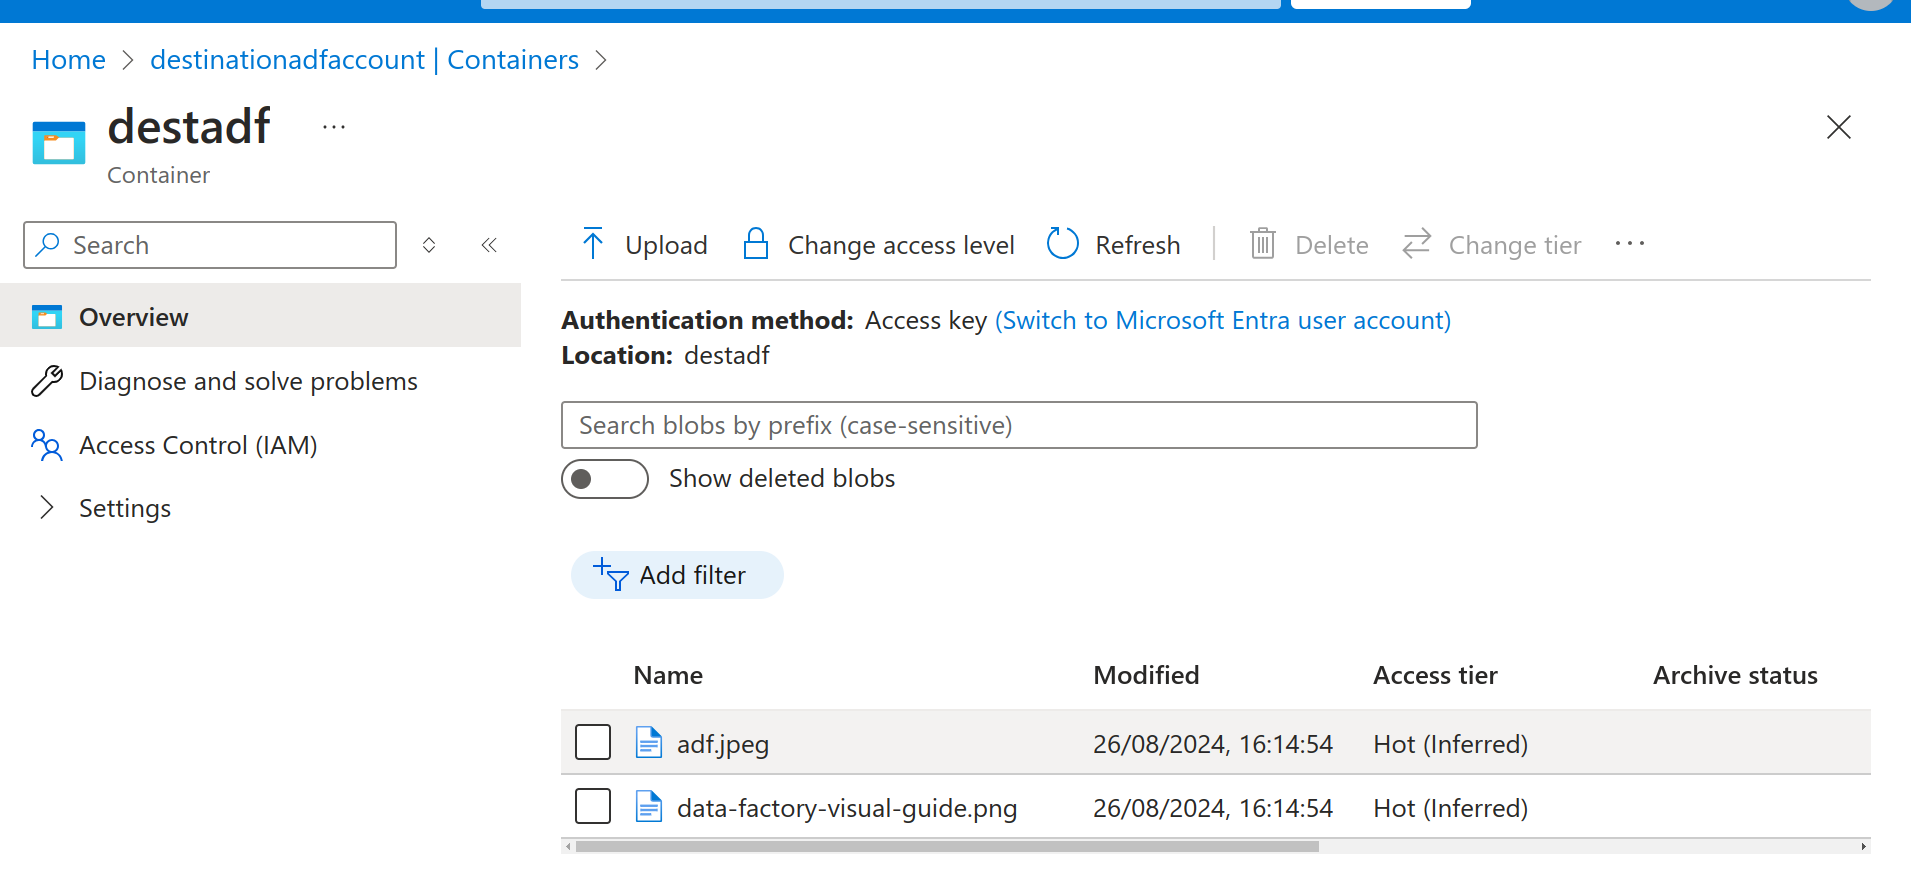
Destination Storage Account
So as you can see above, the ADF pipeline has successfully copied the image files from the source to the destination storage account. You can also add multiple activities in between if you want to perform any data transformations before actually storing the contents in the destination. For example, if you want the files to be zipped you can select the compression type while setting up the dataset etc.
Summary
In this blog, we understood what an Azure Data Factory (ADF) is and how it solves our use case. One can achieve a lot using ADF, whether you’re modernizing legacy systems, building new data workflows, or scaling your analytics capabilities. ADF can adapt to your evolving needs. It makes managing and organizing data a lot easier so that you focus on more of the decision-making. If you’re looking to streamline your data processes, Azure Data Factory could be just the tool you need.


