
The RTE Color Picker Plugin for AEM
The Rich Text Editor (commonly known as RTE) in Adobe Experience Manager (AEM) is a great tool for authoring the text on the page, but it does not have any out of the box (OOTB) color picker plugin. There are few custom solutions available over the internet, however, they often lead to the following common frustrations:
- Time to load the dialog.
- Multiple clicks to apply color.
- Inconsistency with other Apps.
So, let’s delve deep into a custom solution for integrating a color palette plugin into RTE to lessen (address) the challenges outlined above.
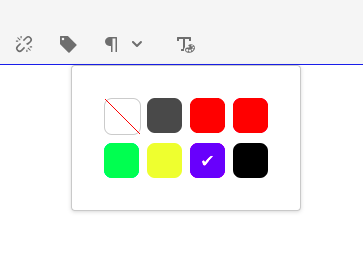
Custom rte color picker palette
Steps to implement the custom Color Palette in AEM
First of all, let’s download the package.
You can either install the downloaded package from the CRX package manager and jump to the steps mentioned in section 2, or unzip it to continue with the steps below and then move on to the steps in section 2.
Once the downloaded package is installed or unzipped successfully, it will have the following files:
1. color-picker.css
2. color-picker.js
3. css.txt
4. js.txt
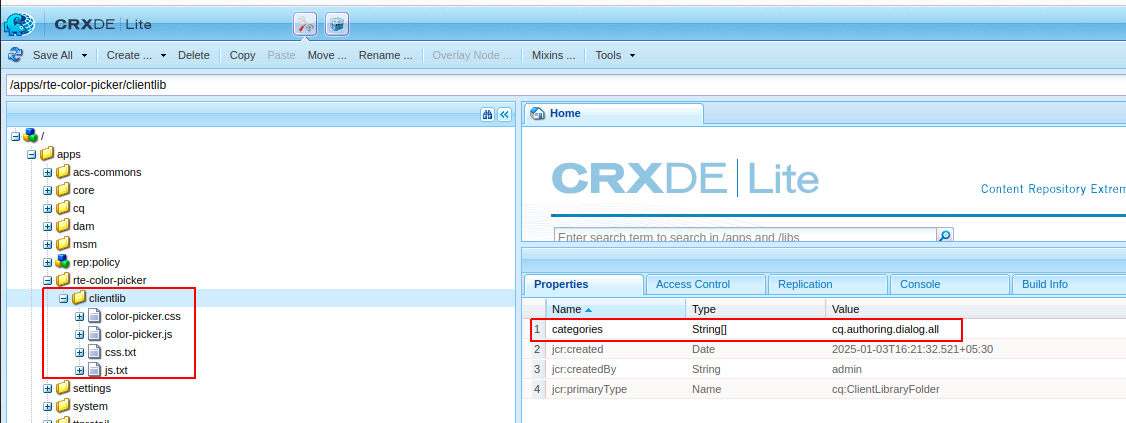
RTE color picker plugin files
Steps are divided into two sections. Here, in Section 1, the plugin is developed by extending the box class CUI.rte.plugins.Plugin, whereas Section 2 is more about the common steps to be followed to add an available plugin to the RTE component toolbar.
Section 1:- Create a client library for the color picker plugin
1.1 Firstly, create a client library with the category cq.authoring.dialog.all as shown above. (Want to shorten the scope? Give the client library a custom name and add this name to the extra-clientlibs property of the desired component.)
1.2 Now, create a JavaScript file inside the same client library and paste the code from /apps/rte-color-picker/clientlib/color-picker.js.
1.3 As per standard, create a js.txt file and add the JavaScript file name created in step 1.2 to js.txt. (As js file is directly created inside the clientlib folder, so there is no need to define the base)
1.4 Similarly, create a CSS file inside the client library to put the color palette styling and paste the code from /apps/rte-color-picker/clientlib/color-picker.css.
1.5 Create a css.txt file under the client library folder and add the CSS file name created in step 1.4 to css.txt.
Section 2:- Configure the color picker plugin in the RTE component
Let’s follow the steps below to configure the plugin for the component. You may refer documentation of Adobe by clicking the link present in the reference section for more details.
2.1 Navigate to the rtePlugins node of the text component, e.g., /apps/ttnretail/components/text/cq:dialog/content/items/tabs/items/properties/items/columns/items/column/items/text/rtePlugins.
Create a node named “rte-color-picker” of primary type nt:unstructured. Add a property called features of type String with the value *.
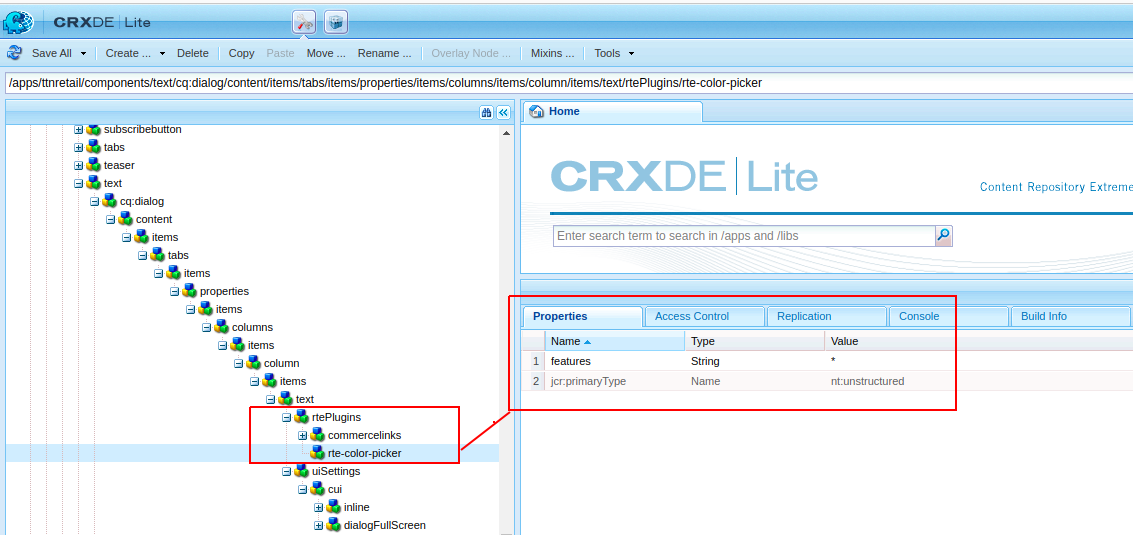
Aem rte plugin node
2.2 Now, navigate to the “inline” node under uiSettings, as shown below.
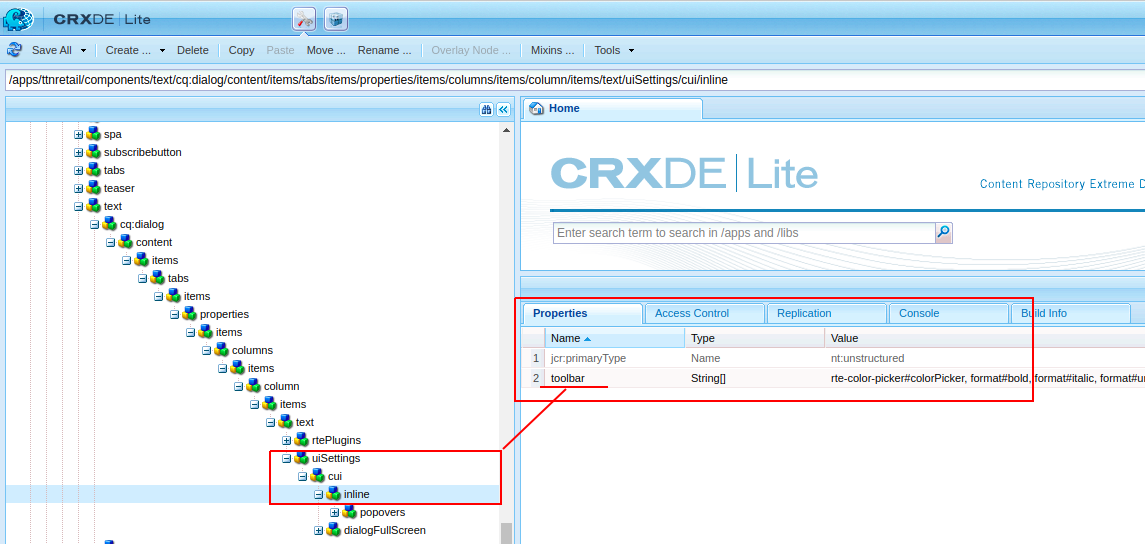
AEM RTE uiSettings inline node
2.3 Double-click on the toolbars property, which will display a pop-up as shown below. Click on the plus (+) button and add rte-color-picker#colorPicker. Then click “OK” and save the changes.
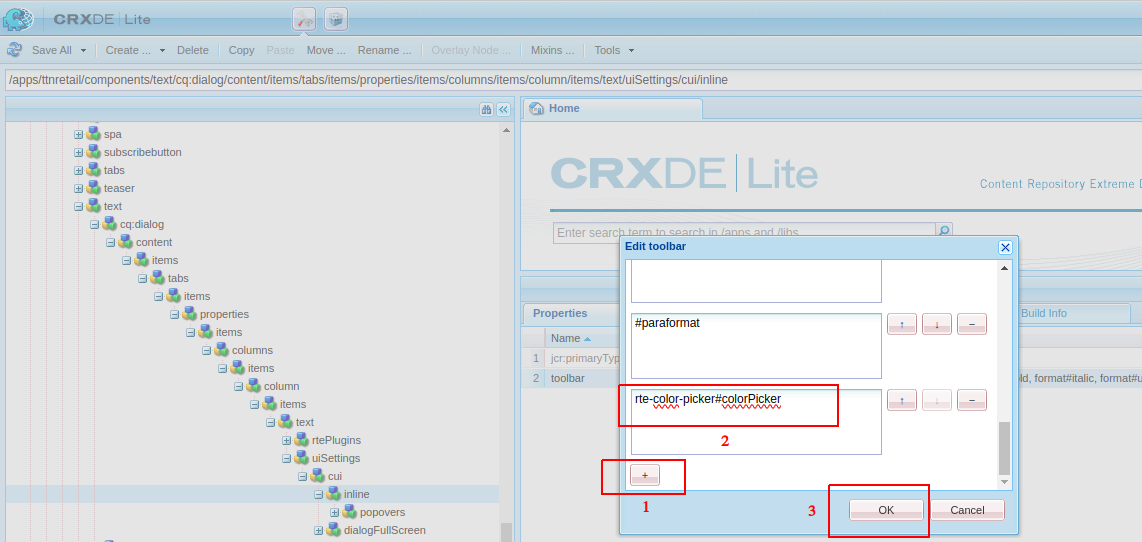
Edit toolbar inline node
2.4 (Optionally) Add this plugin to the dialogFullScreen node as well, if needed in maximize mode. Navigate to the plugin node inside dialogFullScreen (if the node is not present, take a reference from the OOTB text component to create(overlay) dialogFullScreen under uiSettings/cui).
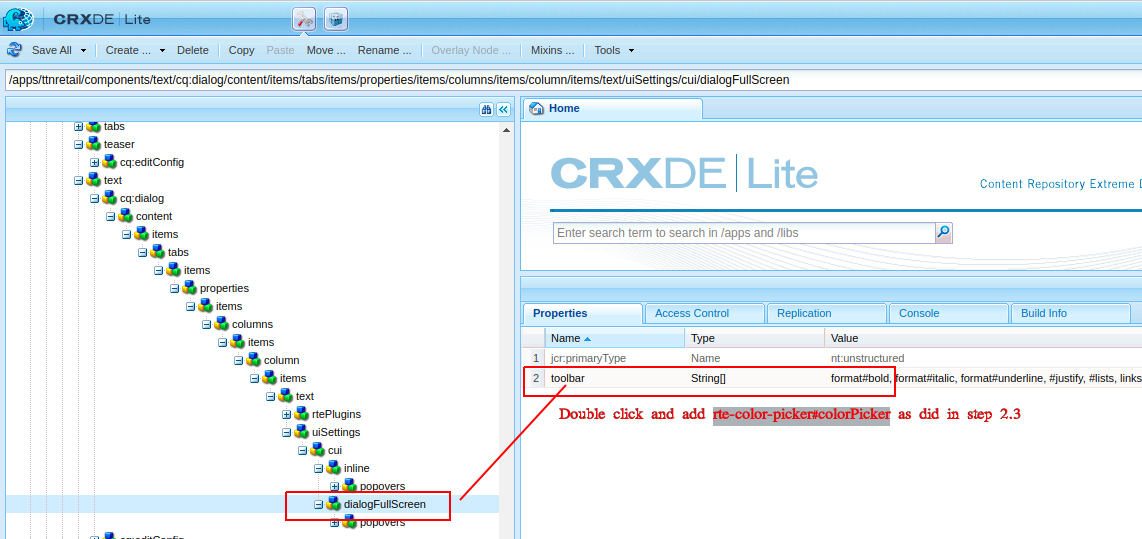
dialogFullScreen
2.5 Add the client library category to the extraClientlibs property of the component (Optional: only if a custom client library name was given instead of cq.authoring.dialog.all in step 1.1).
Result:
Just ensure to save all the changes after each steps.
Now, let’s author the RTE component on any page to check the color picker plugin. First select some text in the RTE and then click on the plugin icon, it will display the palette with the colors specified in the JavaScript file at line number 7 of the file color-picker.js
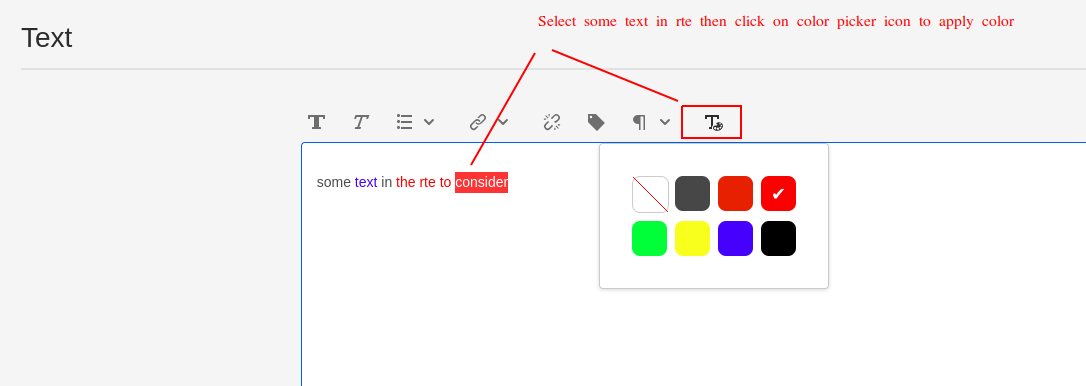
RTE color picker
Note:
i. Congratulations!, plugin is tested. Now, it’s time to customise the colors displayed in the palette which can be specific to the project, navigate to line 7 of the color-picker.js file and modify the array values (add or remove hex color codes as needed) as highlighted in the image below.
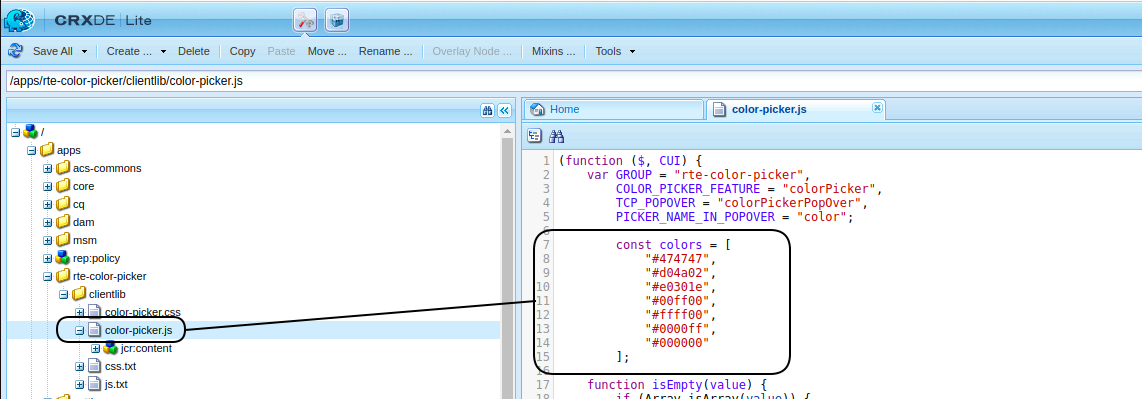
RTE color pciker js
ii. Last but not least, don’t forget to add the Handlebars dependency if the plan is to use it in an Experience Fragment.
Feel free to consider customising and optimising this solution so that it suits your needs to streamline the color selection process and enhance content authoring efficiency.
