
Simplistic Guide to configure SMTP & Email Settings in Adobe Commerce
Email configuration in Adobe Commerce is essential for maintaining effective communication with customers through transactional emails and notifications. Unlike Adobe Commerce Cloud, SMTP (Simple Mail Transfer Protocol) functionality is not natively included in Adobe Commerce Community Edition by default. However, you can easily integrate SMTP capabilities into Adobe Commerce Community Edition through extensions offered by various vendors. Here’s a comprehensive guide on how to set up SMTP settings, configure store email addresses, and create custom email templates for Adobe Commerce.
Prerequisites :
- Adobe Commerce Edition: Ensure you are using Adobe Commerce Edition (formerly known as Magento Commerce) for this setup. The version specifics may vary, but these instructions generally apply to recent versions.
- SMTP Plugin: Install an SMTP extension for Adobe Commerce.
Configuring SMTP Settings for Email Sending
- Navigate to Settings: Go to Stores > Configuration in Adobe Commerce Admin Panel.
- Scroll down and locate the section where your SMTP settings are configured, often under a vendor-specific label.
- SMTP Configuration: Click on SMTP to configure the Mail Sending Settings.
- Fill Mandatory Fields:
Enter the necessary details such as:
-
- Enable : Flag should be set as “Yes”
- Host: The hostname or IP address of the SMTP server. For our configuration, we are using Gmail as the SMTP server, so the host should be set to “smtp.gmail.com”
- Port: The port number used by the SMTP server (typically 25 for unencrypted, 465 for SSL/TLS, or 587 for STARTTLS)
- Authentication Method : set as Login
- Authentication Protocol : choose SSL
- Username: Your username for authenticating with the SMTP server.
- Password: Your password associated with the provided username.
- Set Return-Path : No
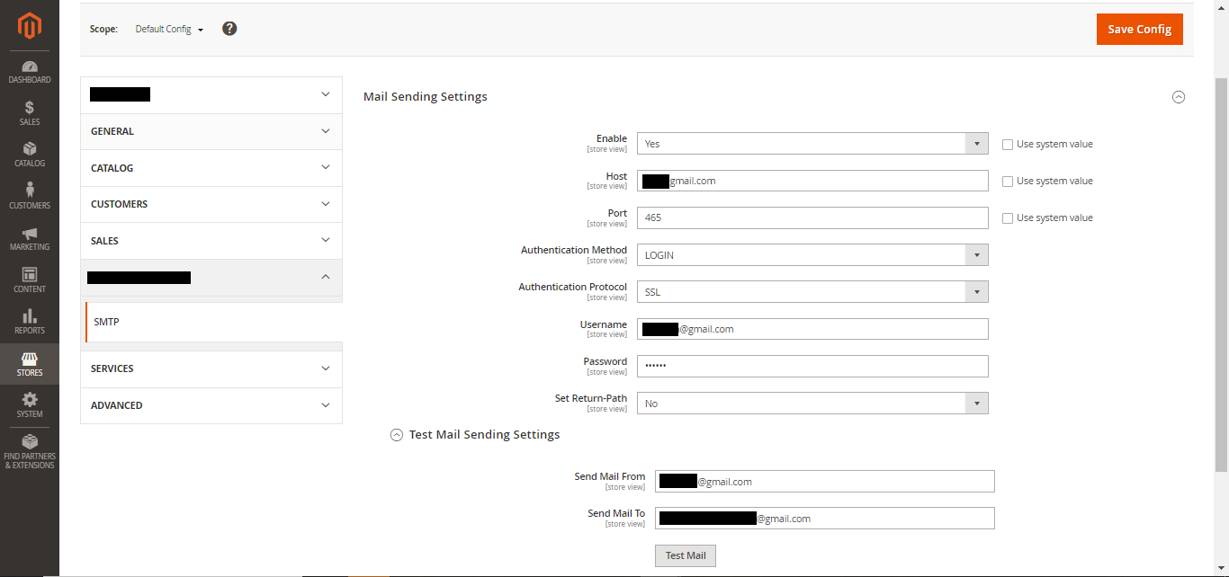
Mail Sending Settings
5. Test Email Sending Settings:
To ensure your SMTP settings are correct and working, you can test it by:
-
- Enter your email address into the provided field “Send Mail To” for testing purposes.
- Clicking on the “Test Mail” button to send a trial email.
- Check your email inbox to verify if the test email was received successfully.
6. Save Config:
Once you have confirmed your SMTP settings are correct and the test email was successfully generated:
-
- Click on the “Save Config” button at the top-right corner to save the SMTP information.
Configuring Store Email Addresses in General Settings
To configure store email addresses under the “General” settings in your application, follow these steps:
- Navigate to General Settings: Go to Stores > Configuration in your application’s admin panel.
- Access General Settings:
Scroll down to find and click on General in the left-hand menu. - Select Store Email Addresses:
In the General settings section, locate and select Store Email Addresses. - Add Important Email Addresses and Sender Names:
-
- Enter essential email addresses in Customer Support, Sales Representative, and General Contact [Sender Email] fields.
- Assign corresponding [Sender Name] like “Customer Support” and “Sales Representative” for the above email address.
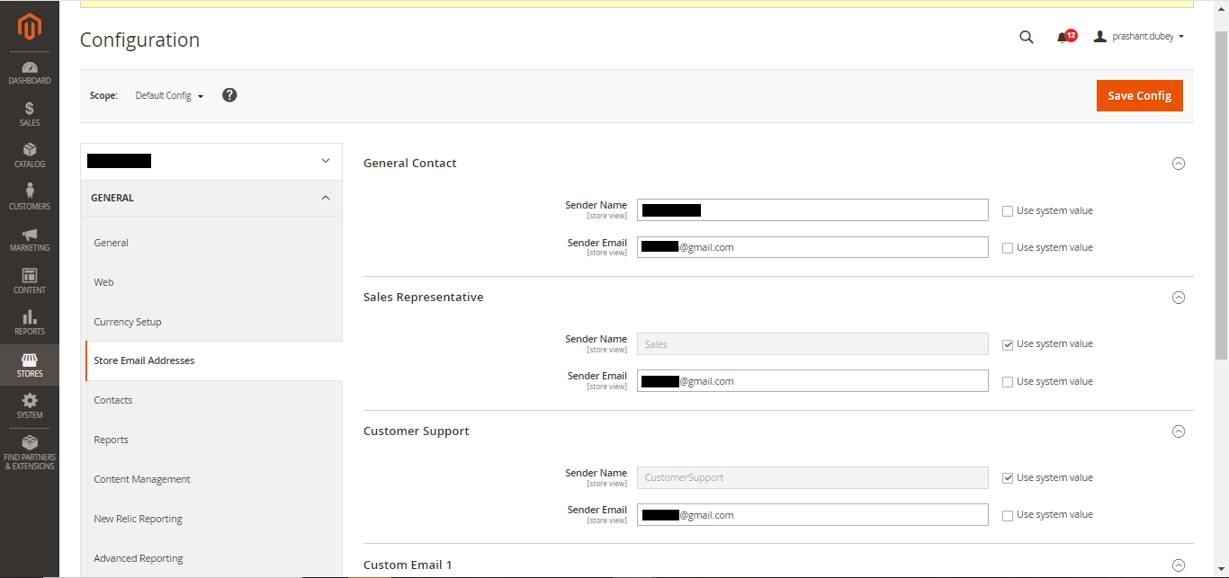
Store Email Address
5. Save Changes:
After adding email addresses and assigning sender names, click on the Save Config button to apply your settings.
Customized Template Creation for the triggering of emails
USE CASE COVERED – “Forgot Password“
- Navigate to Email Templates:
- Access Email Templates: Go to your application’s admin panel and navigate to the Marketing options.
- Click on Email Templates: Find and click on the “Email Templates” option.
- Add New Template:
- Add New Template: Click on the “Add New Template” option located in the upper right corner.
- Select Template Type: Choose the type of template you wish to customize (e.g., reset password email).
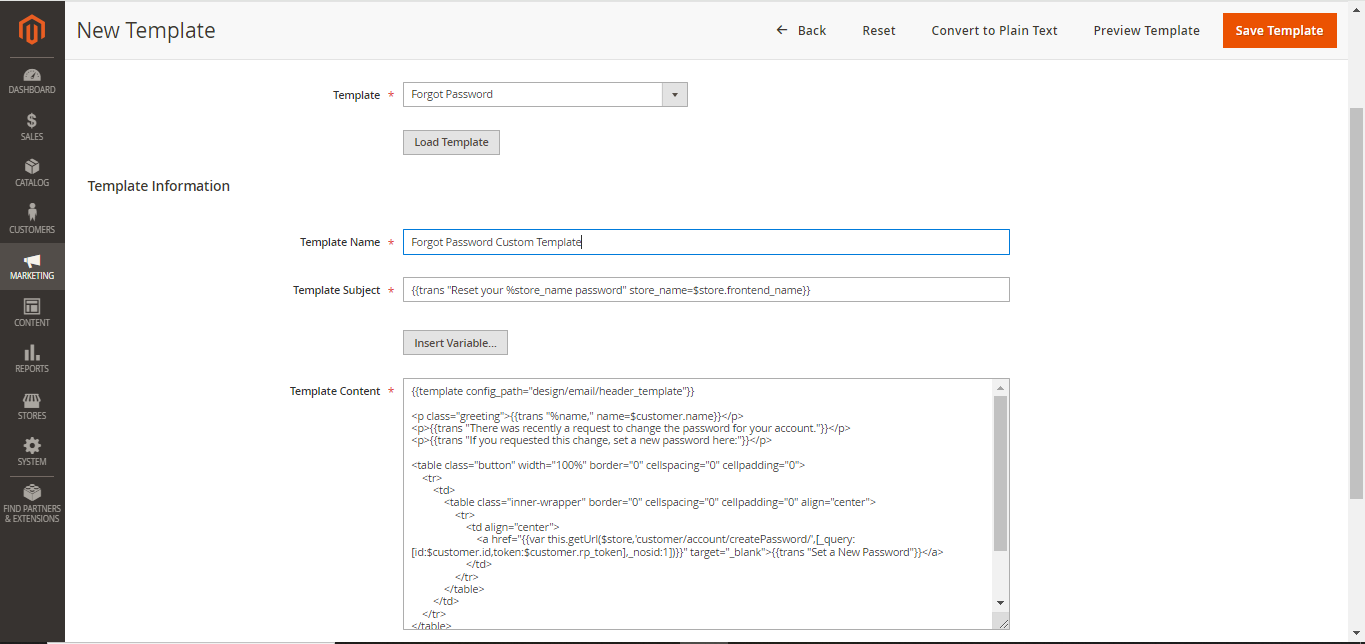
New Template Creation
-
- Load Template: Select the template you want to customize and click on “Load Template“.
- Customize and Save Template:
- Enter Template Details: Enter a name for your custom template, add Template subject and fill the template content as required.
- Save Template: Once satisfied with your changes, click on the “Save Template” button to save your custom template.
- Configure Customer Password Options:
- Navigate to Configuration: Go to the “Stores” option and open “Configuration”.
- Open Customer Configuration: Under “Customers”, select “Customer Configuration”.
- Set Custom Template for Reset Password Emails:
- Scroll to Password Options: Look for the “Password Options” section and find the setting related to reset password template.
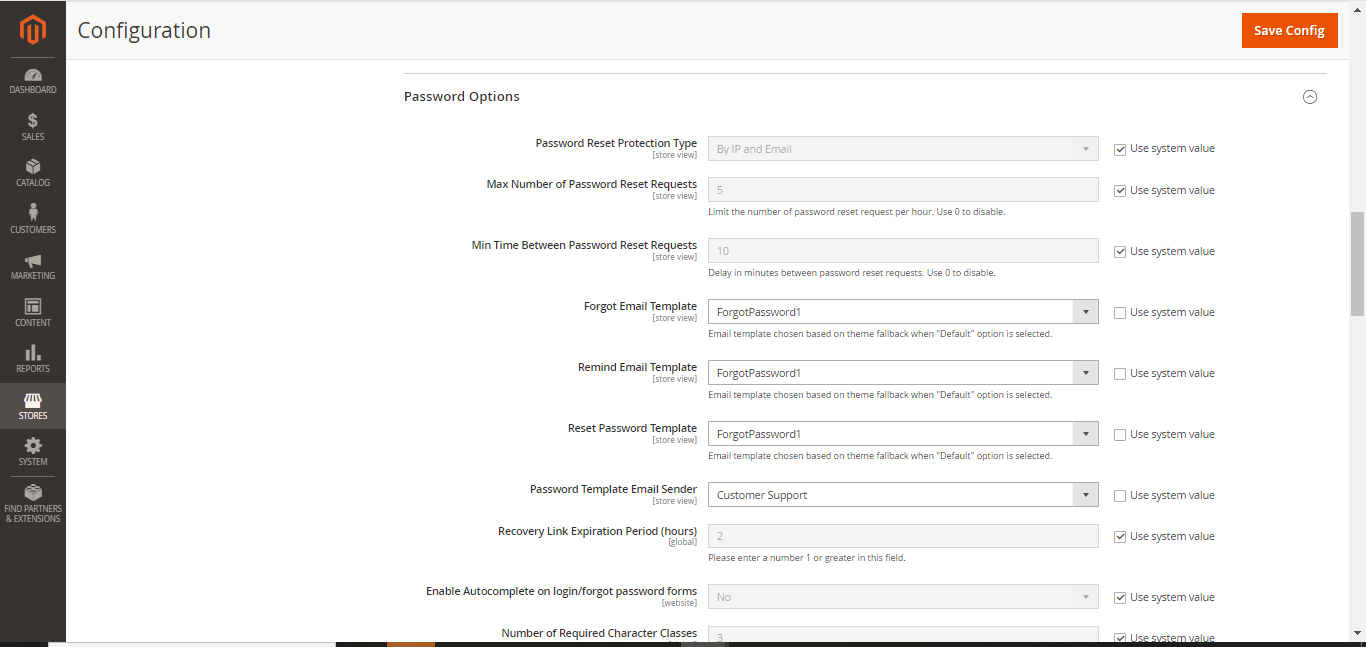
Password Options
-
- Choose Custom Template: Select your custom template from the dropdown menu for reset password emails.
- Save Configuration: Click on the “Save Config” button to apply your changes.
