Getting started with Flutter GetX – State Management
Introduction
When starting a new Flutter application, choosing the right state management approach is crucial. This blog aims to simplify that decision for you. In this tutorial on Flutter state management with GetX, I will introduce you to GetX, a robust Flutter framework.
GetX
State management facilitates data transfer within an application, triggering state updates and rebuilding the interface accordingly. This process is particularly critical in complex applications, where inefficient state updates can become costly. Flutter offers Stateful Widgets for managing state, but they come with certain limitations and are expensive to manage in terms of resource, performance and memory consumption.
To address these limitations, we can use GetX for state management in Flutter. GetX is a robust and lightweight solution that also offers the below solutions:
– State management
– Dependency injection
– Route management
Why GetX
Counter App using Getx State Management
In this tutorial, I will be taking example of a counter app by separating the UI logic and business logic using a controller and the Obx widget step by step.
class CounterRepository {
  CounterRepository();

  final Rx count = 0.obs;
  final int _value = 1;

  void increment() => count.value += _value;

  void decrement() => count.value -= _value;
}
Get.lazyPut() allows you to initialise your controller when necessary, such as when your screen becomes visible to the user, and removes the controller when your screen is no longer part of the widget stack.
void main() {
  // Creating an instance of CounterRepository for dependency injection via Getx
  Get.lazyPut(() => CounterRepository());
  runApp(const MyApp());
}

class MyApp extends StatelessWidget {
  const MyApp({super.key});

  @override
  Widget build(BuildContext context) {
    return GetMaterialApp(
      title: 'Getx Demo',
      theme: ThemeData(
        primarySwatch: Colors.blue,
      ),
      home: const CounterScreen(),
    );
  }
}
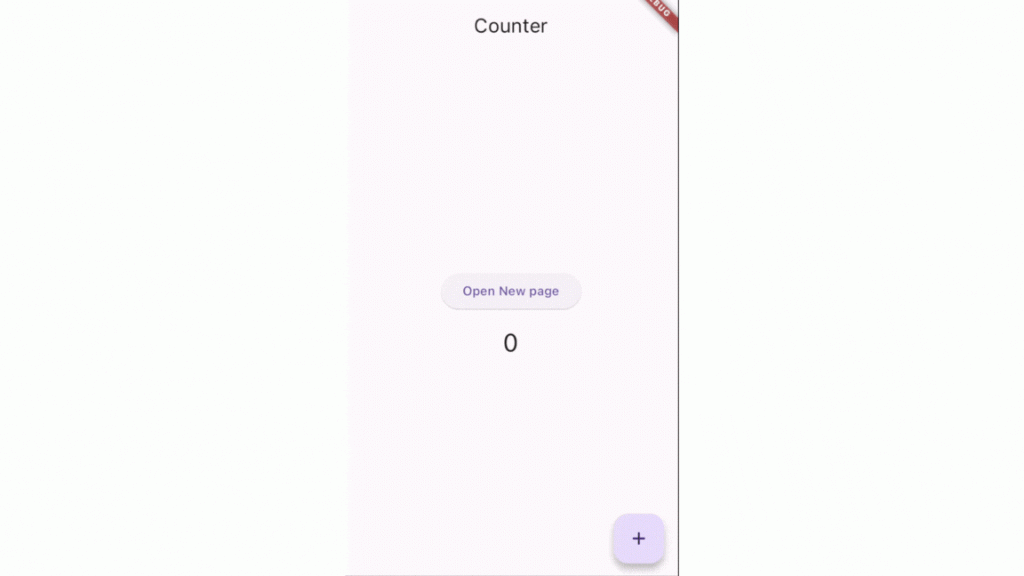
Creating a Counter screen containing a number text, a button to navigate to another screen and a floating button to control the increment behaviour. The text widget is wrapped within Obx, enabling it to retrieve the value of the observable variable. Without Obx, the value would remain unchanged. The increment value is initialised in the controller as 0 which will be the initial value displayed at the run time.
class CounterScreen extends StatelessWidget {
  const CounterScreen({Key? key}) : super(key: key);

  @override
  Widget build(BuildContext context) {
    final CounterRepository repo = Get.find();

    return Scaffold(
      appBar: AppBar(
        title: const Text('Counter'),
      ),
      body: Center(
        child: Column(
          mainAxisAlignment: MainAxisAlignment.center,
          children: [
            ElevatedButton(
              onPressed: () => {Get.to(() =>SecondScreen())},
              child: const Text('Open New page'),
            ),
            const SizedBox(height: 16),
            Obx(
              () => Text(
                '${repo.count.value}',
                style: Theme.of(context).textTheme.headlineMedium,
              ),
            ),
          ],
        ),
      ),
      floatingActionButton: FloatingActionButton(
        onPressed:repo.increment,
        child: const Icon(Icons.add),
      ),
    );
  }
}
The second screen is navigated when we click the button using Getx’s Route management function Get.to this function works similar to Navigator.of but without having to use context. Here also The text widget is wrapped within Obx which allows it to listen to changes and update accordingly. Since we are using the same object of CounterRepo by getting it from getx dependency management the increment data will be preserved in the SecondScreen as well. We can use decrement function to make changes in the actual value using the instance of CounterController provided by Getx using Get.find().
class SecondScreen extends StatelessWidget {
  const SecondScreen({Key? key}) : super(key: key);

  @override
  Widget build(BuildContext context) {
    final CounterRepository repo = Get.find();

    return Scaffold(
      appBar: AppBar(
        title: const Text('Counter'),
      ),
      body: Center(
        child: Column(
          mainAxisAlignment: MainAxisAlignment.center,
          children: [
            ElevatedButton(
              onPressed: () => {Get.back()},
              child: const Text('Go to previous Screen'),
            ),
            const SizedBox(height: 16),
            Obx(
              () => Text(
                '${repo.count.value}',
                style: Theme.of(context).textTheme.headlineMedium,
              ),
            ),
          ],
        ),
      ),
      floatingActionButton: FloatingActionButton(
        onPressed:repo.decrement,
        child: const Icon(Icons.remove),
      ),
    );
  }
}

Key Features:
-
- Reactive Variables (Rx): Easily transform variables into observables using .obs.
- Obx Widget: Reactive UI updates with minimal code.
- Workers: Manage asynchronous tasks, including debouncing, intervals, and one-time events.
- Simple State Manager (GetBuilder): Lightweight solution for managing multiple state updates efficiently.
- StateMixin: A streamlined approach to managing state with different statuses (loading, success, error).
-
Differences between builders:
- GetX vs GetBuilder: GetX utilizes reactive programming for finer-grained control, while GetBuilder offers a simpler, block-based approach.
- GetX vs Obx: GetX handles both reactive variables and mechanical updates, while Obx focuses solely on reactive changes.
- GetX vs MixinBuilder: MixinBuilder combines features of both GetX and GetBuilder, offering flexibility but with a higher resource consumption.
-
Advantages:
- High Performance: Smart algorithms and optimizations minimize rebuilds and ensure efficiency.
- Granular Control: Precisely target which widgets are updated, avoiding unnecessary rebuilds.
- Easy to Learn: Intuitive syntax and clear concepts make state management accessible.
- Lightweight: Low memory footprint and minimal dependencies.
- Comprehensive Solution: Handles state management, navigation, and dependency injection.
Resources
- Official Documentation can be found here – Link
- Full source code here – Link
- Getx pub can be found here – Link
Conclusion
In conclusion, GetX stands as a versatile and powerful library within the Flutter ecosystem, offering streamlined solutions for state management, dependency injection, and route management. Its intuitive syntax, efficient performance, and robust capabilities make it a preferred choice for developers seeking to enhance their Flutter applications. With GetX, developers can achieve increased productivity, improved code organization, and optimized performance. As Flutter continues to evolve, GetX remains a valuable asset, empowering developers to create seamless and responsive applications across a variety of platforms. Whether you’re a seasoned developer or new to Flutter, exploring the features and functionalities of GetX can unlock a world of possibilities for your app development journey.


