
Azure Backup Center: A Complete Guide to Modern Data Protection
Data has become a key asset for companies in today’s world. As data grows larger, protecting it and keeping it available is becomes a challenge. Microsoft Azure Backup Center gives you a strong way to back up and protect your data in the cloud. This post gives you a full look at Azure Backup Center, including what it can do why it’s good, and how to use it best.
Introduction
Azure Backup Center is a tool that brings data protection management together to make backing up and getting your data back easier and better. It provides you one place to handle backup rules, check on backup health, and make sure you follow the rules for different Azure services and things you have on-site. So, whether managing cloud or on-site workloads, Azure Backup Center offers a unified solution for backup and recovery, enhancing both efficiency and security.
Key Points of Azure Backup Center
- Centralized Backup Management: Azure Backup Center lets you handle all your backup tasks from one dashboard. You can set up and monitor your backup rules for Azure VMs, SQL databases, or on-site workloads in one place.
- Unified Monitoring and Reporting: The system provides full monitoring and reporting tools. You can check the backup status, see detailed reports, and get alerts about any problems or failures. This helps you stay in the loop about how well your backups are doing and act fast if you need to.
- Granular Backup Policies: Azure Backup Center lets you create and enforce detailed backup policies that fit your company’s needs. You can set how long to keep backups how often to back up, and how to recover data. This ensures your data has protection that matches your specific needs.
- Integrated Security and Compliance: Azure Backup Center puts security first. The platform works with Azure Security Center to guard against advanced threats and keep your backups safe. It also helps you follow compliance rules by offering features like encryption, controls based on roles, and logs for audits.
- Simple Recovery Options: If you lose data or it gets corrupted, Azure Backup Center has easy ways to get it back. You can restore single files whole VMs, or databases by clicking a few times. The process to recover data is quick and dependable cutting down on downtime and lost information.
- Cost Management and Optimization: Azure Backup Center shows you what your backups cost and helps you use your storage better. You can see cost breakdowns, find places to spend less, and use features like incremental backups to save on storage costs.
Benefits of Azure Backup Center
- Better Productivity: Azure Backup Center makes backup management more productive by bringing everything together in one place. It cuts down the hassle of juggling multiple backup systems and simplifies backup tasks, which saves you time and energy.
- Stronger Data Safety: Azure Backup Center uses Azure’s strong setup to keep your backups safe and accessible. It has features like storage in different places and coding to scramble data, which protects your information from hardware problems, disasters, and people who shouldn’t see it.
- Flexibility and Scalability: Azure Backup Center grows with your needs. It doesn’t matter if you’re backing up a handful of virtual machines or running a big enterprise setup. This tool supports many data sources and backup scenarios giving you room to adapt as your requirements change.
- Cost-Effective Solution: Azure Backup Center helps you save money. It uses pay-as-you-go pricing and offers different storage options. You pay for what you use. To cut costs even more, you can use features like incremental backups and retention policies.
- Simplified Compliance: Azure Backup Center makes it easier to follow rules and meet industry standards. It works with Azure Security Center and has built-in features to help you stay compliant. You can keep track of who does what with audit logs, protect your data with encryption, and control who can access it. This way, your data stays safe and follows the rules.
Things to Keep in Mind While Setting Up The Backup
- Set Up Clear Backup Rules: Create backup rules that match what your company needs. Decide how long to keep backups how often to make them, and how you need to recover data. This ensures your data stays safe in the best way for you.
- Keep an Eye on Backups and Test Them: Check your backups often and try recovering data to make sure it works when you need it. Set up warnings to let you know if something goes wrong.
- Boost Security: Use Azure Security Center to make your backups more secure. Turn on encryption, set up who can access what, and look over activity logs to keep your data safe from unauthorized use and threats.
- Reduce Storage Costs: Keep an eye on how much space your backups are taking up and find ways to save money. Use tools like incremental backups and data deduplication to help with this. Every so often, take a look at how much storage you need and modify your backup rules if necessary.
- Keep Up with Azure’s New Stuff: Azure Backup Center is always getting better with new features and improvements. Make sure you’re in the loop about the latest updates and the best ways to do things. This will help you get the most out of what the platform can do and make sure your backup plan is still doing its job.
Steps to Create a Backup in Azure Backup Center
There are 2 main components needs to be set before creating a backup:
- Vault
- Policy
Vault
Azure provides two types of vaults for backup and disaster recovery services: Recovery Services Vault and Backup Vault. Whereas both the vaults work similarly in storing backup data, they are designed for different use cases and scenarios. You can select the one as per your requirements as shown in the screenshot below:
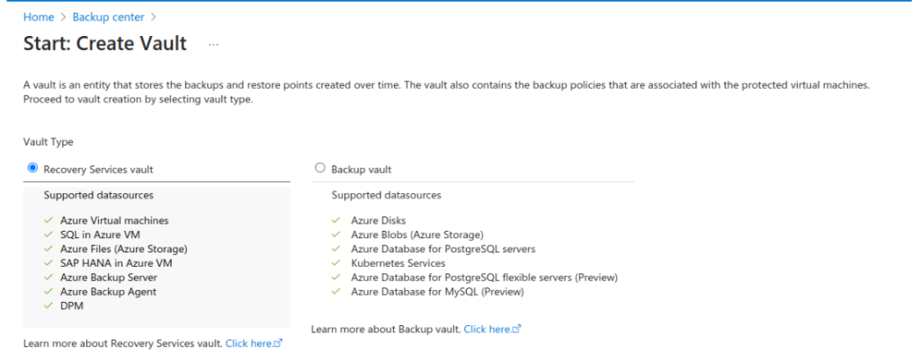
vault
Policy
There are mainly two types of policy from which we can select:
- Enhanced Policy refers to the newer, more advanced backup policies introduced by Azure Backup. These policies provide enhanced functionality and greater flexibility in managing backup schedules, retention, and data protection.
- Standard Policy refers to the traditional backup policies that have been available in Azure Backup. These policies offer basic features and a simpler approach to managing backups.
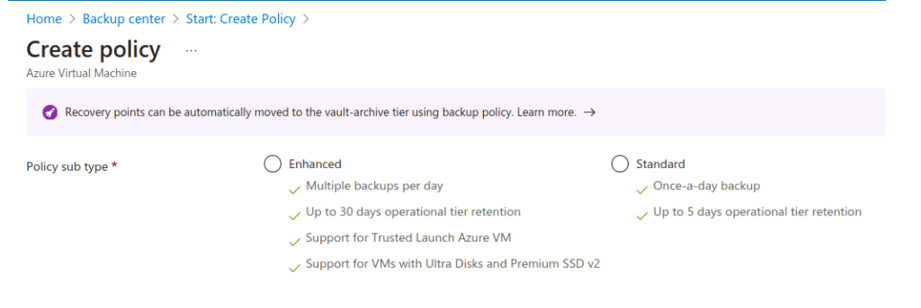
policy
Once you selected the correct policy and vault as per your requirements now you can proceed with the given steps mentioned below:
In this example, we will create a virtual machine backup you can create the backup for other services like SQL, Azure Disks, etc. By selecting the correct policy & Vault type.
-
-
- Sign in to Azure Portal:
- Go to the Azure Portal and log in with your Azure credentials.
- Create a Vault:
- In the Azure Portal, click on “Create a resource” and search for “Recovery Services Vault” or “Backup Vault”.
- Click “Create” to start the setup.
- Fill in the required details:
- Subscription: Select your Azure subscription.
- Resource Group: Choose an existing resource group or create a new one.
- Vault Name: Provide a unique name for the vault.
- Region: Select the Azure region where the vault will be located.
- Click “Review + Create” and then “Create” to deploy the vault.
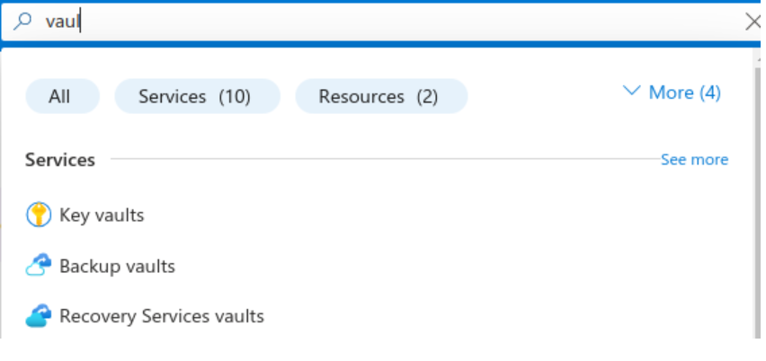
- search-for-vault
- Access Azure Backup Center:
-
- Once the Recovery Services Vault is created, navigate to it by selecting “All resources” or using the search bar.
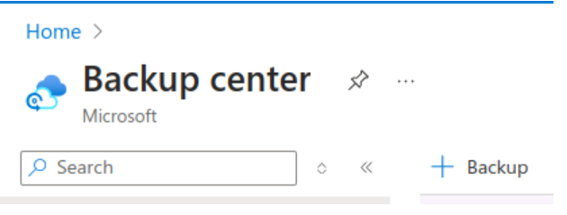
- Click on the vault you just created and then select “Backup Center” from the menu.
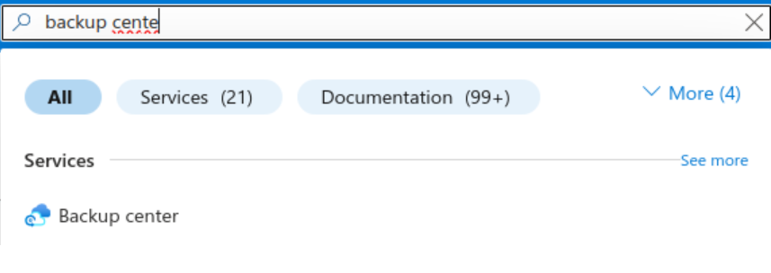
backup-center
-
- Sign in to Azure Portal:
-
Configure Backup for a Virtual Machine:
-
-
- Navigate to the Backup Center:
- In the Backup Center, click “+ Backup” to start the backup configuration process.
- In the Backup Center, click “+ Backup” to start the backup configuration process.
- Select Backup Goal:
- Choose “Azure” as the “Where is your workload running?” option.
- For “What do you want to back up?”, select “Virtual machine”.
- Click “Start Discovery” to list available virtual machines.
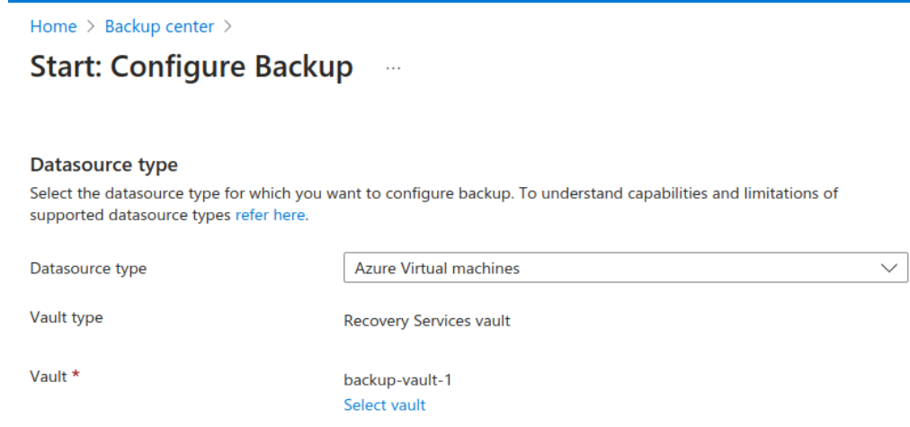
configure-backup
- Choose a Virtual Machine:
- Select the virtual machine you want to back up from the list.
- Click “Backup”.
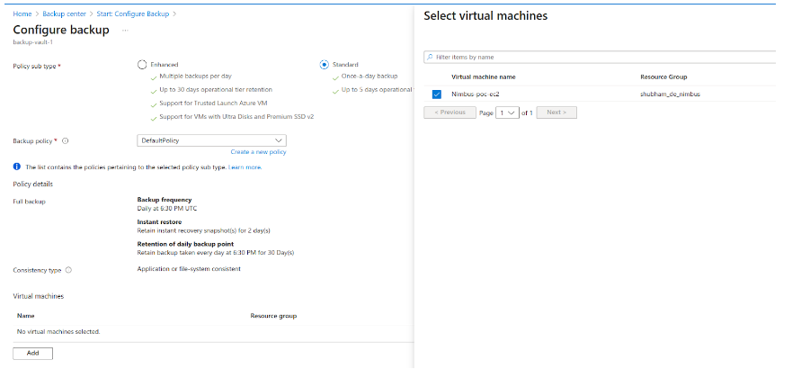
backup-vm
- Configure Backup Policy:
- Choose a backup policy. You can select from predefined policies or create a custom one.
- Define the frequency (daily, weekly) and retention range for your backups.
- Click “OK” to apply the policy.
- Start Backup:
- Review the configuration and click “Enable backup” to start the initial backup process.
- The backup job will be initiated, and you can monitor its progress in the “Backup jobs” section.
- Navigate to the Backup Center:
-
Conclusion
Azure Backup Center gives you a strong way to manage and protect your cloud data. It offers a central place to manage things, taken care of everything, and keep your data safe. This makes it a great tool for backing up and getting your data back. If you follow the best ways to do things and use what Azure Backup Center can do, you can make sure your key data stays safe and easy to get to. You can also make your backup work smoother and faster. In the end, you’ll feel better knowing your data has good protection.


