iOS: CI/CD Integration via FastLane & Firebase using Gitlab : Part – 3
In the second part of the blog, we covered the Code Signing approach via the match import command and created a separate repository and uploaded the private keys and certificates in a Gitlab repo for syncing them across the machines. Now we are moving to the next part of this series where we will use CI/CD workflow via Fastlane & Firebase with Gitlab Actions.
We will use the next step to create and run your first GitLab CI CD pipeline:-
1.Create .gitlab-ci.yml file.
2. Check the status of your pipeline and jobs.
3. Check the available runner or create a runner.
4. Edit the yml file and delete .gitlab-ci.yml file.
Before you begin
We are considering that you have access to the details below:
- A GitLab account with access to CI/CD pipelines.
- Your iOS project code is in a GitLab repository.
- An Apple Developer account.
- fastlane is installed locally.
Get started with GitLab CI/CD
To use GitLab CI/CD, you start with a .gitlab-ci.yml file at the root of your project. This file specifies the stages, jobs, and scripts to be executed during your CI/CD pipeline. It is a YML file with its own custom syntax.
Step 1: Create a .gitlab-ci.yml file
You have to create a YML file in your repository. A YML file where you specify instructions for GitLab CI/CD. There are two ways to add the YML file in your project as follows-
a) Manually (.yml) file creation: New File
Now create a .gitlab-ci.yml file: Go to specific project -> in left side bar -> Code > Repository.

Select the branch which you want to commit to. Then select the plus icon and click on New file.

Enter the Filename .gitlab-ci.yml and write down code in the file.
Or
b) Choose template: iOS with Fastlane
To Integrate the template type like iOS with Fastlane: Go to specific project -> in left side bar -> Build > Pipelines.

Select the template which you want to integrate to it. Then select the iOS with Fastlane and click on Use template.

The template will add some code by default in the file. Click on Commit changes.

When you commit the changes then the pipeline will start and runs the jobs.

Step 2: To check the status of your pipeline and job
Go to Project -> build -> pipelines.

A pipeline with defined stages should be displayed:
To view a visual representation of your pipeline by selecting the pipeline ID-

To view details of a job by selecting the job name. You can see build.


As we can see the job is executed and fails due to some reason. Don’t worry about the failed status (there can be multiple reasons to fail a job like an incorrect executor selected by default, etc). By default, Gitlab will pick the available executor(docker-machine) to execute the job if not specified the executor explicitly.
In this blog, we will use the Gitlab Runner to execute your job.
Step 3: To Check available runner or Create runner
Go to particular Project ->Settings -> CI/CD ->Runner and expand Runners.

Minimum one runner is active with a green color next to it, to process your jobs.
Runners are the agents that run your jobs. These agents can run on physical machines or virtual instances. In your .gitlab-ci.yml file, you can specify a container image you want to use when running the job. The runner loads the image, clones your project, and runs the job either locally or in the container.
In this blog, We will create a Gitlab runner from scratch.
The next step is to register the Gitlab runner.
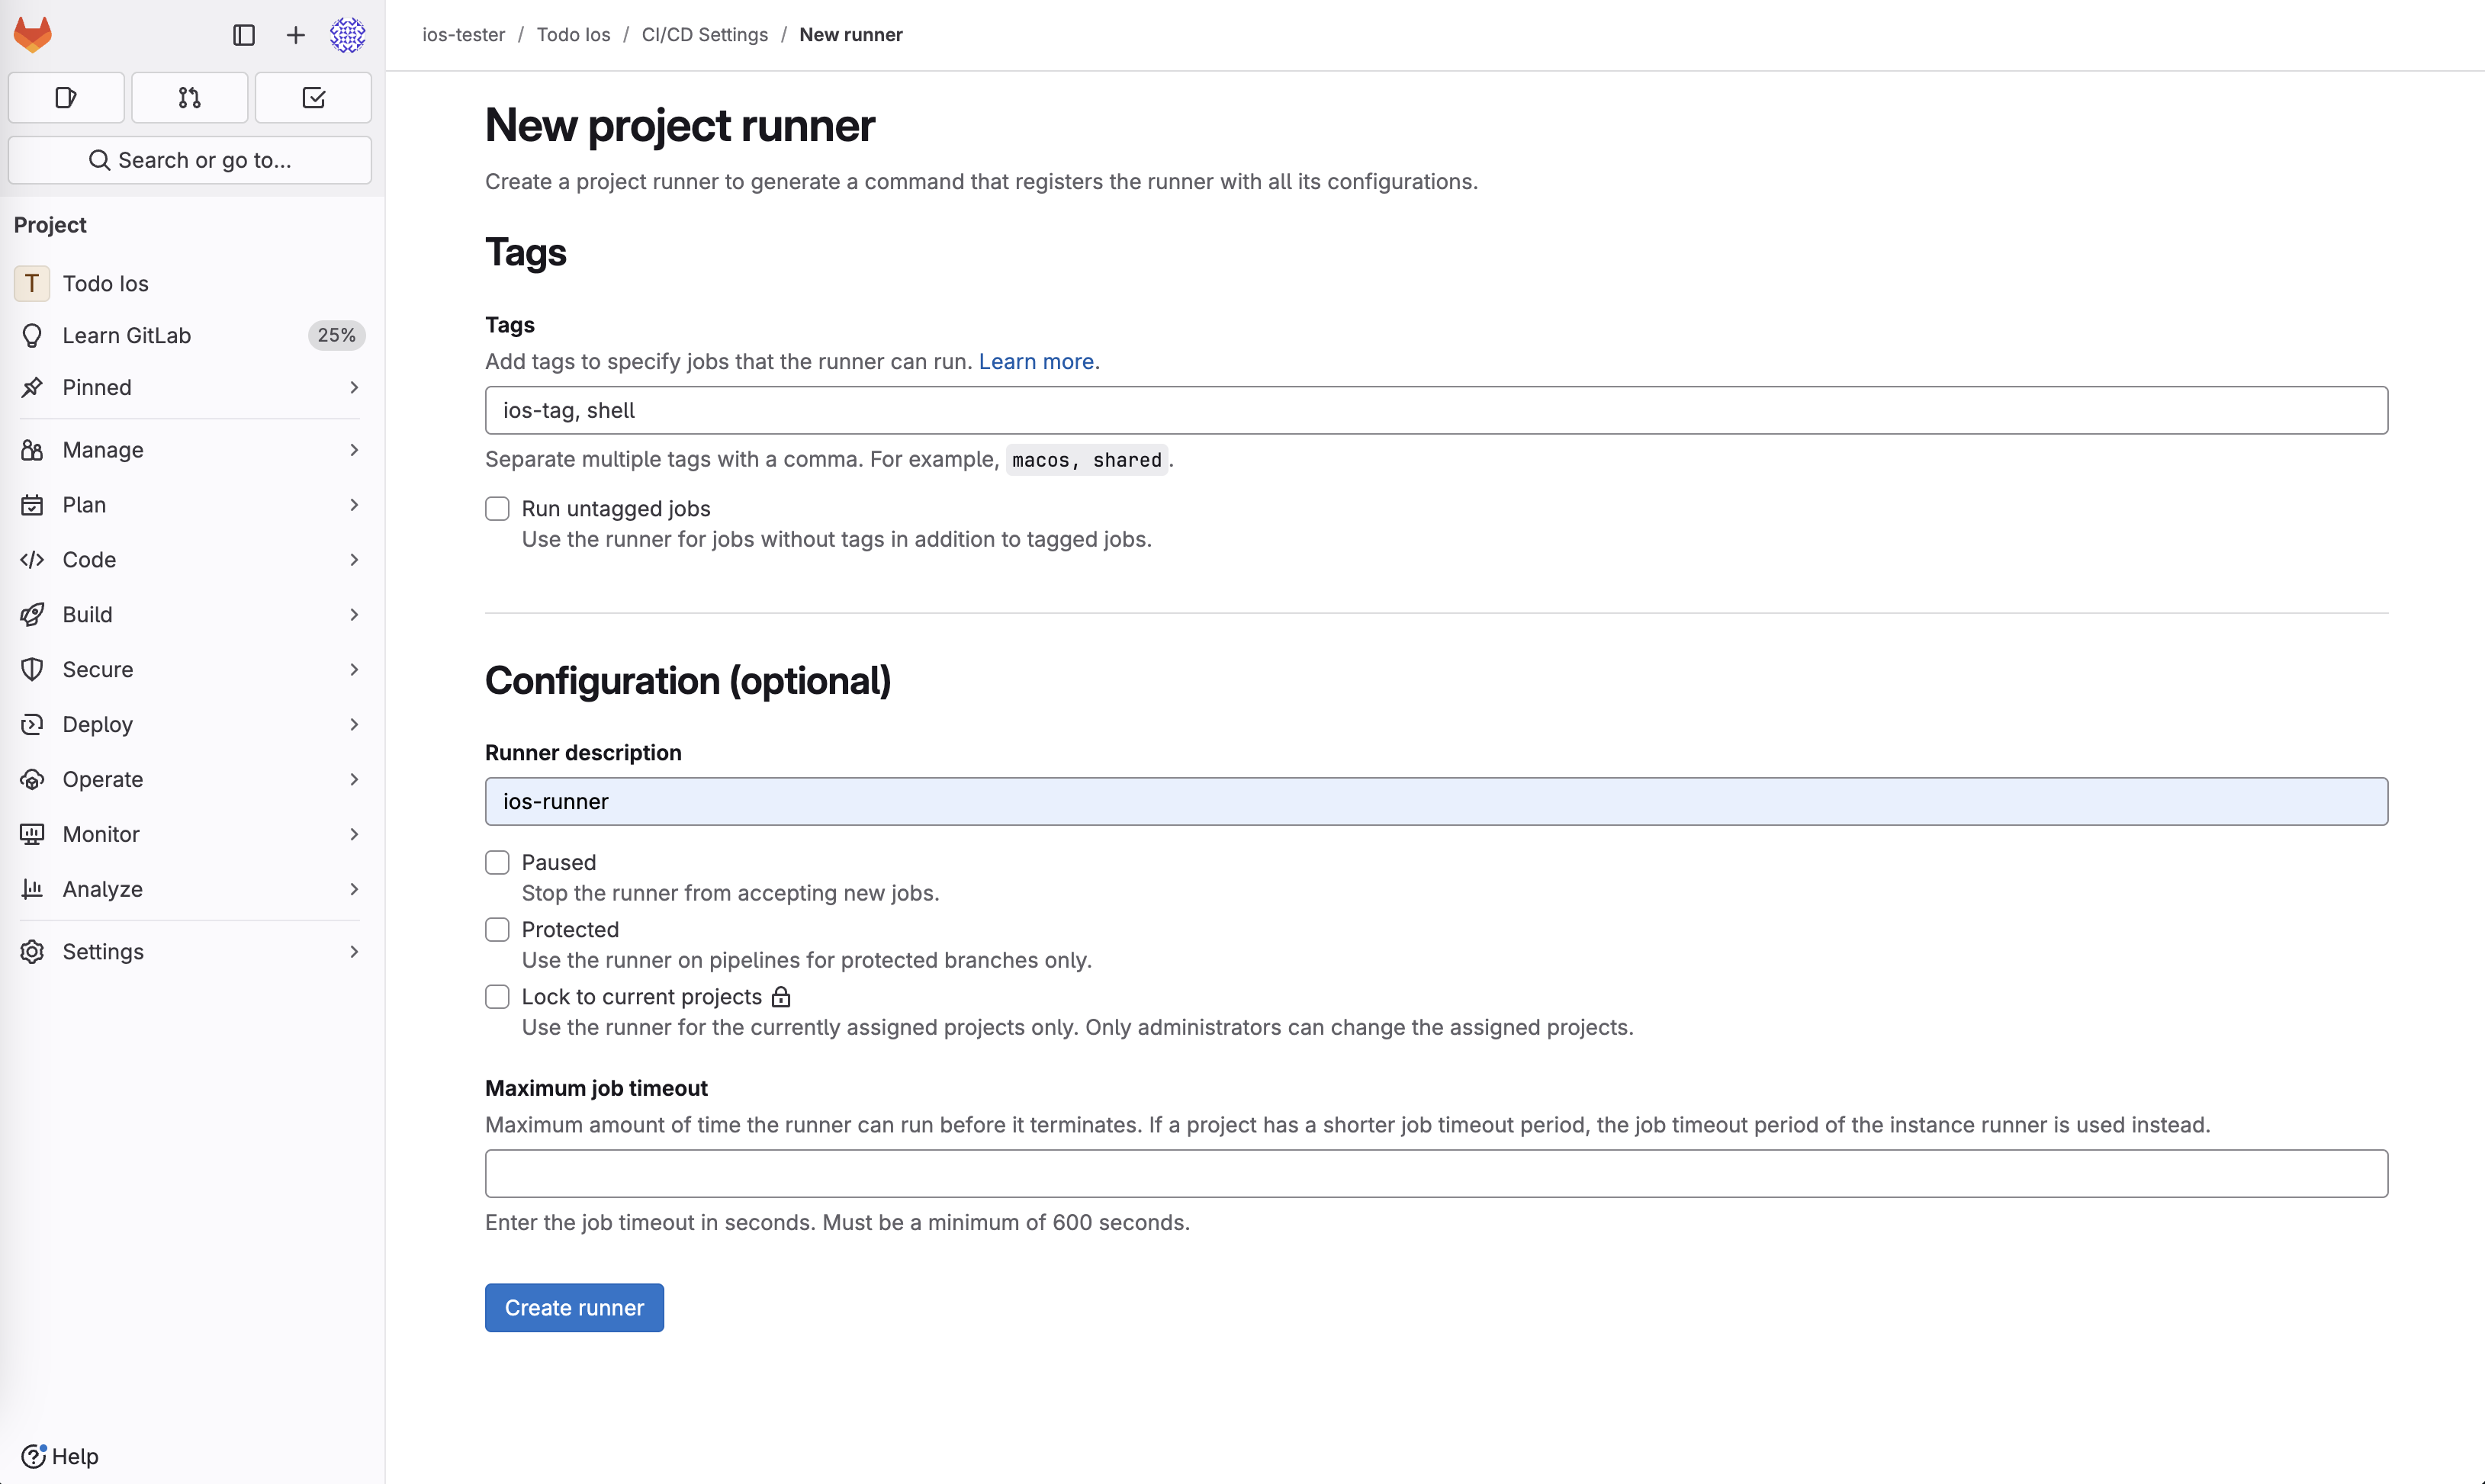
Click on New project runner under the Runner section ->project runner:-
You can add the some basic details as per required for the configurations tag as ‘ios-tag, shell’ and runner description as ‘ios-runner’-

Click on Create runner post filling the details, Runner is created successfully now. Then, you will be asked for some more details like platform – Operating systems, Cloud, Containers.

In this blog, we will choose the Operating system ‘macOS’ as a platform.
Important: GitLab Runner must be installed before you can register a runner.
Installing Gitlab Runner
The GitLab Runner is a service that’s installed on your Mac, which runs the build and test process that you set up in a configuration file(.gitlab-ci.yml).
- Download the binary for your system:
- For Intel-based systems:
$ sudo curl --output /usr/local/bin/gitlab-runner "https://s3.dualstack.us-east-1.amazonaws.com/gitlab-runner-downloads/latest/binaries/gitlab-runner-darwin-amd64"
- For Apple Silicon-based systems:
$ sudo curl --output /usr/local/bin/gitlab-runner "https://s3.dualstack.us-east-1.amazonaws.com/gitlab-runner-downloads/latest/binaries/gitlab-runner-darwin-arm64"
2. Give it permissions to execute:
$ sudo chmod +x /usr/local/bin/gitlab-runner

Registering Gitlab Runner
Step 1:
Copy and paste the following command into your command line to register the runner. The same command should be displayed on the above create runner page.
$ gitlab-runner register --url https://gitlab.com –token [token_value]
Note: The [token_value] will be auto generated post create a runner as given in above image for the reference.
Step 2:
Choose an executor when prompted by the command line. Executors run builds in different environments. (There are given number of executors, We have used shell since its won’t have any dependency)
(ssh, docker+machine, docker-ssh+machine, kubernetes, docker, parallels, virtualbox, docker-ssh, shell)
$ shell

Step 3 (optional):
Manually verify that the runner is available to pick up jobs:
$ gitlab-runner run

To verify that your gitlab runner is running or not, enter the below command:
$ gitlab-runner verify

Check the runner status. If it’s not running, Please use below commands to run the runner:
$ gitlab-runner stop
$ gitlab-runner restart
Click on View runners-

How to verify if Runner properly registered
- Goto below Path <Home>/Users/<user>/gitlab-runner/config.toml
- .gitlab-runner directory will be created. This is hidden directory
- In that directory there is “config.toml”
- This config file will list down all the runners installed on the Mac machine

Step 4: Edit a .gitlab-ci.yml file
Go to particular Project ->Code -> Repository ->.gitlab-ci.yml-> Edit-> Edit single file

You need to replace the content of file with content given below:

stages:
  - build

variables:
  LC_ALL: "en_US.UTF-8"
  LANG: "en_US.UTF-8"
  GIT_STRATEGY: clone


build:
  stage: build
  tags:
    - ios-tag
    - shell
  before_script:
    - whoami
    - echo $SHELL
    - security default-keychain
    - security list-keychain -d user
    - export KEYCHAIN_PATH="$HOME/Library/Keychains/login.keychain-db"
    - export KEYCHAIN_PASSWORD="KEYCHAIN_PASSWORD"
    - security unlock-keychain -p ${KEYCHAIN_PASSWORD} ${KEYCHAIN_PATH}
    - security find-identity -v -p codesigning -s ${KEYCHAIN_PATH}
    - ruby -v
    - which ruby
    - which bundle
    - bundle install

  script:
    - echo "Start execution"
    - bundle exec fastlane build --verbose
    - echo "End execution"
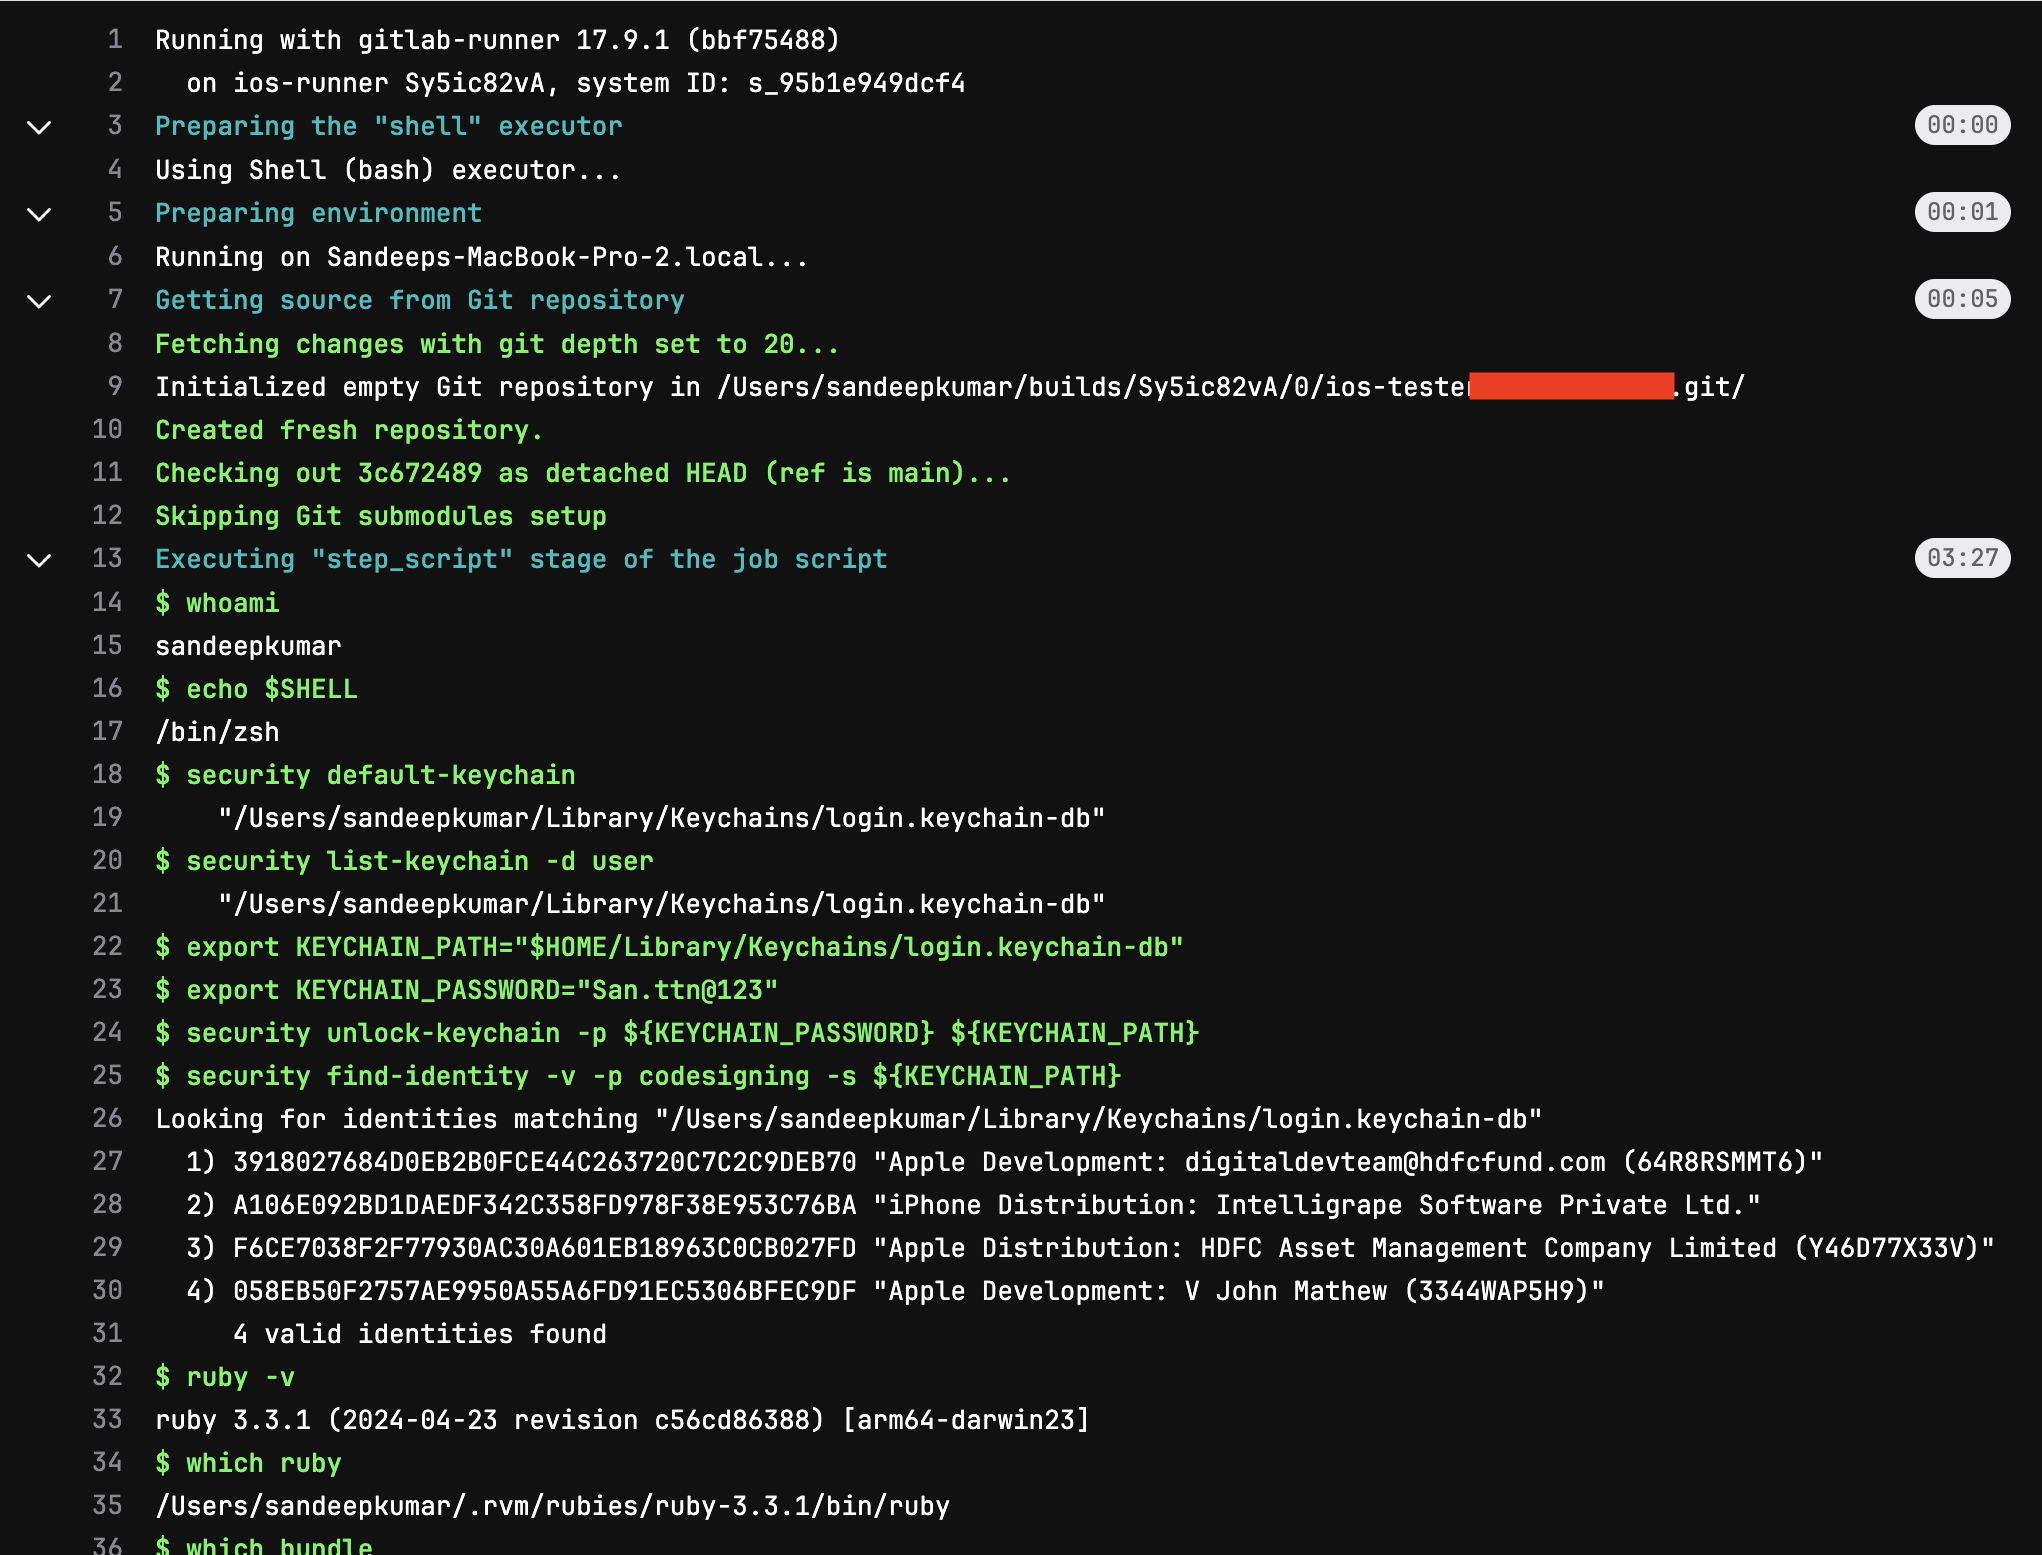
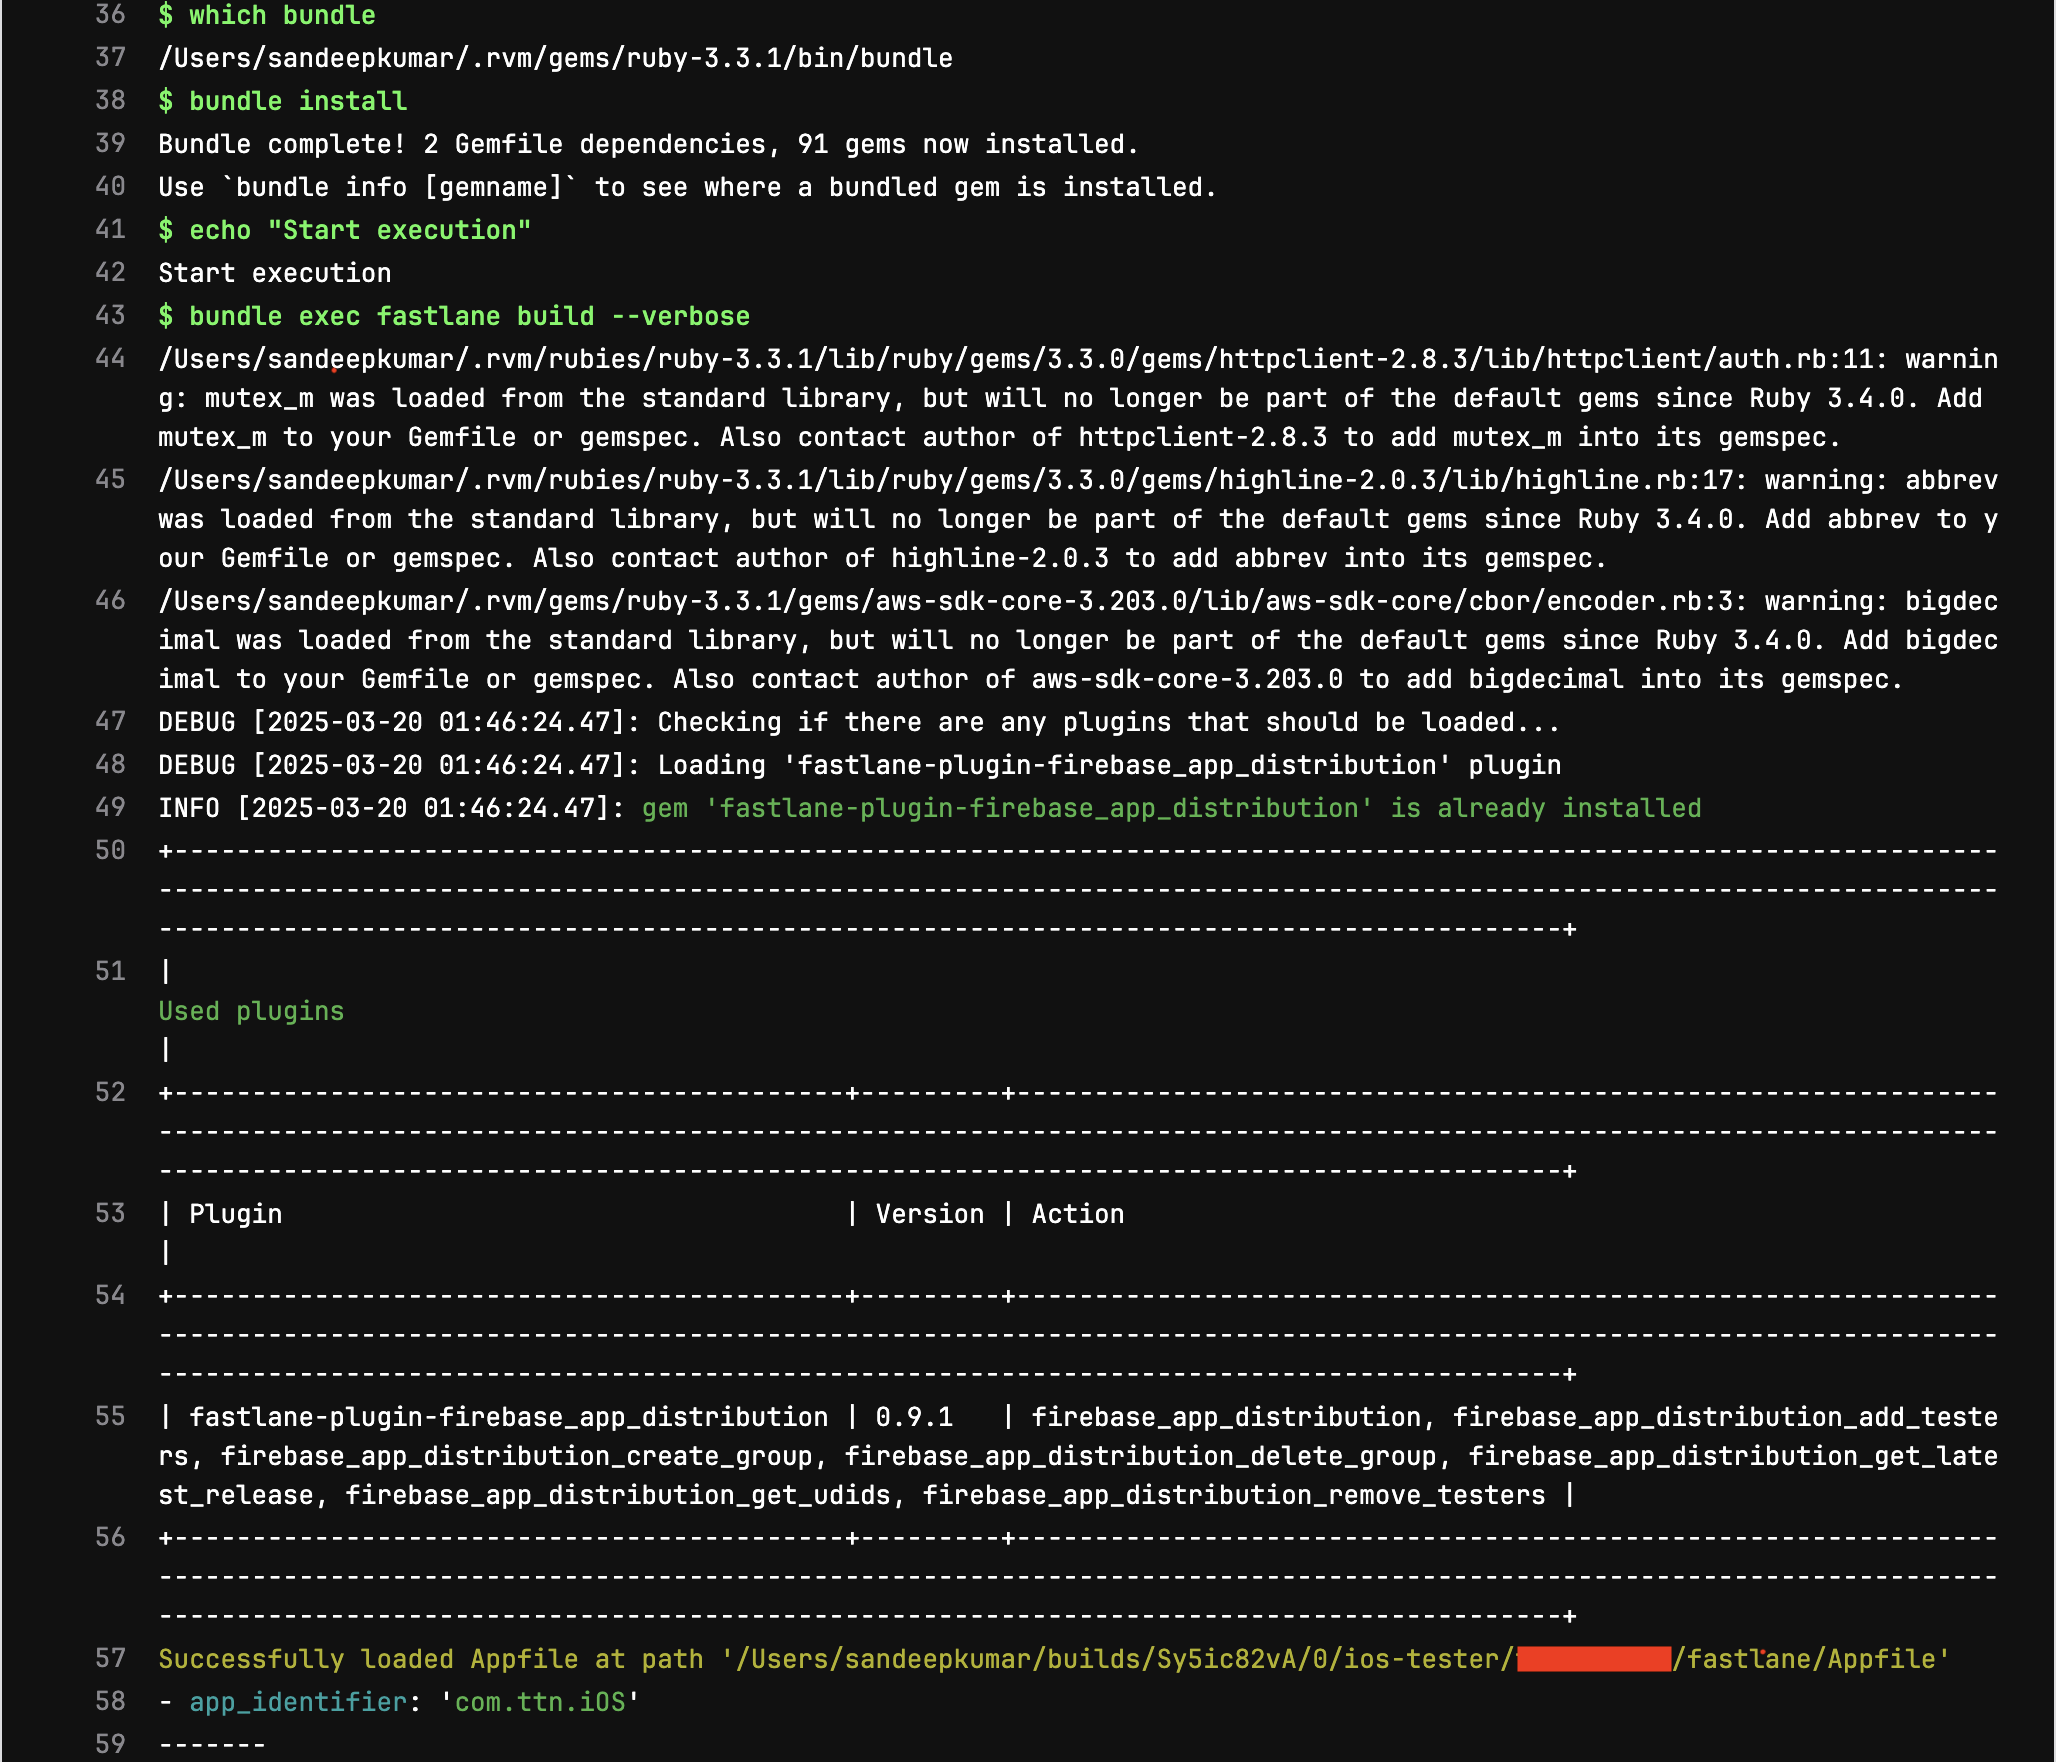
And click on Commit changes then job will start the execution:


To view a visual representation of your pipeline by selecting the pipeline ID-


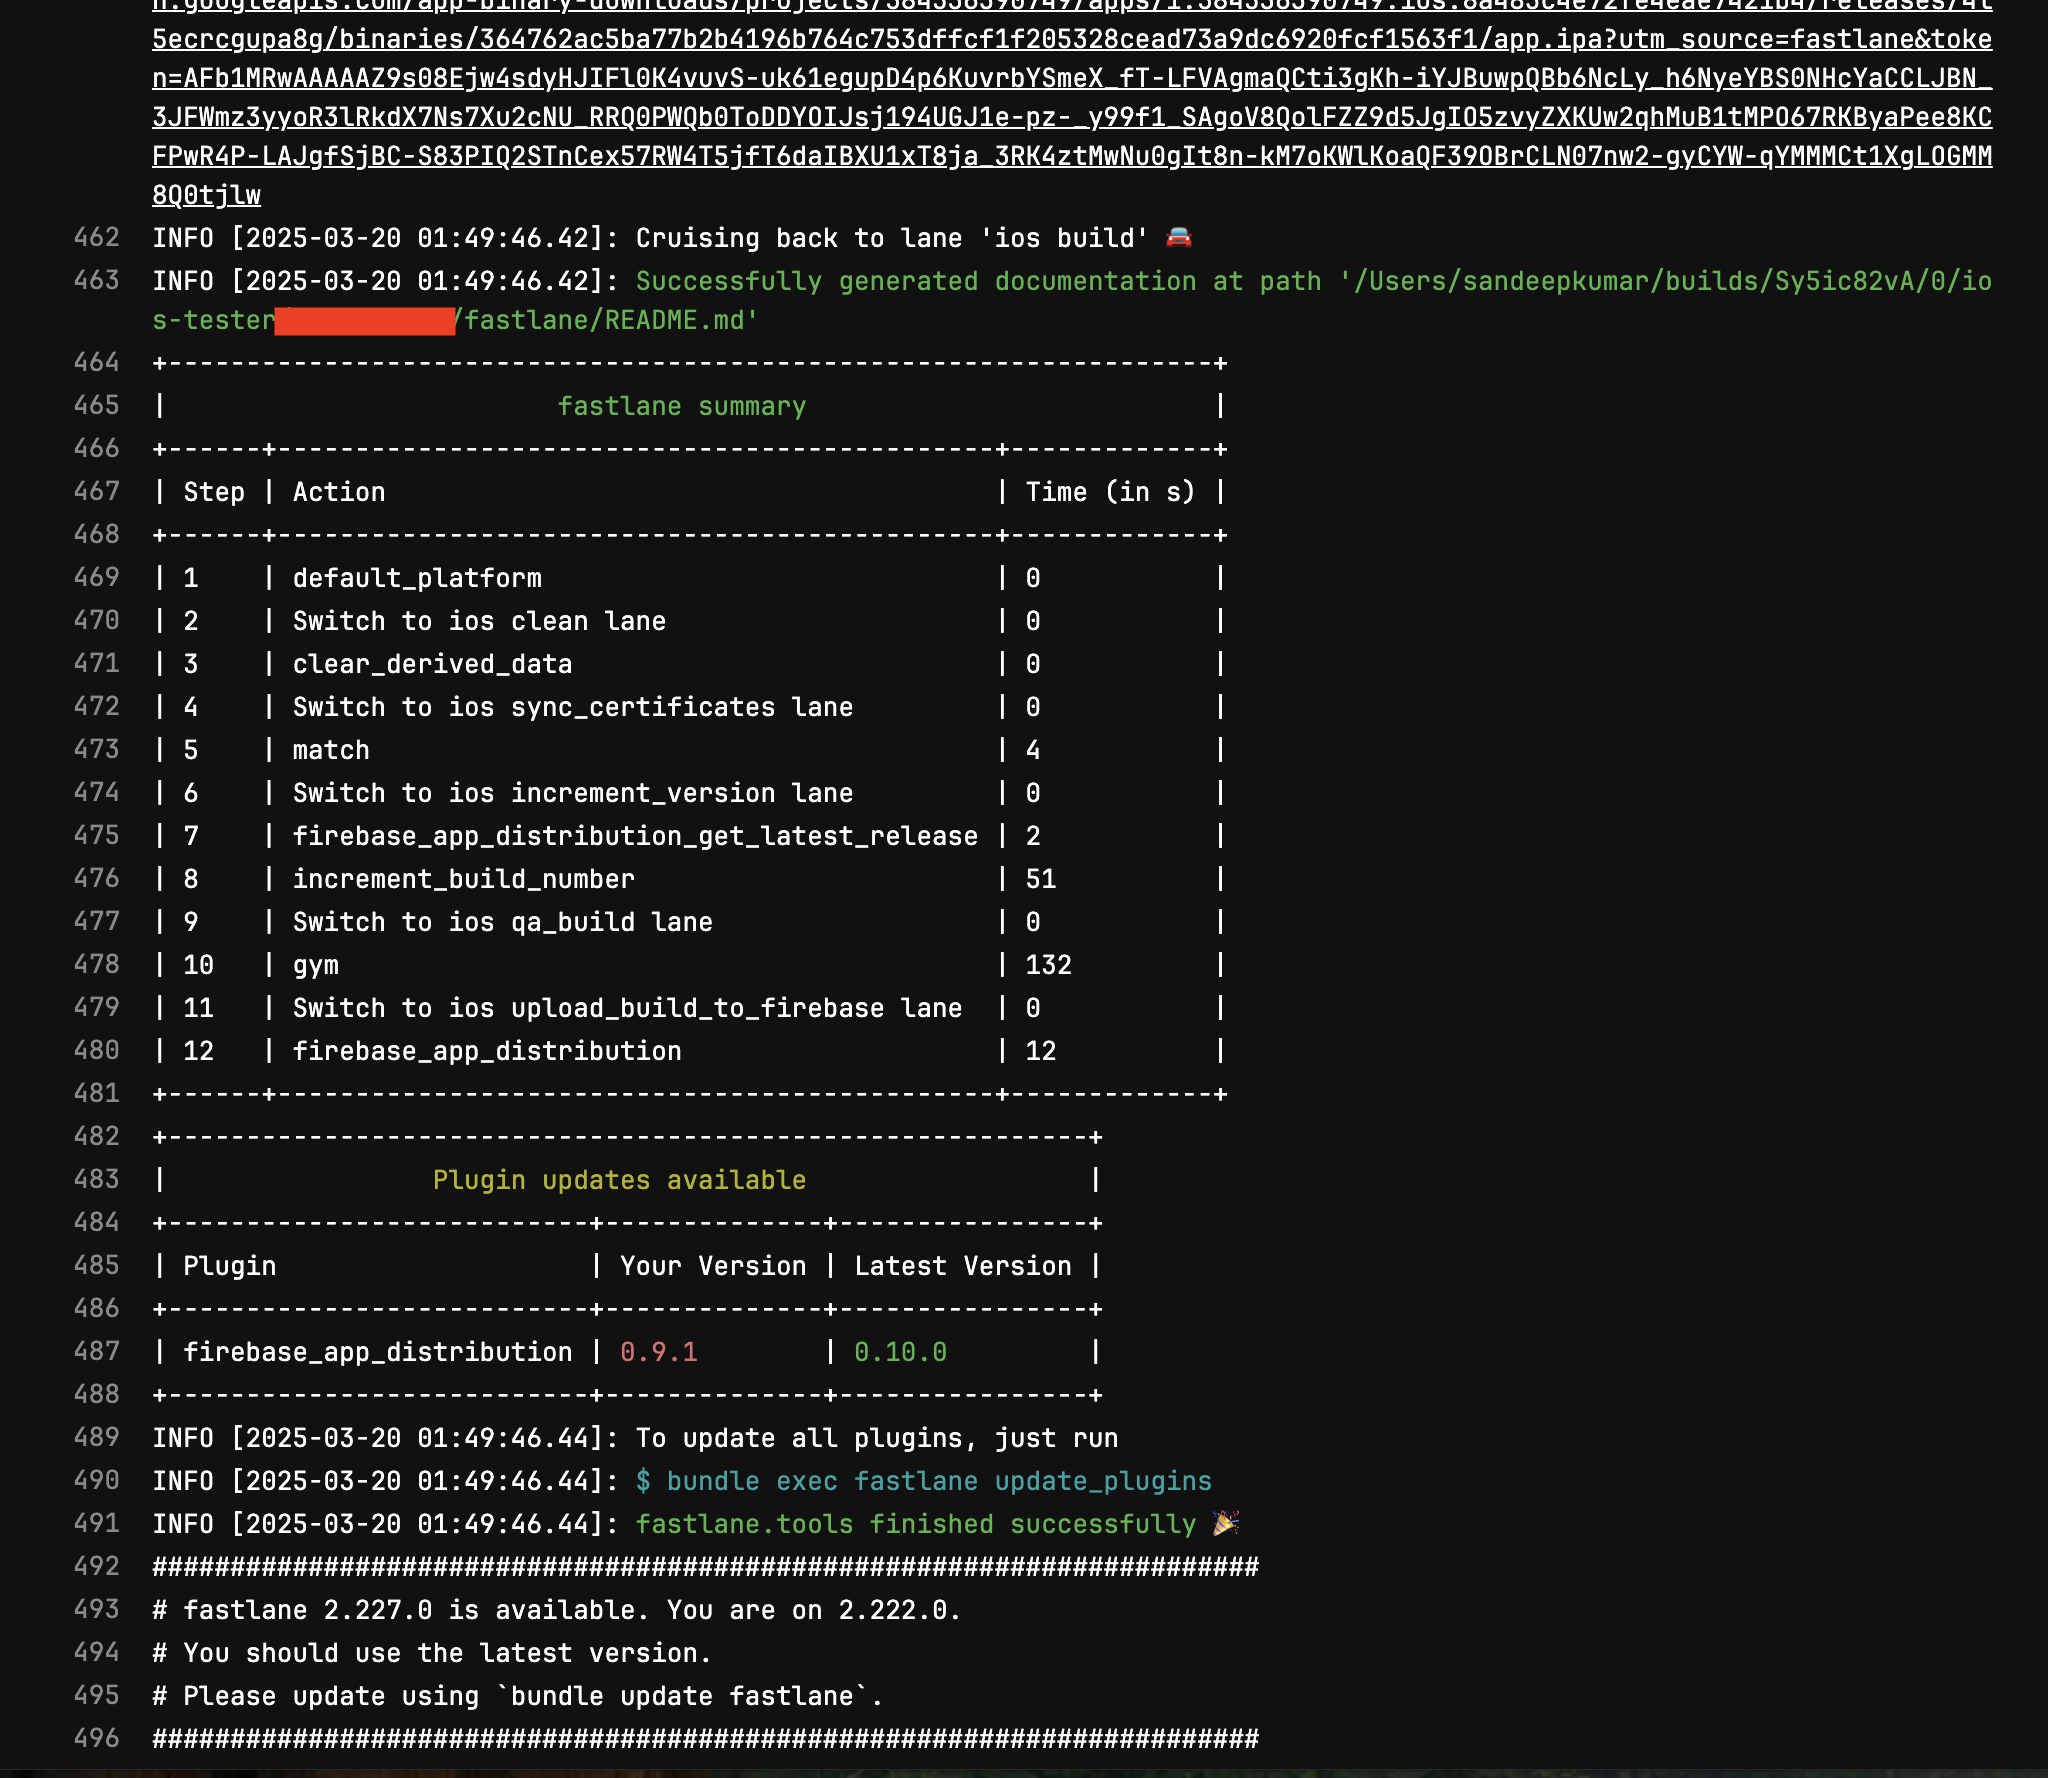
Pipeline Job status:

Uploaded build link:

Concluding that we have covered the CI/CD workflow via Fastlane & Firebase with Gitlab Actions in in this part.
Stay tuned!


