
Migrate Azure Windows VM to AWS Windows EC2 using AWS Application Migration Service
Migrating applications from one cloud provider to another can be a daunting task, but with the right tools and strategy, it becomes manageable and efficient. In this blog post, we’ll walk you through the process of migrating a WordPress server from Azure to AWS using AWS Application Migration Service (AWS MGN). This step-by-step guide will help you understand the process and ensure a smooth transition for your WordPress website.
Objective:
This blog aims to provide a comprehensive, step-by-step guide for migrating a WordPress server from Azure to AWS using AWS Application Migration Service (AWS MGN). The objective is to simplify the migration process, minimize downtime, and ensure a smooth and efficient transition by leveraging AWS’s robust tools and infrastructure. Through this guide, you will gain practical insights into the key steps involved, from preparing the source environment to verifying the successful replication and launch of their WordPress site on AWS.
What is AWS Application Migration Service?
AWS Application Migration Service (MGN) simplifies the migration journey by replicating your servers to AWS, then automatically converting and launching them in the cloud when you’re ready. This service eliminates the complexity of manual migration, allowing you to save costs, boost productivity, enhance resilience, and leverage AWS services for modernization.
Key Benefits of Cloud Migration:
- Cost Efficiency: Lower upfront investments and operational costs by paying only for the resources you use.
- Scalability: Quickly scale resources up or down to match business needs, avoiding over-provisioning.
- Innovation: Access and experiment with new technologies to drive growth and stay competitive.
- Security: Benefit from advanced security features and compliance tools provided by cloud providers.
- Business Continuity: Ensure uninterrupted operations with robust disaster recovery solutions.
- Collaboration: Enhance team collaboration with integrated cloud-based tools.
Steps to be followed:
Initial Steps:
- WordPress Database Migration:
For a comprehensive, step-by-step guide to MySQL migration using AWS DMS, explore this detailed blog post here.
Migrating MySQL databases to AWS using the Database Migration Service (DMS) offers a streamlined approach to moving your data to the cloud, minimizing downtime, and ensuring data integrity. With AWS DMS, businesses can automate many complex migration tasks, making the process more efficient and less error-prone. This service supports a range of use cases, from real-time data replication to one-time migrations, making it a versatile tool for organizations seeking scalability and enhanced security. By leveraging AWS DMS, you can significantly reduce costs while ensuring a smooth and reliable migration. - Prepare Your Azure VM:
- Before starting the migration, ensure that you have an Azure VM.
- We will be conducting a migration test by moving a WordPress installation from an Azure VM to an AWS EC2 instance.
- Install and verify WordPress installation:
- Log in to your Azure VM.
- Follow the instructions mentioned here to install WordPress on a windows VM.
- Ensure that WordPress is installed and running. You should be able to access the WordPress dashboard via a web browser.
Step-by-Step Solution:
Step 1: Set Up the AWS Application Migration Service
- Navigate to AWS Application Migration Service:
- Go to the AWS Application Migration Service (AWS MGN)
- Before we do the configuration, We’ll discuss what is the launch template and replication template.
Replication Template: A Replication Template defines how your source servers (on-premises or other cloud environments) should be replicated to AWS. It includes settings for the replication servers, such as the instance types, volume settings, and network configurations for the Replication Server. This server is responsible for creating snapshots and EBS volumes and replicating all your data into it.
Purpose and Why it’s Needed:
- Configuration Consistency: It ensures that the replication process is consistent across multiple servers by applying the same settings to all of them.
- Simplified Management: By using replication templates, you can streamline and standardize the replication settings for multiple servers, reducing manual configuration and errors.
- Optimization: You can tailor the replication settings to meet the performance and cost requirements of your migration.
Launch Template: A Launch Template specifies how the target instances in AWS should be configured when the replication is complete and the servers are launched. It includes instance type, network configurations, key pairs, and other settings necessary for the target instance launch.
Purpose and Why it’s Needed:
- Automated Instance Creation: It allows you to automate the creation of target instances based on predefined settings, ensuring that they are launched consistently and correctly.
- Flexibility and Customization: You can define different launch templates for different application requirements, providing flexibility to handle various types of applications and workloads.
- Efficiency: It streamlines the deployment process, allowing you to quickly and efficiently launch instances with the required configurations without manual intervention.
Step 2: Replication template and Launch template configuration:
- Create the Replication template and choose the desired instance type, volumes, subnet etc. for the Replication Server.
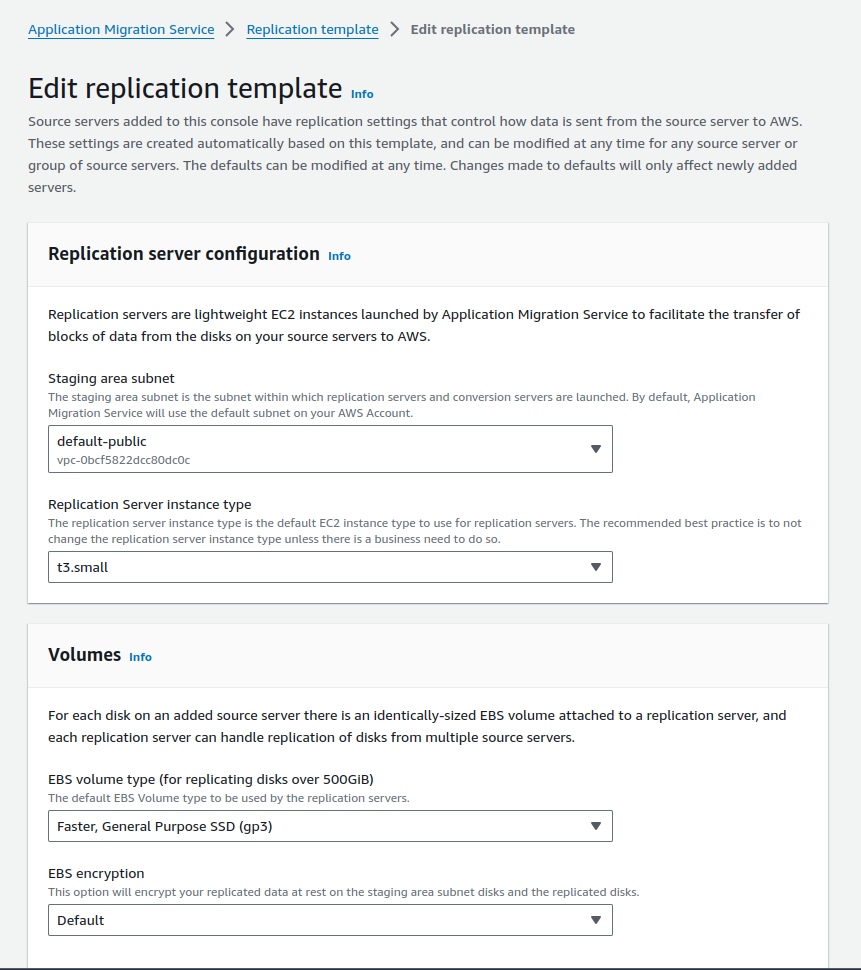
ReplicationTemplate
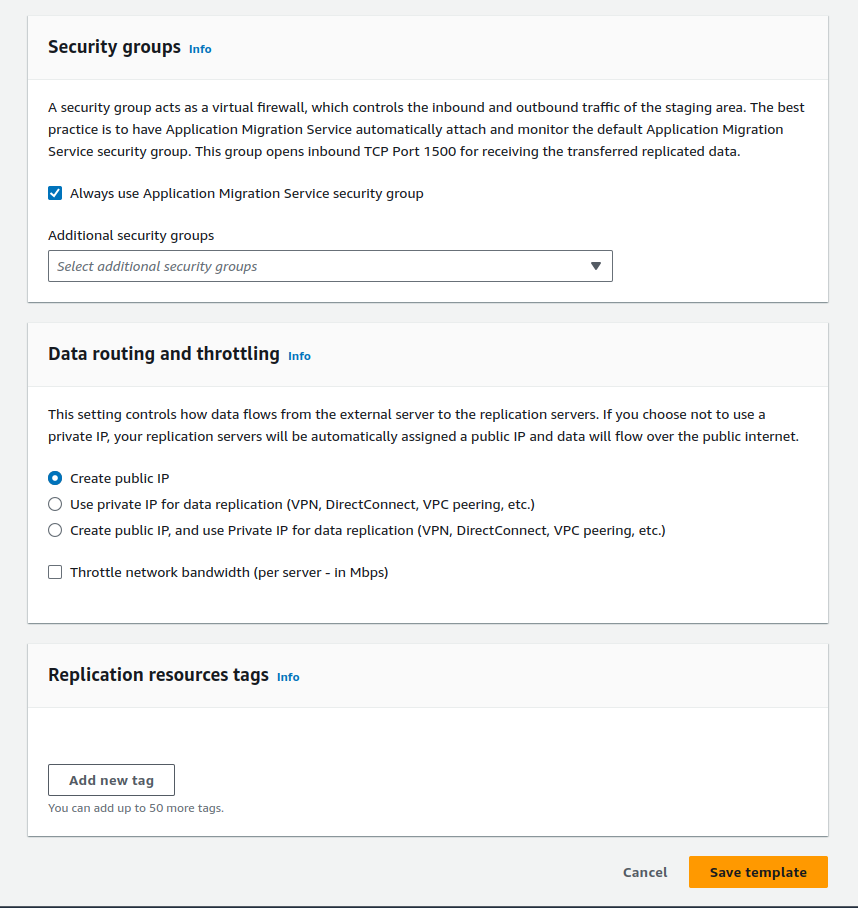
ReplicationTemplate2
- Create the Launch template and choose the desired instance type, volumes, subnet etc. for the Target Server.
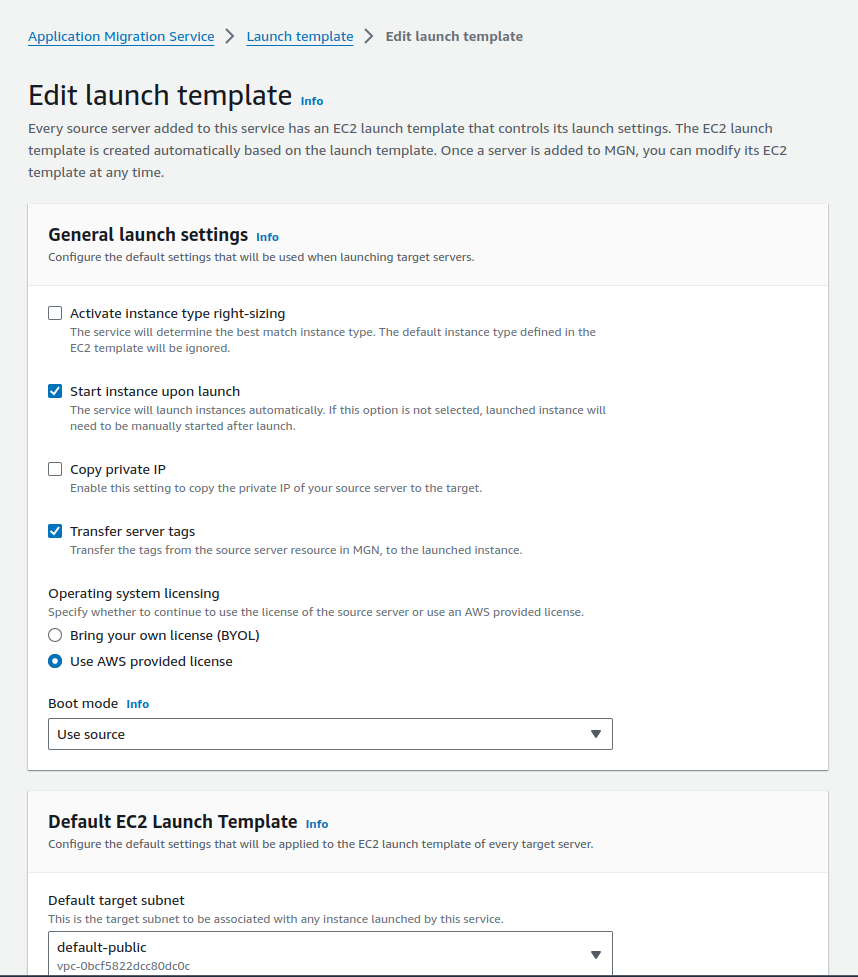
LaunchTemplate
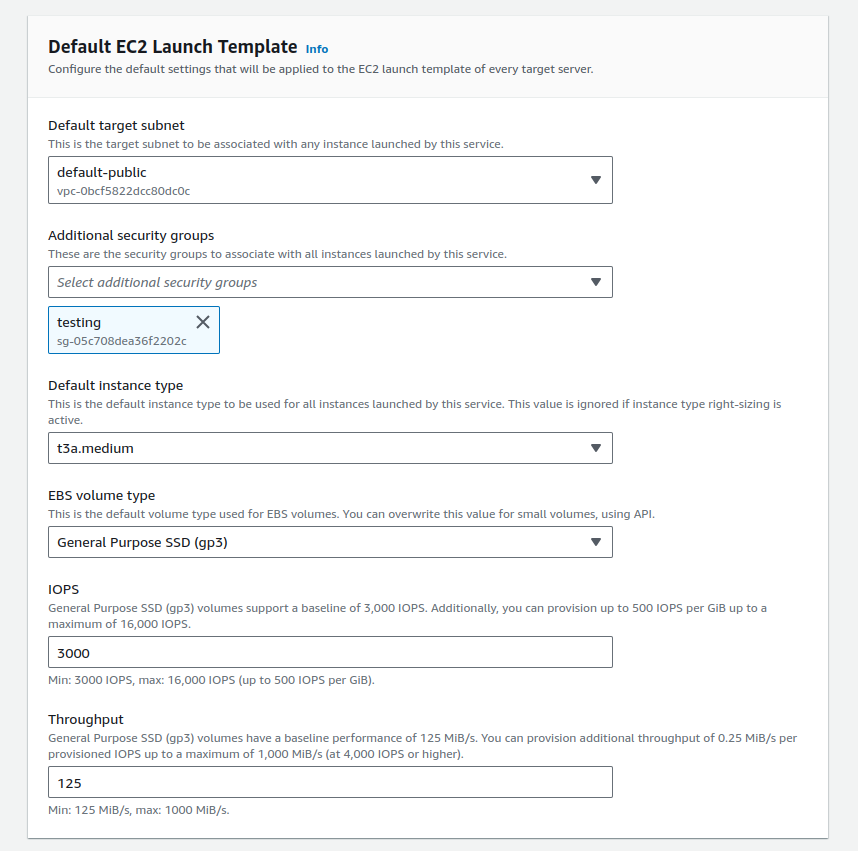
LaunchTemplate2
Step 3: Install the AWS Replication Agent on Your Azure VM
- Download the Replication Agent:
- Look for Source Servers in the AWS MGN console and Click on Add server.
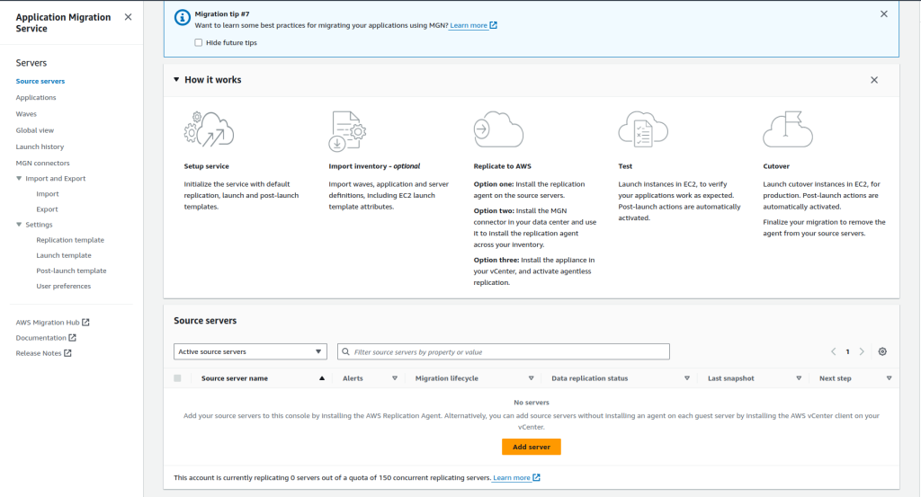
Add-server
- Select the operating system i.e Windows.
- Choose which disks to replicate, we’ll replicate all the disks for now.
- Create a new user with permission as AWSApplicationMigrationAgentInstallationPolicy and use the access and secret access key.
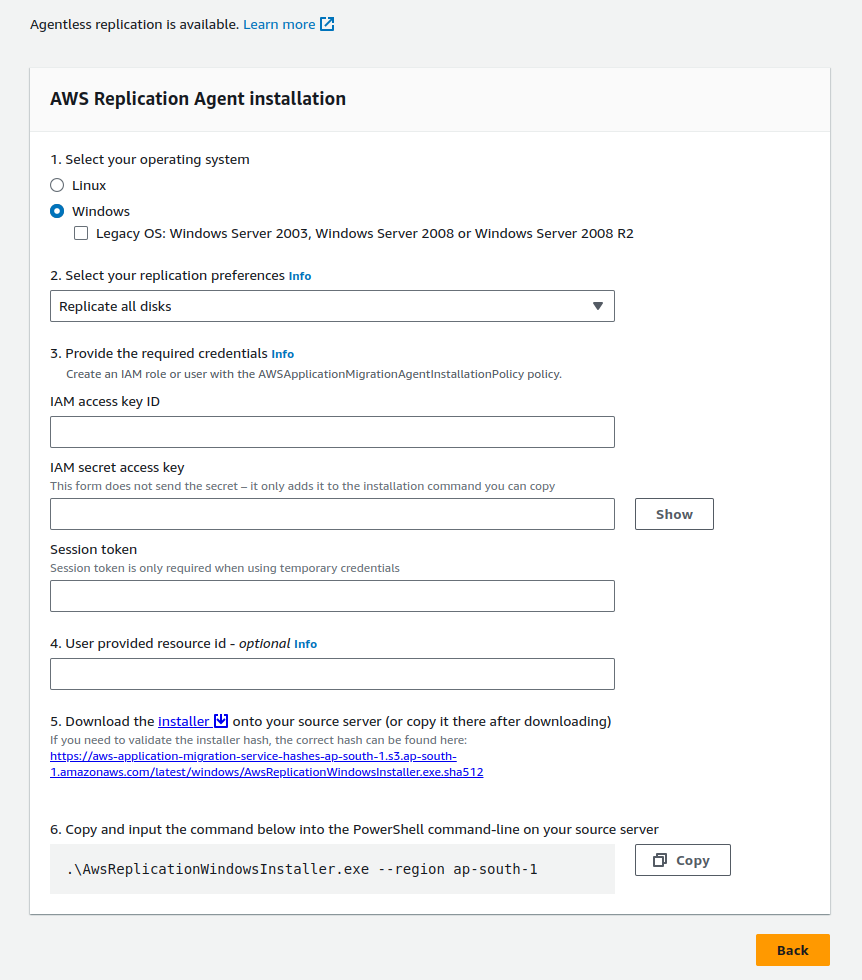
DownloadAgentInstaller
2. Install the Replication Agent:
- Right click on the Installer, copy the link address, and paste it on your Azure VM to download the agent installer.
- Run the downloaded installer and follow the on-screen instructions to install the replication agent.

agent installation
Step 4: Verify Server Creation:
- In AWS Application Migration Service, a replication server will automatically be created.
- This server is responsible for creating snapshots and volumes of your source VM.
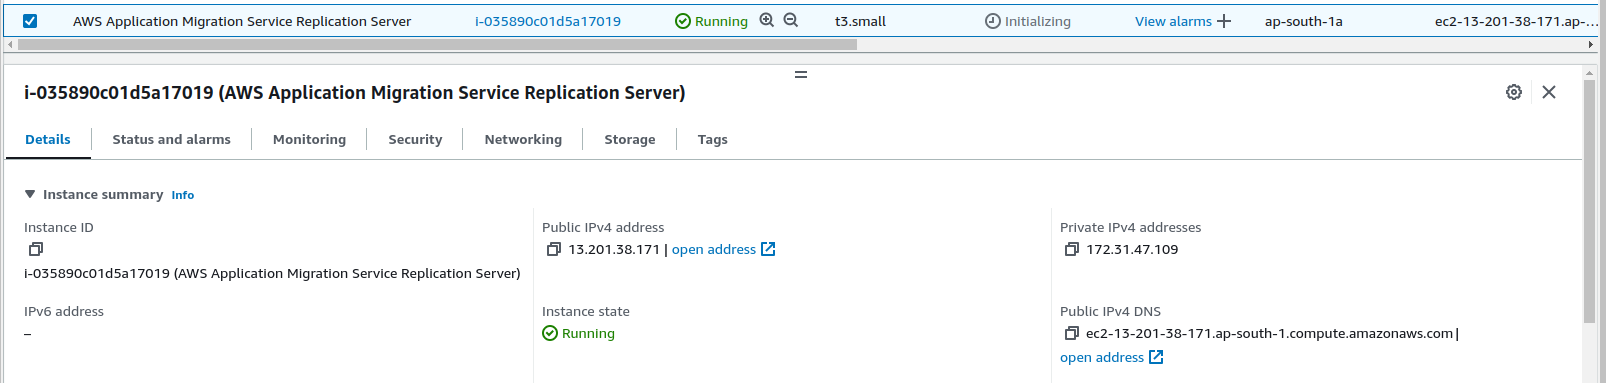
Replicationserver-auto
Step 5: Monitor Replication Progress
- Monitor the status of the replication job from the AWS MGN console.
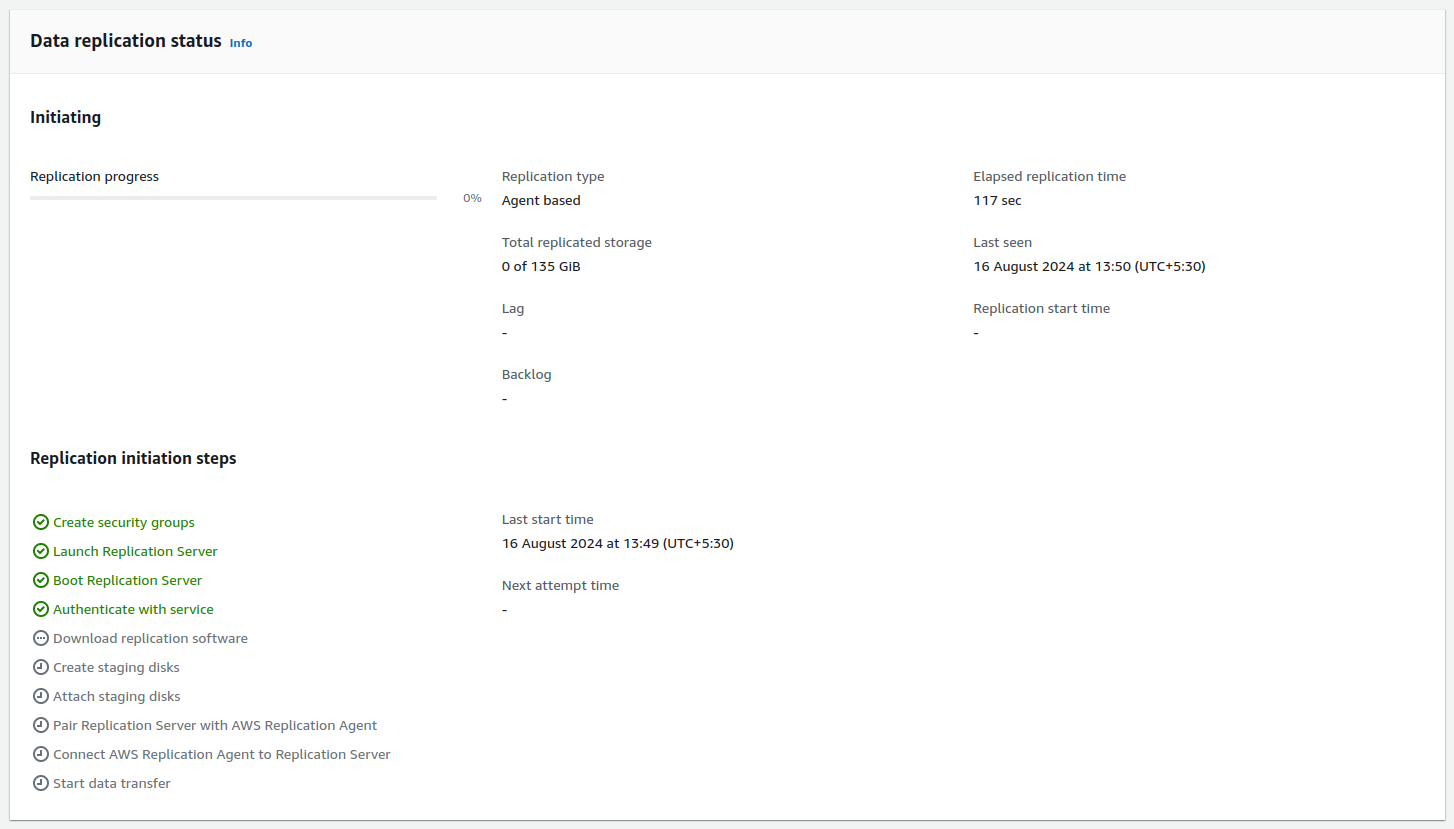
ReplicationStarted
Step 6: Launch and Test the Migrated VM
Launch test instances:
- After the replication progress completes to 100% then click on the Test and cutover option on the top right side of the console and Launch test instances.
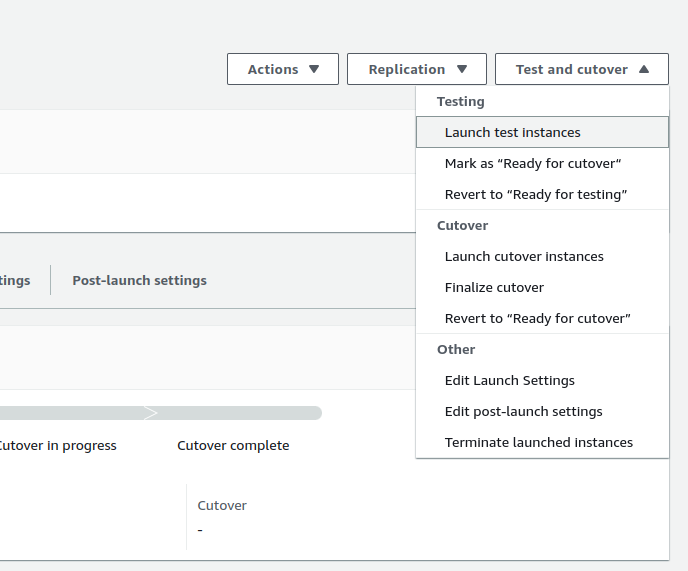
LaunchInstances-testandcutover
- You can see that an instance with the same name as that of Azure VM is created, and I will proceed to mark it as Ready for Cutover.
- I will proceed directly to the Cutover phase without testing the data. However, it is advisable to thoroughly test your data on a test VM, especially when working on a production server.
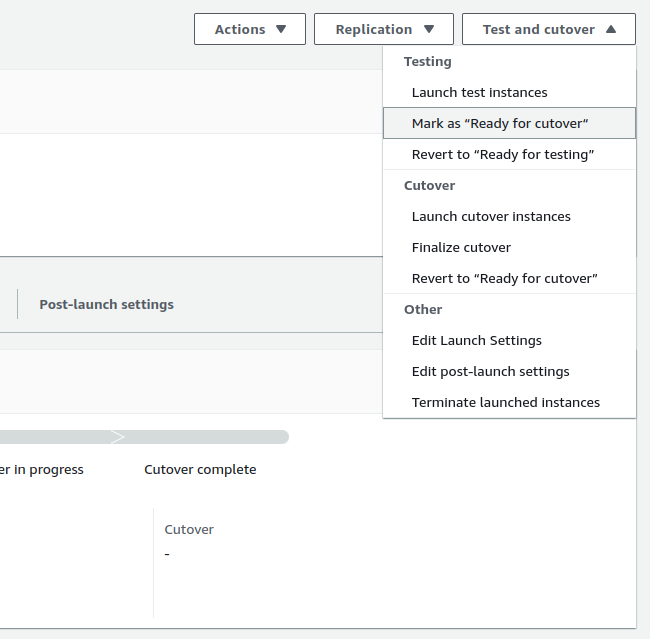
MarkAsReadyForCUtover
- After that click on Launch cutover instances in the Test and Cutover section to launch the final cutover instance.
- We can see our final cutover instance with the same name as Azure VM, which is machine5 in our case.
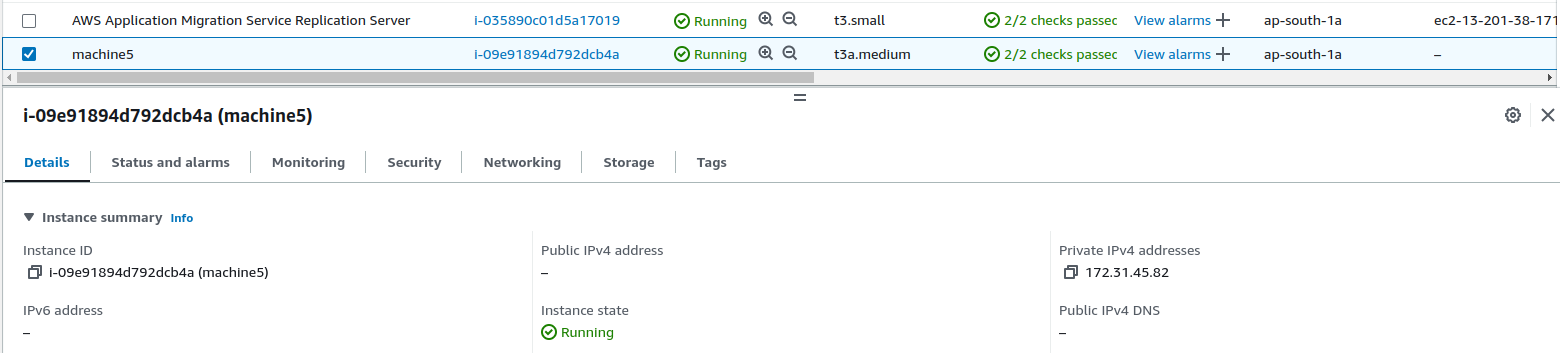
FinalCutoverInstance
Test the VM:
- After launching the instance, connect via RDP to verify that everything has been successfully replicated.
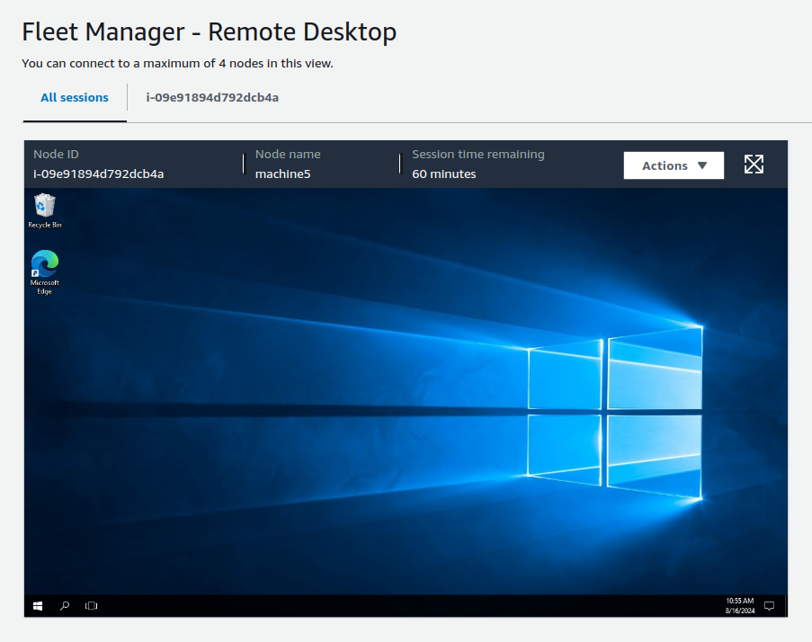
RDP-fleetmanager
- Navigate to the root directory of your WordPress installation.
- Locate the wp-config.php file in the root directory.
- Open the wp-config.php file in a text editor and update the database details.
- define(‘DB_NAME’, ‘your_database_name’);
- define(‘DB_USER’, ‘your_database_user’);
- define(‘DB_PASSWORD’, ‘your_database_password’);
- define(‘DB_HOST’, ‘<rds-endpoint>’);
- Verify that the WordPress installation has been replicated successfully by accessing localhost/wp-admin in your browser.
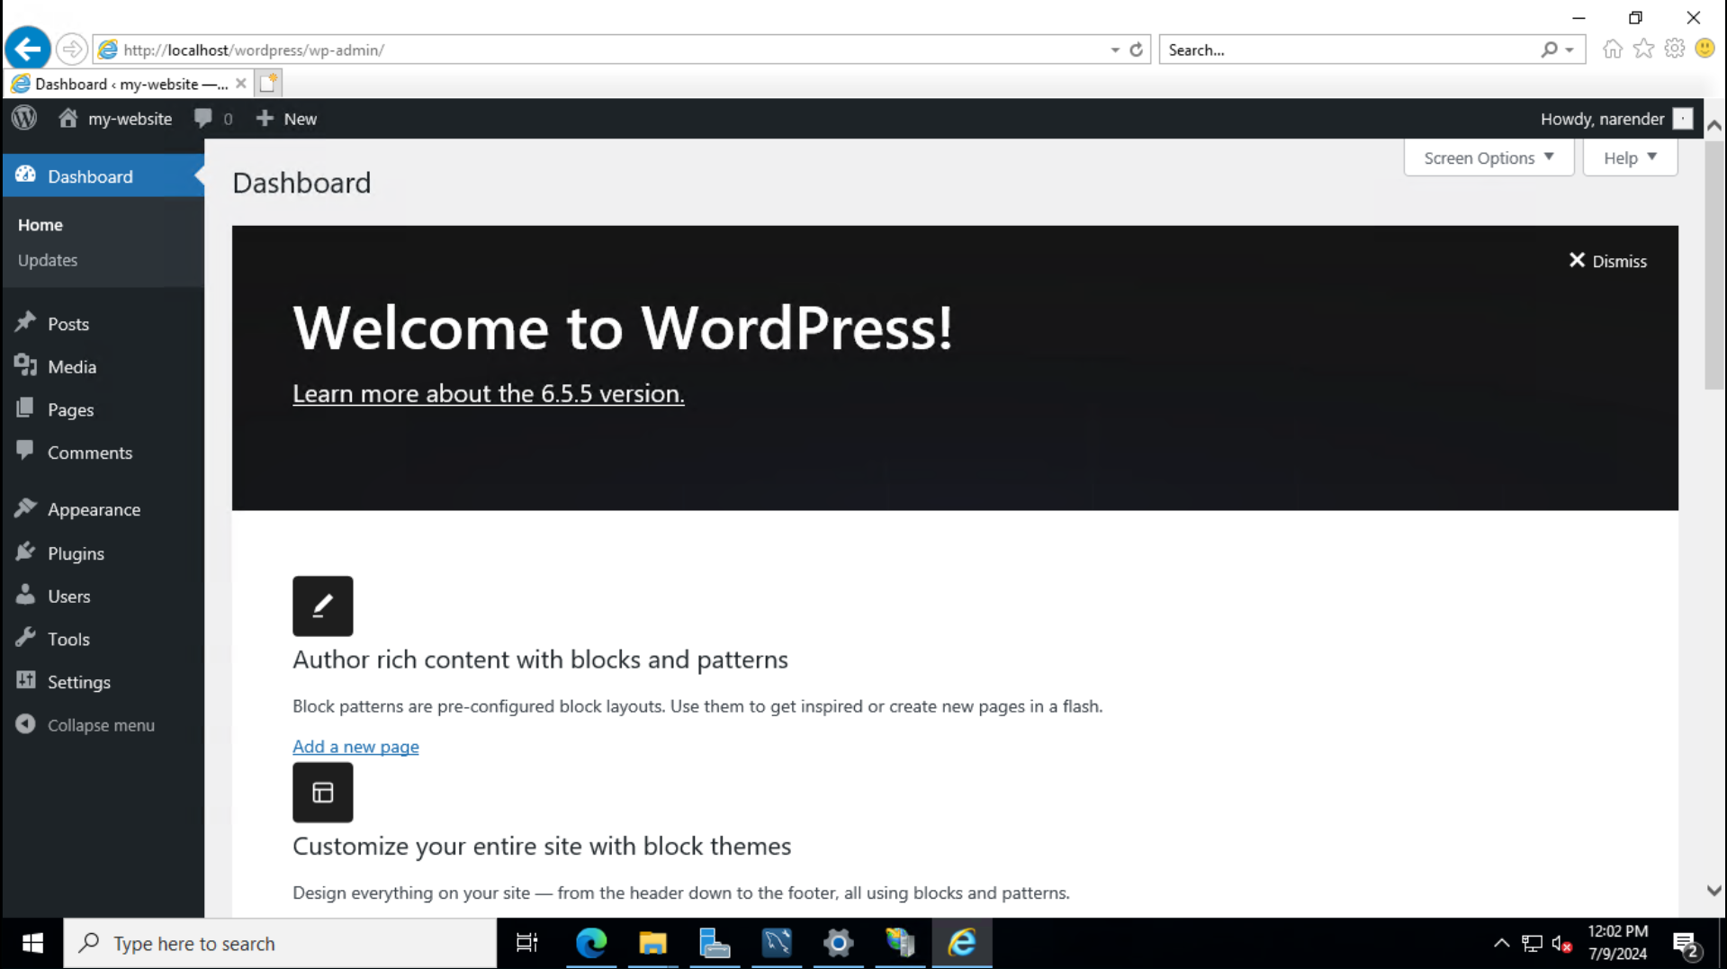
wordpress-access
Conclusion
Migrating applications from Azure to AWS with the Application Migration Service brings significant benefits: improved performance, global reach, cost savings, and top-notch security. AWS’s vast network infrastructure ensures low-latency access and a smooth user experience. The service simplifies the migration process, minimizing downtime and complexity. By leveraging AWS’s secure environment and extensive support resources, organizations can excel in the cloud and provide exceptional experiences for their customers.


