Redshift IdP Authentication Setup using Azure Active Directory
Introduction
Recently, we helped a large enterprise customer set up their data warehouse on Amazon Redshift using Azure AD for corporate credentials. This allowed users to log in with their corporate credentials, improving user experience and simplifying maintenance. We achieved this by setting up Azure AD federated access to Amazon Redshift.
This post explains how to set up a federation using Azure AD and AWS IAM. Azure AD manages users and provides federated access to Amazon Redshift through IAM, eliminating the need to create separate database users in Amazon Redshift.
- Here we have attached an Image from AWS which provides a better understanding of this Architecture.
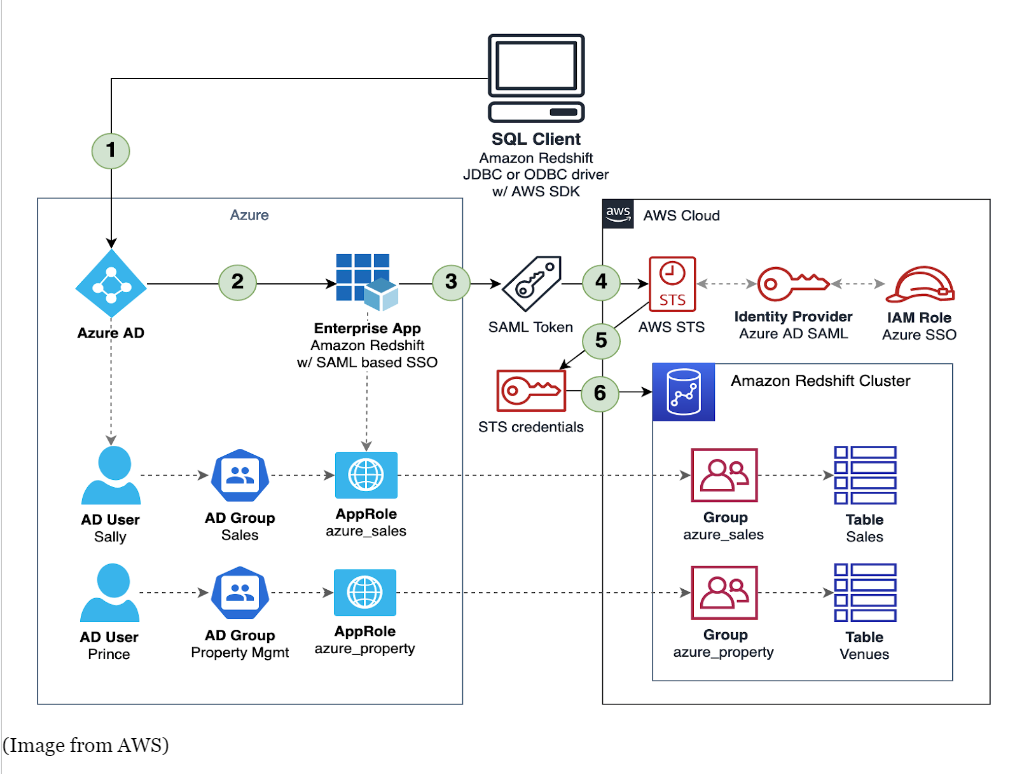
AWS graph
- AWS graph
STEPS TO PERFORM
-
Create an OAuth Application for the use
To set up your Azure application, you must create both an OAuth application and a Redshift Client application. The OAuth application is used to authenticate the user and provide a login token. The Redshift Client application is used to retrieve user and group information.
- Open Your Azure Console and Select Microsoft Entra ID or Azure Active Directory
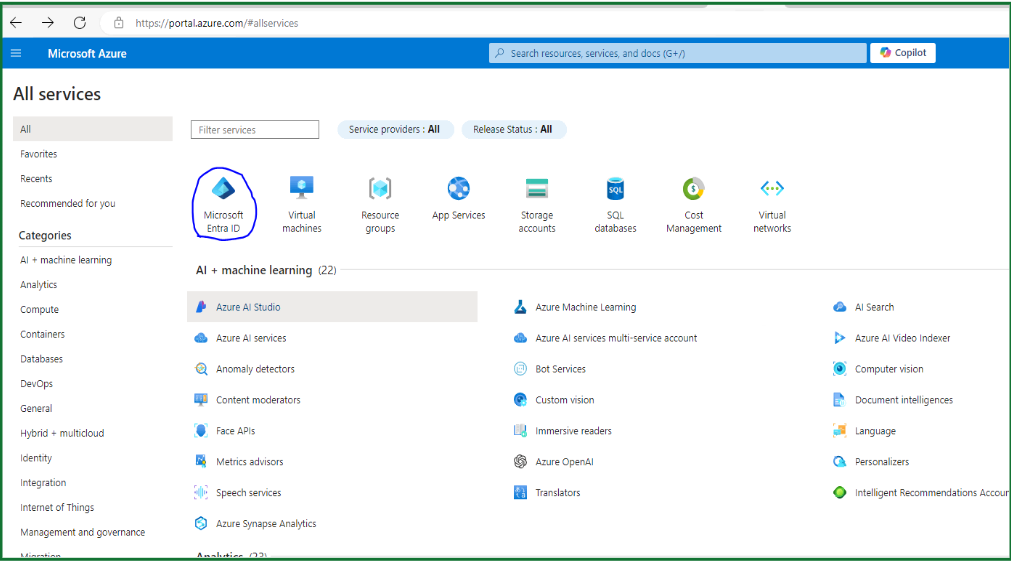
Azure Console
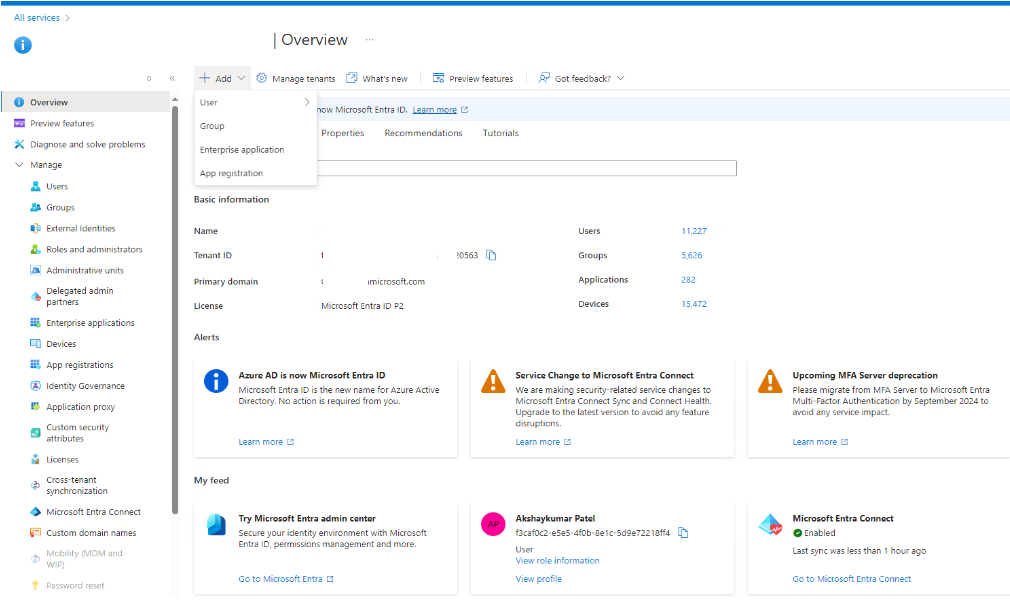
Azure Application
- Open the App Registration Option and Click on New Registration
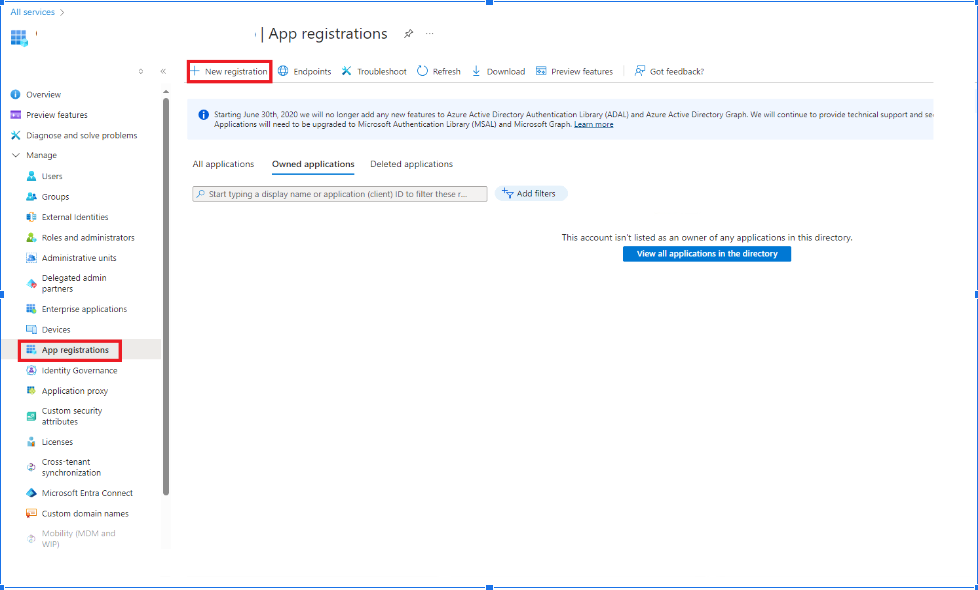
Create APP
- Provide all the Details Here
For Name, enter a name for your application. Example: Test Redshift OAuth For Redirect URI, choose Public client/native(mobile and desktop) and enter the redirect URL https://<your-redshift-instance-host> Keep the default settings for the remaining fields.
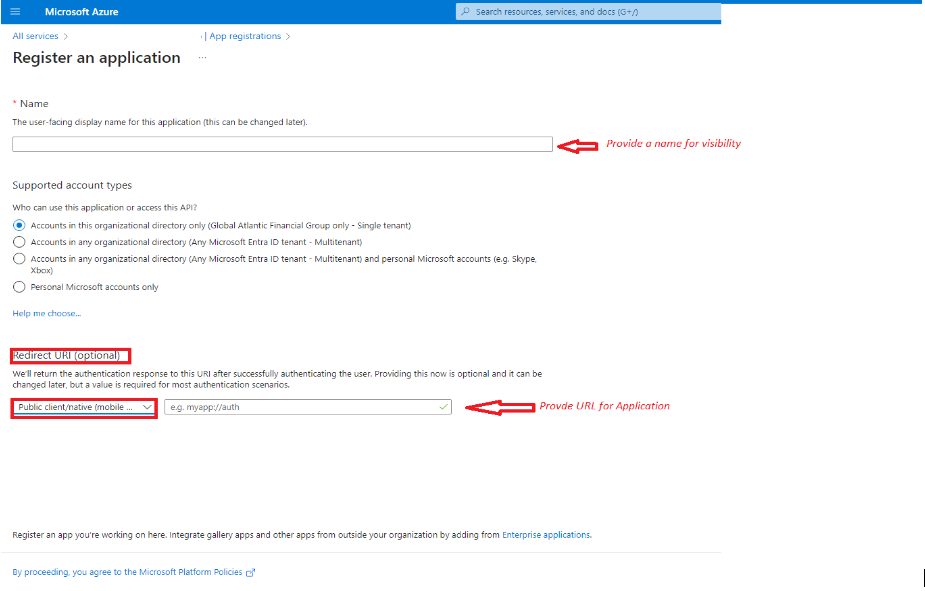
Details to add
- Overview of Application
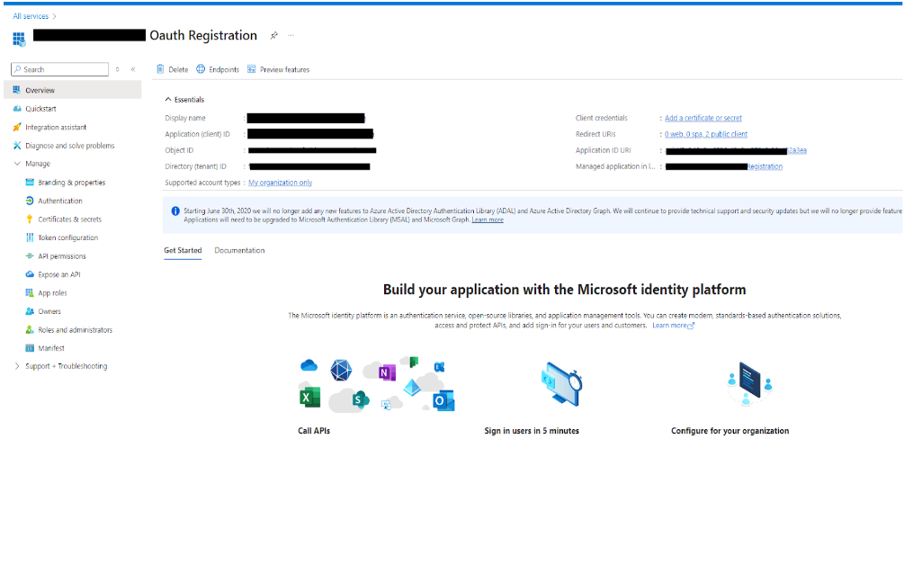
Overview of APP
- Collect Required Details from the Overview Page of the Application
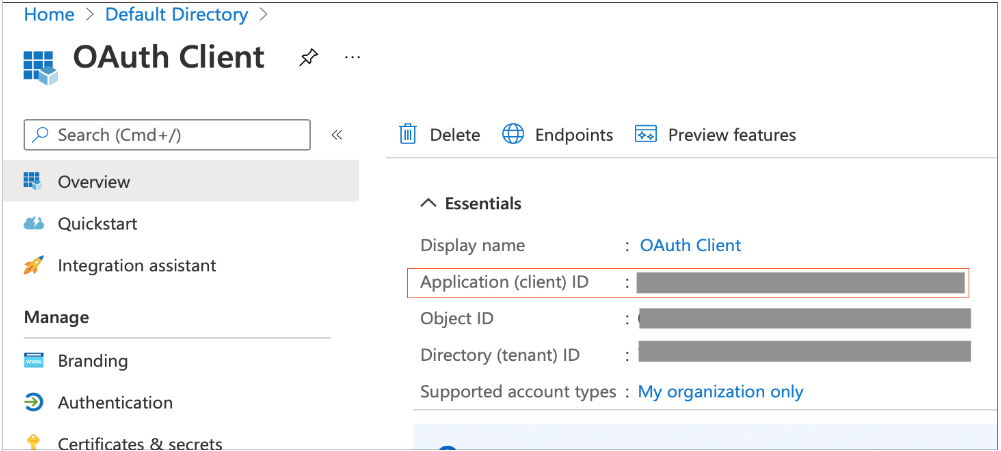
Overview of APP
Gather below listed Information from Overview of Your Application
Application (client) ID - referred to as <OAUTH_CLIENT_ID>
Directory (tenant) ID - referred to as <OAUTH_TENANT_ID>
- Expose API to users
The application is created, select Expose an API from the left navigation pane. If this is your first setup, Set appears to the right of the Application ID URI. The Application ID URI must be unique within your organization’s directory, such as https://your.company.com/1az3ds2b-5tf3-ed6g-1qzn733t
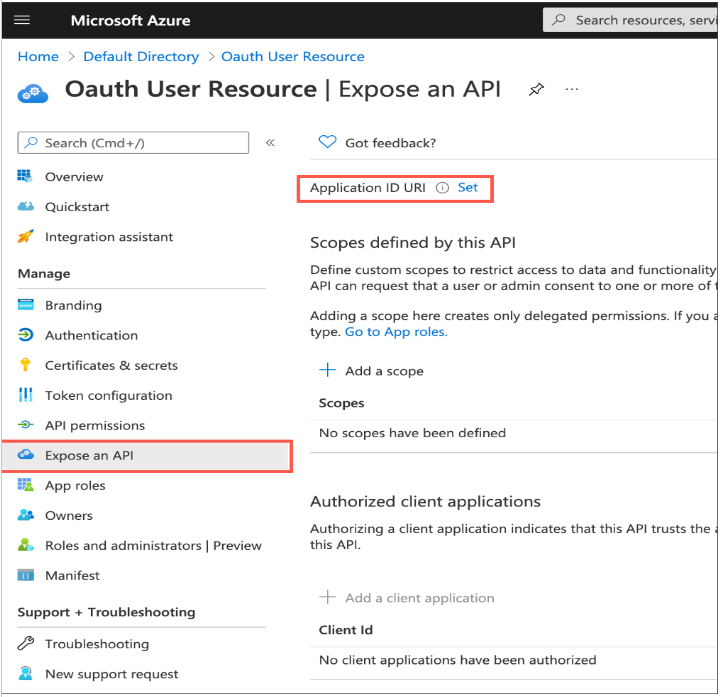
API Expose
Add Application URI Add Scope Name like. Session:role-any Provide Consent details like who can consent, Display name Add Scope
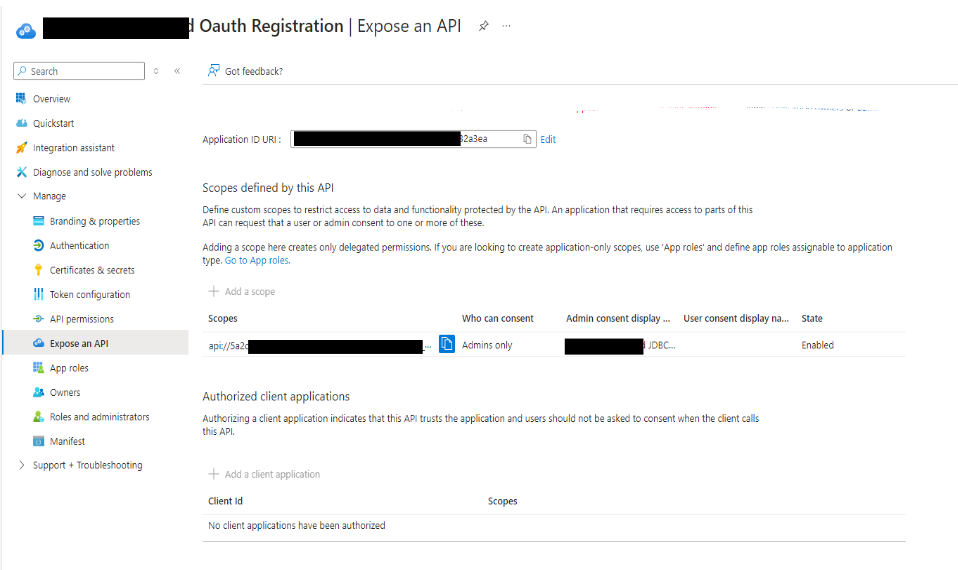
Add Scope
- Authentication
Select Authentication from the left navigation pane, and under Web, specify the redirect URI using the following format:
<https://<public url of your Redshift instance>
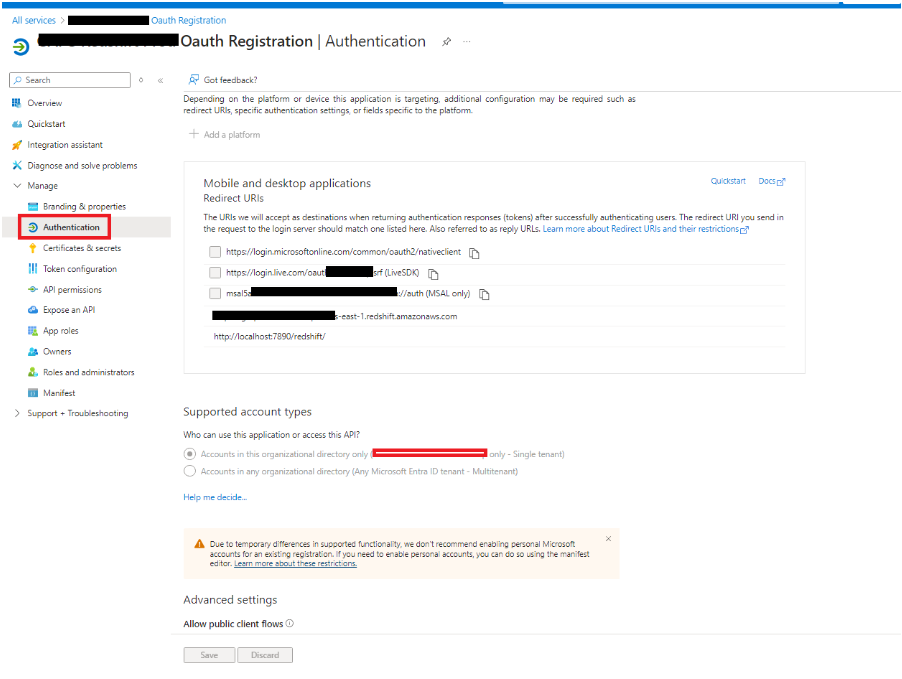
Application Authentication
- Certificate and Secret Details
Select Certificate and Secret from Left Side Panel and select New Client Secret Provide required details like description and expiration time (default – 6 month) Copy that value to your notepad as it will be referred to as <OAUTH_CLIENT_SECRET>
- API Permission
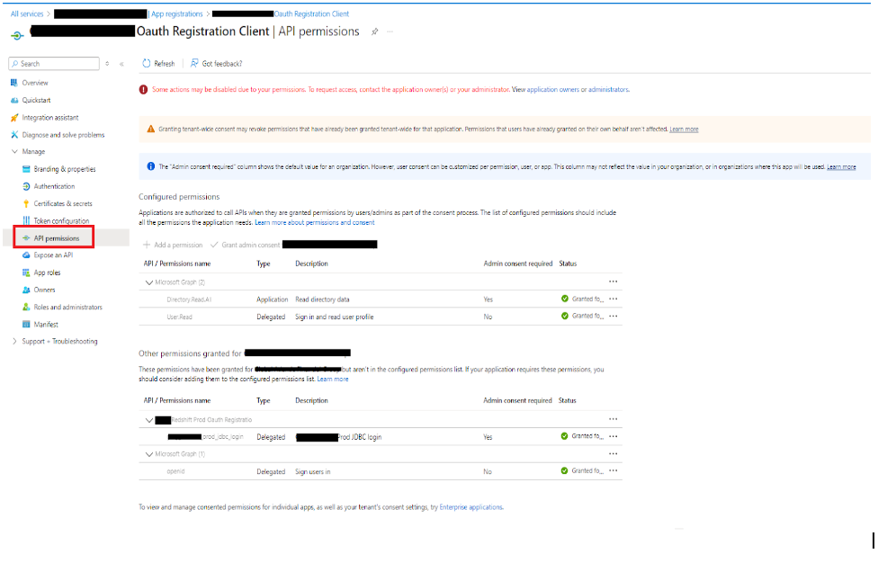
API Permission
- Create a Group and add Users
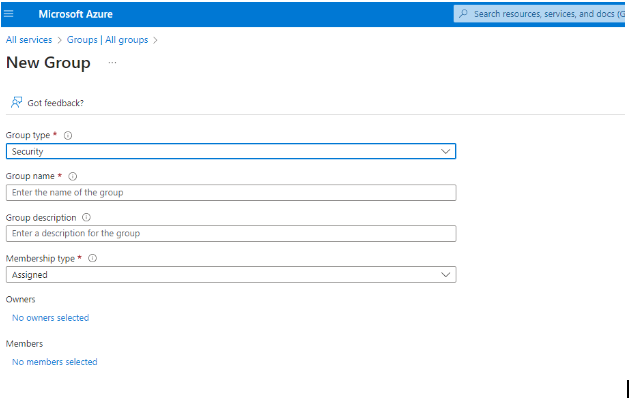
Create New Group in Azure
- Add Application Access to that Group and its members
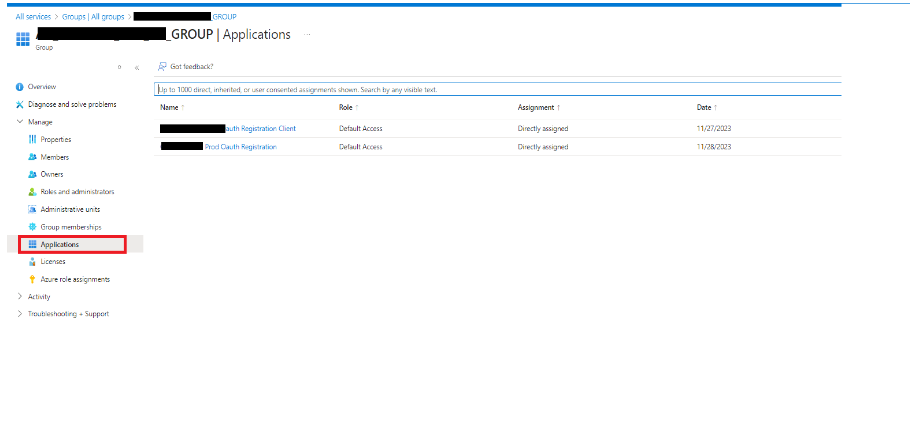
Group Permission
- Get your Identity ID and all required information from the manifest option
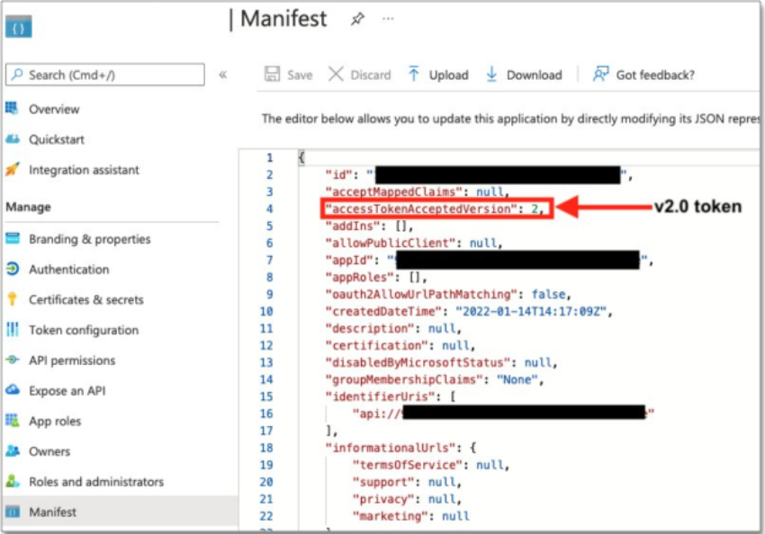
App Menifest
- Collect Required Details to Setup Identity Provider in Redshift
| Required Parameters | Value From Application |
| Issuer | <OAUTH_TENANT_ID> |
| Client_Id | <OAUTH_CLIENT_ID> |
| Client_secret | <OAUTH_CLIENT_SECRET> |
| Audience | application ID URI |
STEPS TO EXECUTE ON REDSHIFT SQL EDITOR
-
Setup Identity Provider details in Redshift
- Execute below statement in Redshift Query Editor
CREATE IDENTITY PROVIDER <idp_name> TYPE azure

NAMESPACE '<namespace_name>'

PARAMETERS '{

"issuer":"<Microsoft_Azure_issuer_value>",

"audience":["<Microsoft_Azure_token_audience_value>"],

"client_id":"<Microsoft_Azure_clientid_value>",

"client_secret":"<Microsoft_Azure_client_secret_value>"

}';
2. To Get all registered IDP details
select * from svv_identity_providers;
3.Create User and Role in Redshift and provide access and check permissions
- Create Role in Redshift with Oauth Setup and Grant select permission on schema.
CREATE ROLE “oauth_aad:TEST_ROLE_RO_GROUP”;

GRANT USAGE ON SCHEMA public to role “oauth_aad:TEST_ROLE_RO_GROUP”;

Grant select on all tables in schema public to role “oauth_aad:TEST_ROLE_RO_GROUP”;

Example -

GRANT { { SELECT | INSERT | UPDATE | DELETE | DROP | REFERENCES } [,...] | ALL [ PRIVILEGES ] } ON { [ TABLE ] table_name [, ...] | ALL TABLES IN SCHEMA schema_name [, ...] } TO "<namespace_name>:<Azure AD username>";
- Make Sure you have that user email added to that AD group which we have created from Azure Console.
- Create a user assign a role to that user and check the access permissions.
CREATE USER “oauth_aad:test@testemail.com” PASSWORD DISABLE;

GRANT ROLE “oauth_aad:TEST_ROLE_RO_GROUP” to “oauth_aad:test@testemail.com”;

Set session authorization “oauth_aad:test@testemail.com”

Select * from public.tablename;
- You can check grants for any user and which role has been assigned to which user.
SELECT * FROM SVV_USER_GRANTS;
Connection Setup in DBeaver for Redshift Access
| Steps | Instruction | Images for Reference |
| 1 | Go To DBeaver and Open New Driver Tab |
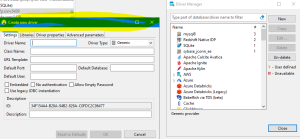 New Driver |
| 2 | Add required information for Drive |
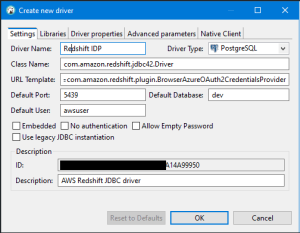 Driver Properties Values |
| 3 | Add New Libraries
Download JDBC Driver version 2.1 or above for AD Authentication Support |
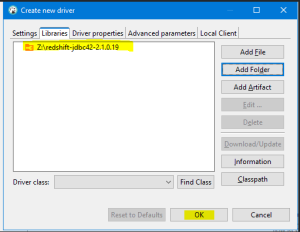 Libraries |
| 4 | Add Driver Properties
Reference – We have collected all required Parameter values in our blog Steps |
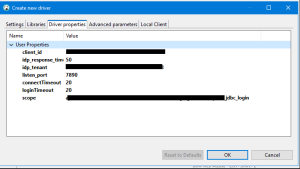 Values |
| 5 | Create a New Database Connection using this Driver and Check your connection |
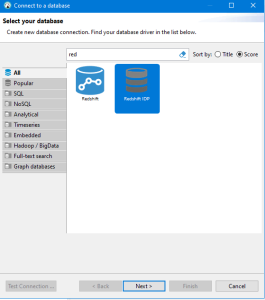 New Connection |
| 6 | Test Your Connection |
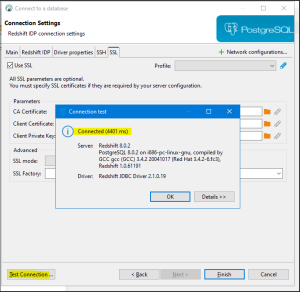 Connection Setup |
Conclusion
In This blog, we have setup AD Authentication with Azure Active Directory for Redshift, which helps us to minimize admin load to create users and manage passwords.

