Setting up WordPress Website on Windows Server 2022 with IIS
For organizations already invested in Microsoft technologies, hosting WordPress on Windows Server 2022 with IIS is a natural choice. Leveraging Windows Server 2022 with IIS for your WordPress site allows you to create a secure, scalable, and high-performing environment tailored to your business needs. This step-by-step guide will show you how to seamlessly integrate WordPress with Microsoft’s powerful server infrastructure, ensuring a smooth and efficient setup process that maximizes the strengths of both platforms.
Objective:
By following this guide, you’ll have a fully functional WordPress site on your windows server 2022. Whether you’re an experienced IT professional or a beginner, this guide will help you get your WordPress site set up and running smoothly.
Prerequisites:
- A Windows Server 2022 machine with administrative access.
- MySQL Installer
- PhP (Non Thread Safe version)
- Microsoft Visual C++ redistributable
- WordPress
Step-by-Step Solution:
Step 1: Installing IIS and required tools.
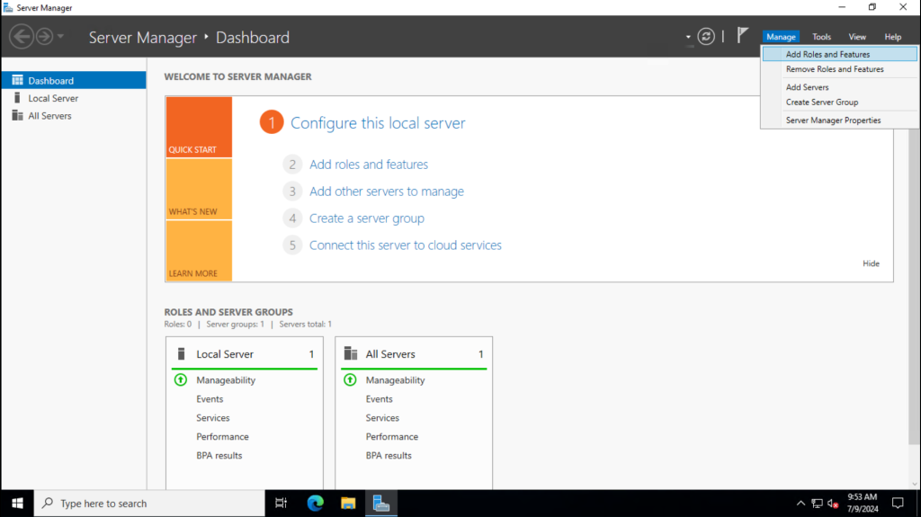
- Open Server Manager and select Manage > Add Roles and Features.
add-roles-and-features
- In the Add Roles and Features Wizard, select Role-based or feature-based installation and click Next.
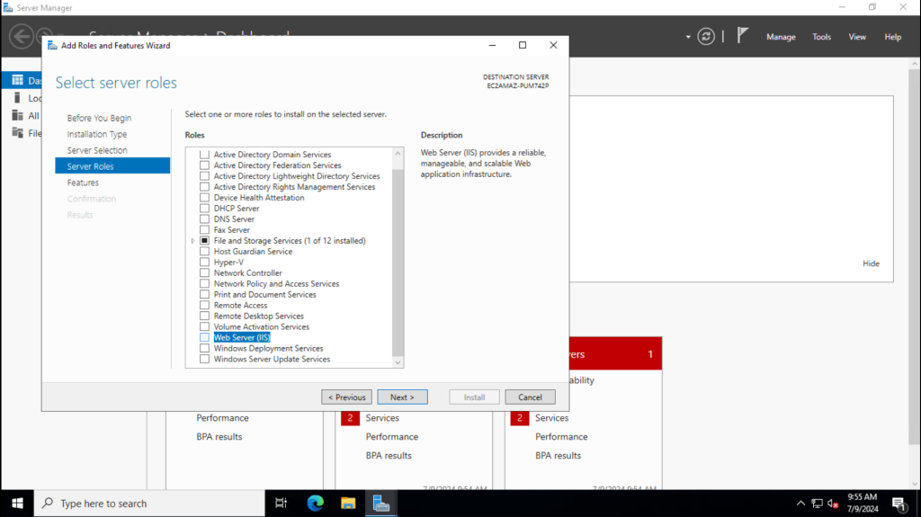
- In the Roles section, select Web Server (IIS) and click Next.
iis
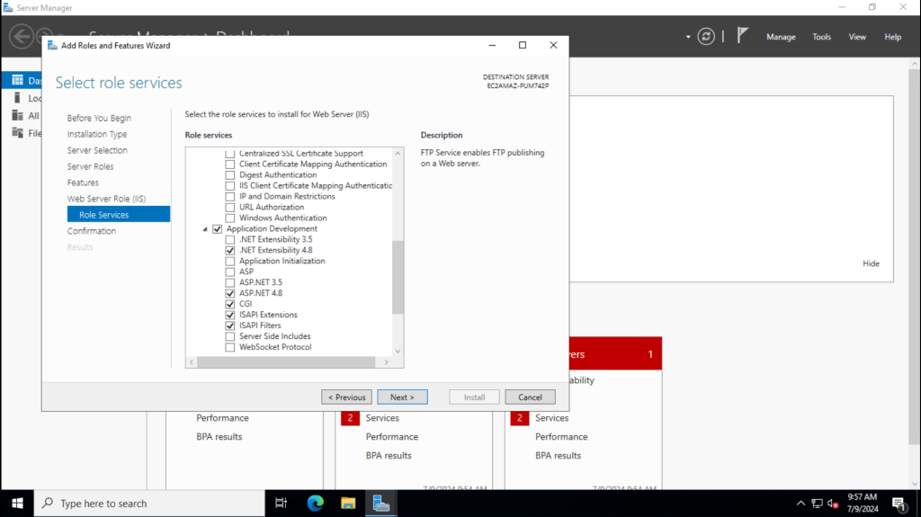
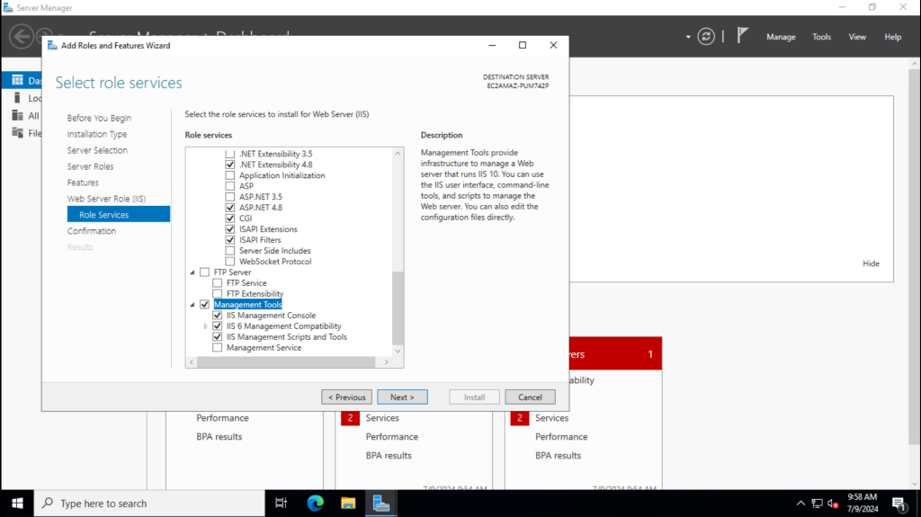
- In the Role Services section, ensure the following services are selected:
cgi
iis-services
- Click Next, then Install.
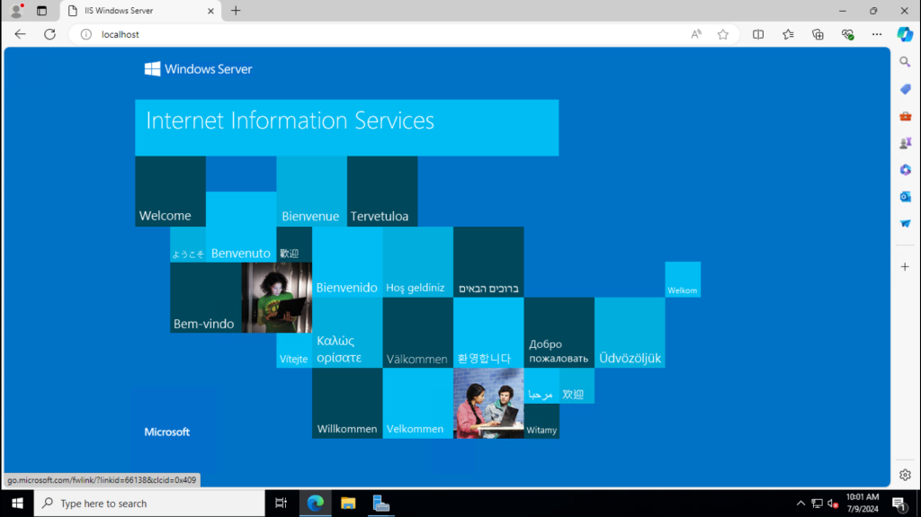
- Verify the Installation by visiting localhost, you will see the following default page of IIS.
iis-installed
Step 2: Install Microsoft Visual C++ Redistributable Version
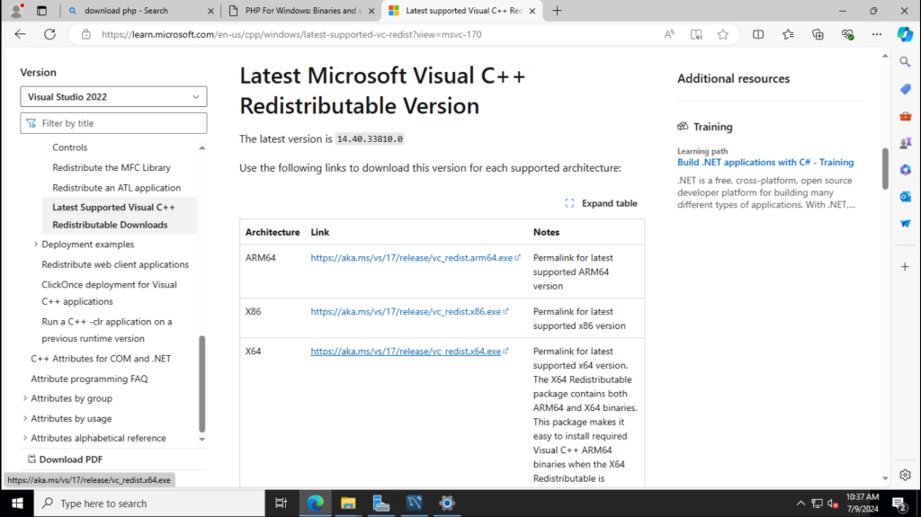
- Download the latest version of Microsoft Visual C++ from here.
visual-c++
- Applications that are built using Microsoft C and C++ tools require Visual C++.
- For WordPress, it is required by various dependencies, including PHP extensions, database servers, and web server components to function properly.
Step 3: Install PHP
- Download the latest Non-Thread Safe PHP version from here.
- Extract the downloaded ZIP file to C:\php
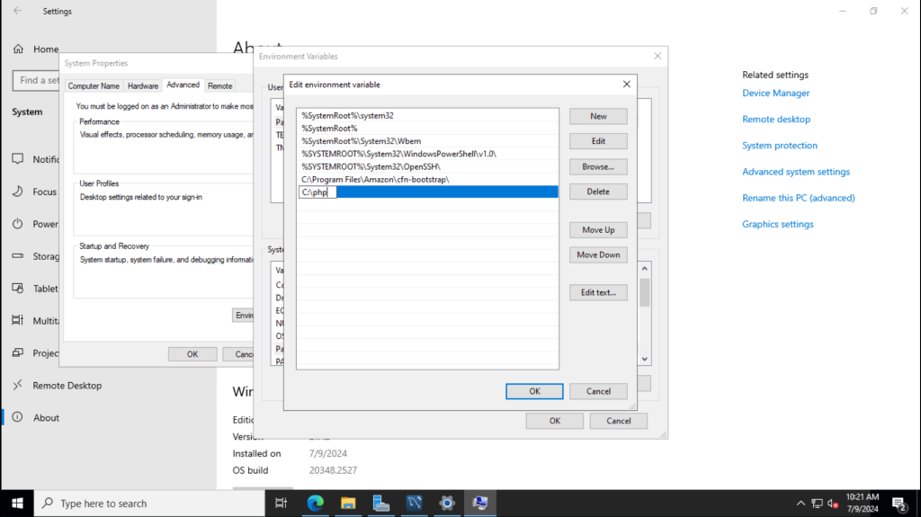
- Add C:\PHP to the system’s PATH environment variable.
- Right-click This PC > Properties > Advanced system settings.
- Click Environment Variables, then find the path variable in the system variables section and click Edit.
- Click New and add C:\php.
php
- Rename the php.ini-production file name to php.ini
Step 4: Configure PHP for WordPress
- Open C:\php\php.ini file in a text editor.
- Uncomment and change the following values:
cgi.force_redirect = 0
cgi.fix_pathinfo = 1
fastcgi.impersonate = 1
fastcgi.logging = 0
extension=mysqli
extension=pdo_mysql
Step 5: Configure IIS for PHP
A) Handler Mapping:
- Open IIS Manager.
- Select your server in the left panel.
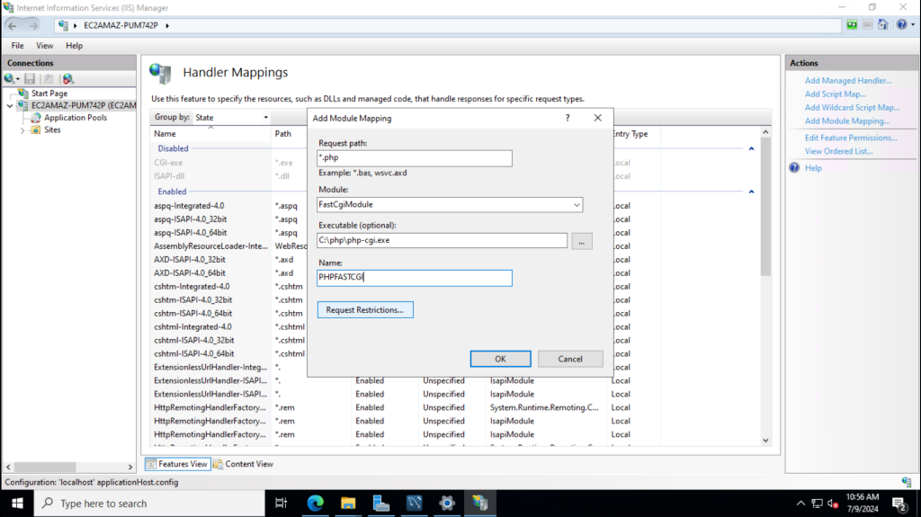
- Double-click Handler Mappings.
- Click Add Module Mapping in the Actions pane.
- Set the Request Path to *.php, Module to FastCgiModule, Executable to C:\php\php-cgi.exe, and any Name to it.
handler-mappings
B) Default Document:
- Click on the Default Documents option.
- Add default.php and index.php
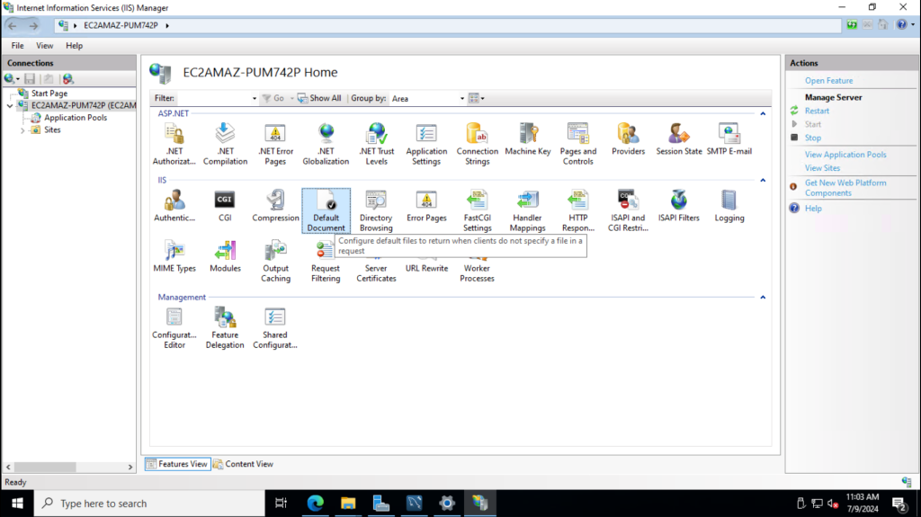
default-document
Step 6: Create and configure the IIS Application Pool
A) Creating a new Application Pool
- Right-click on the “Application Pools”
- Click on the “Add Application Pool” window.
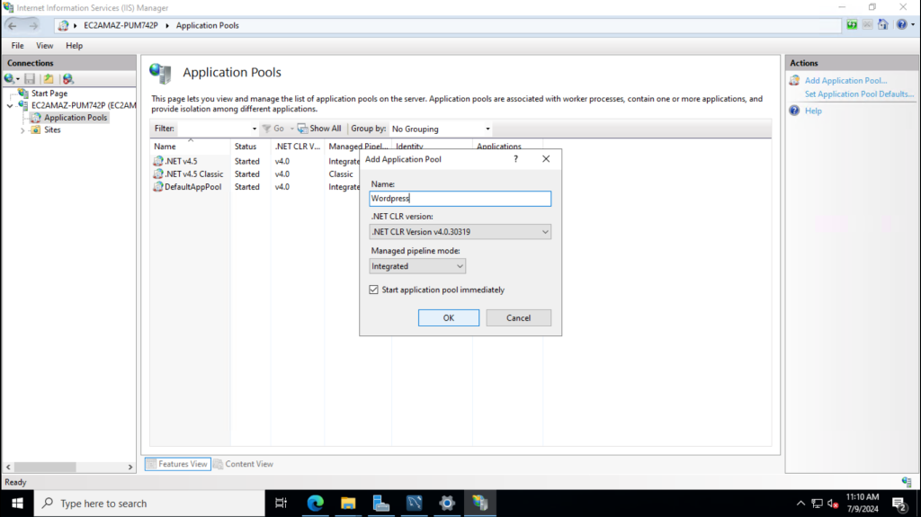
application-pool
B) Configure the Application Pool
- In the “Application Pools” list, find the newly created application pool WordPress.
- Right-click on it and select “Set Application Pool Defaults”
- Click on the ApplicationPoolIdentity > Custom Account > Set credentials > Provide the Username and Password of the Administrator.
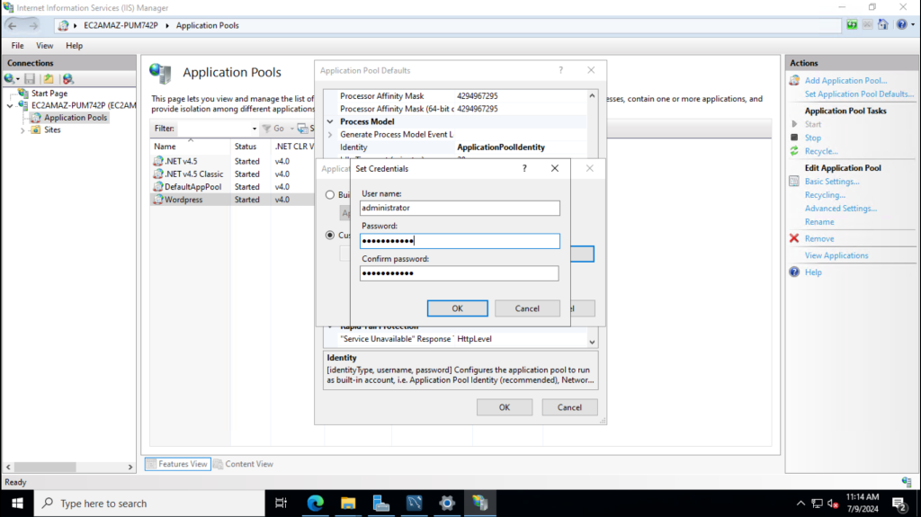
application-pool-user
C) Change Application Pool for Default Web Site
- Click on Default Web Site.
- Right-click on the Basic Setting under Edit Site at the extreme right.
- Select the Application Pool that we created earlier i.e. WordPress.
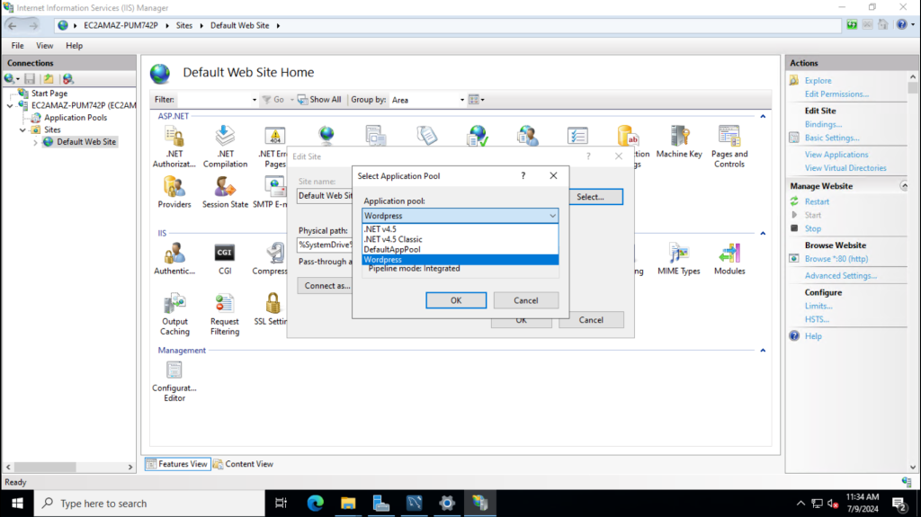
default-application-pool
Step 7: Install MySQL
- Download the MySQL Installer from here.
- Run the installer and choose the Server and Workbench option.
- Follow the prompts to complete the installation, and set a root password when prompted.
- Once installed, open the MySQL Workbench create a database for WordPress, and grant all privileges to the root user.
Note:
You can use the mysql cli commands to create the database.
You can create a new user for WordPress, however I will be using the root user only.
Step 8: Download and Configure WordPress
- Download the latest version of WordPress from here.
- Extract the ZIP file to C:\inetpub\wwwroot\wordpress.
- Rename the wp-config-sample.php to wp-config.php
- Open the wp-config.php file in a text editor and provide the database details.
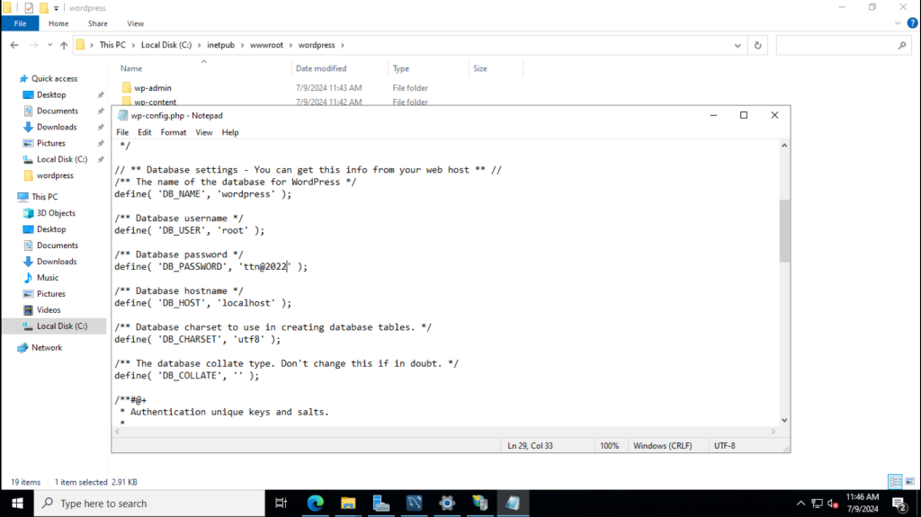
database-details
Step 9: Set Up WordPress
- Open a web browser and navigate to http://localhost/wp-config/install.php
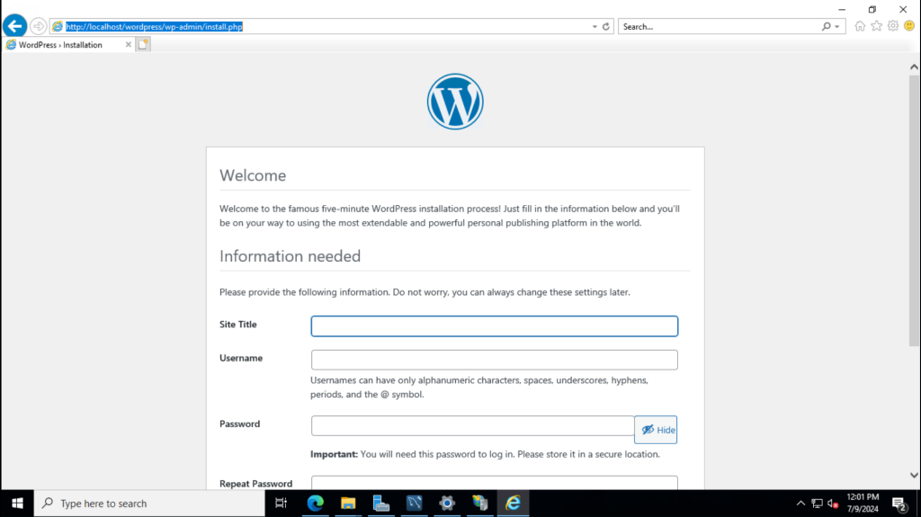
setup-wordpress
- Fill in all the details and click on Install WordPress.
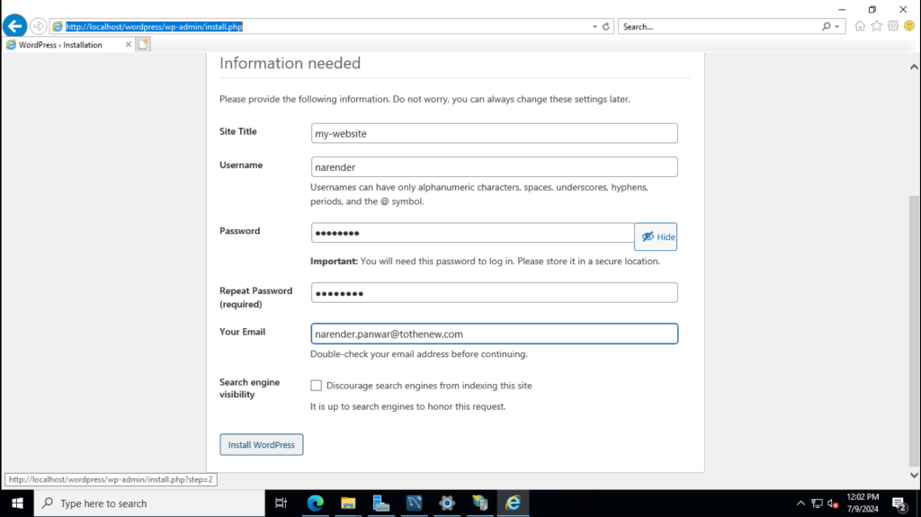
wordpress-configurations
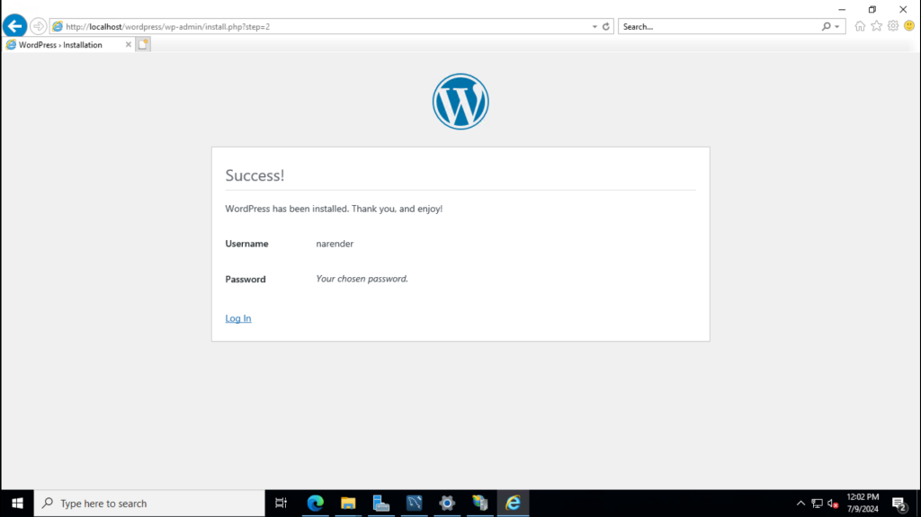
wordpress-installed
Step 10: Accessing the Website
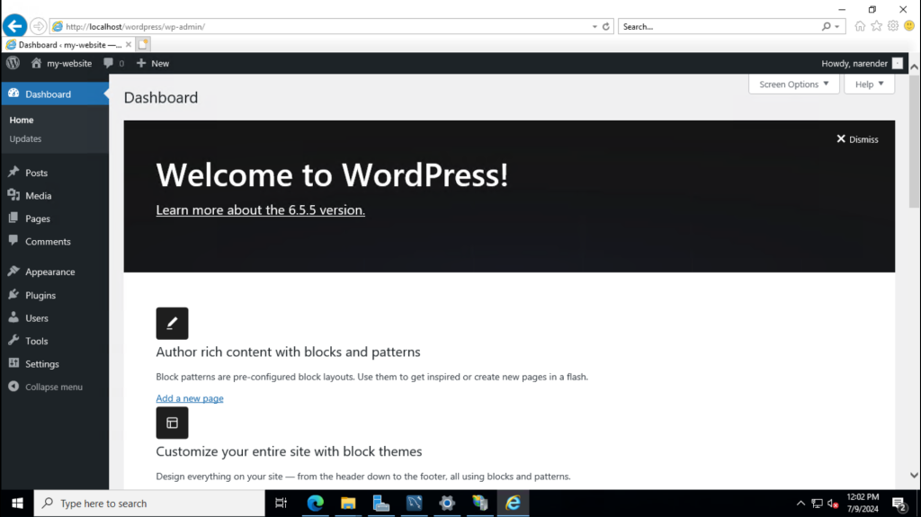
- Access the admin panel using localhost/wordpress/wp-admin
wordpress-admin
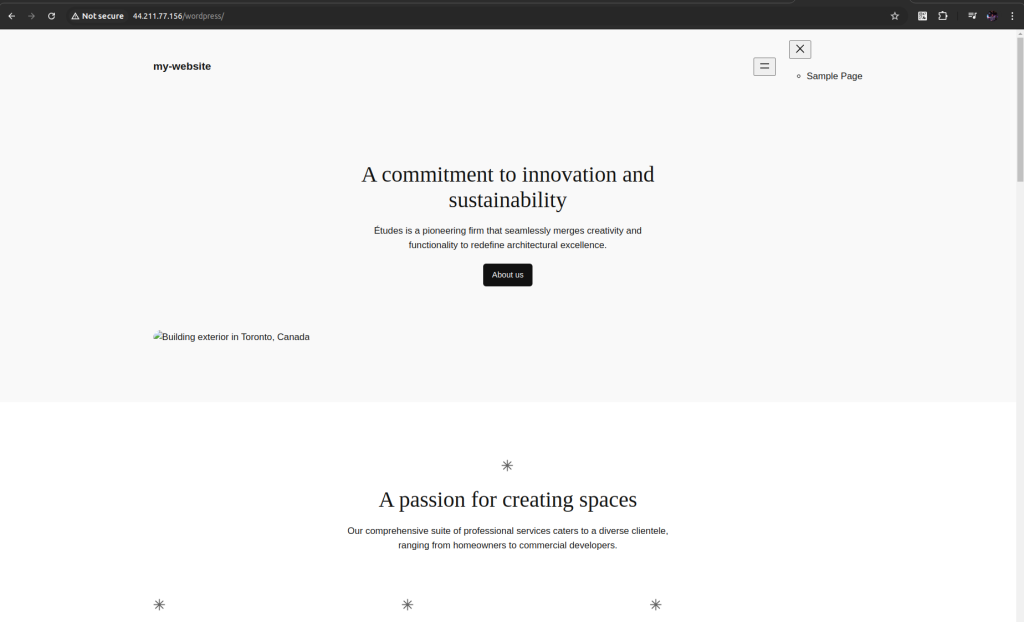
- You can access the website using <server-ip>/wordpress
accessing-wordpress
Conclusion:
Setting up WordPress on Windows Server 2022 with IIS is a strategic choice for businesses seeking to leverage Microsoft’s robust server technologies while utilizing the powerful content management capabilities of WordPress. By following the steps outlined in this guide, you can create a secure, scalable, and high-performance environment tailored to your organization’s needs.
Whether you’re hosting a small business website or a large-scale enterprise platform, this integration allows you to harness the best of both worlds—ensuring that your WordPress site is not only functional but also optimized for security, performance, and long-term scalability. With the right configuration and ongoing management, your WordPress site on Windows Server 2022 with IIS can serve as a solid foundation for your digital presence, ready to meet the demands of today’s ever-evolving online landscape.


