
Accelerate Your Development with Buildkite Pipelines
Introduction
In today’s fast-paced digital landscape, efficient and reliable software delivery is paramount for businesses to stay competitive. Buildkite, a powerful cloud-native CI/CD platform, offers a robust solution to streamline the development process.
Buildkite is a modern cloud-native CI/CD platform that empowers development teams to build, test, and deploy software efficiently. At its core, a Buildkite pipeline is a series of interconnected jobs that execute in a specific order to automate the software development lifecycle. This blog post will delve into the fundamentals of Buildkite pipelines, exploring their components, configuration, and best practices.
It uses a hybrid architecture to separate:
-
The control panel
-
The build environment
Buildkite runs the control panel as a SaaS product, and we run the build environment on our infrastructure.
In other words, Buildkite handles the orchestration, and we can have our own compute unit.
As a result, we have a secure build environment to suit our particular use case and workflow.
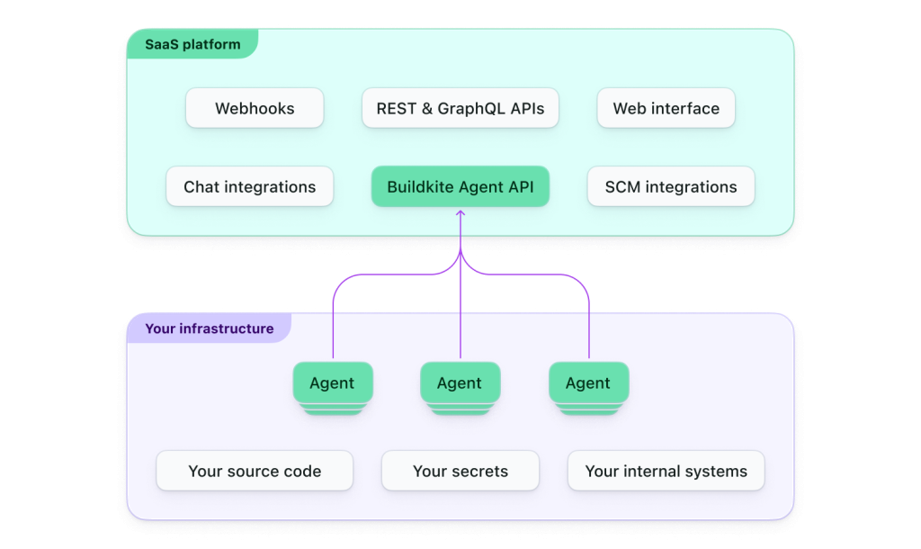
Buildkite Architecture
The hybrid architecture reduces the maintenance burden compared to self-hosted solutions and gives us the security and control missing from fully SaaS build tools.
Objective
This article will provide a step-by-step guide for setting up a buildkite agent on EC2 and help you understand the buildkite pipeline basics.
Prerequisites
- Amazon Linux 2023 EC2 instance
- Buildkite Account
- Github / Gitlab Account.
Agent Installation
Agents in buildkite is a program that is responsible for the execution of the pipeline. It’s a small, reliable, and cross-platform build runner that links our infrastructure to Buildkite. It checks in Buildkite for work, executes jobs, and also reports results. Agents can be installed on the local machine, any cloud servers, or any other remote machines. At least one agent will be required to run builds.

os-release
Step 1: First, Add the yum repository for our architecture (we executed uname -m to find our system’s arch).
system architecture
The default version of the agent is stable. Still, you can get the beta version by using unstable instead of stable in the following command, or the agent built from the repository’s main branch by using experimental instead of stable.
sudo sh -c 'echo -e "[buildkite-agent]\nname = Buildkite Pty Ltd\nbaseurl = https://yum.buildkite.com/buildkite-agent/stable/x86_64/\nenabled=1\ngpgcheck=0\npriority=1" > /etc/yum.repos.d/buildkite-agent.repo'
Step 2: Install agent
sudo yum -y install buildkite-agent

Agent installed
Configure Agent token :
sudo sed -i "s/xxx/YourActualAgentToken/g" /etc/buildkite-agent/buildkite-agent.cfg
or, open the config file with a text editor and input your actual token here, token="xxx"
sudo vim /etc/buildkite-agent/buildkite-agent.cfg
Agent Token
Step 3: Start the buildkite agent and check its service status:
sudo systemctl enable buildkite-agent && sudo systemctl start buildkite-agent && sudo systemctl status buildkite-agent

Agent Status
The buildkite service log can be viewed using the below command:
sudo journalctl -u buildkite-agent

Service Log
Step 4: SSH Setup in Agent Instance
sh-4.2$ sudo su buildkite-agent
bash-4.2$ mkdir -p ~/.ssh && cd ~/.ssh
bash-4.2$ ssh-keygen -t rsa -b 4096 -C "ec2-agent@buildkite"

SSH Setup
Note: In the GitLab User Settings - SSH Keys , Add your public key, key title, and expiration date.

Add public key
Execute the below command to check if the SSH Setup was successful.
ssh -T git@gitlab.comLogin Status check
Note: Exit from the buildkite-agent user after setting up SSH.
Step 5: Docker support for the Buildkite agent
sudo yum install docker
sudo systemctl enable docker.service
sudo systemctl start docker.service
sudo systemctl status docker.service

docker status
Step 6: Docker-compose support for Buildkite agent
# docker-compose (latest version)
sudo curl -L https://github.com/docker/compose/releases/latest/download/docker-compose-$(uname -s)-$(uname -m) -o /usr/local/bin/docker-compose
# Fix permissions after download
sudo chmod +x /usr/local/bin/docker-compose
# Verify success
docker-compose version
docker-compose version
Step 7: Allow buildkite-agent user to run the docker
sudo usermod -a -G docker buildkite-agent

Verify services
A few file locations are listed for quick access :
- Configuration: /etc/buildkite-agent/buildkite-agent.cfg
- Agent Hooks: /etc/buildkite-agent/hooks/
- Builds: /var/buildkite-agent/builds/
- Agent user home: /var/lib/buildkite-agent/
- SSH keys: /var/lib/buildkite-agent/.ssh/
- Logs, depending on your system:
- journalctl -f -u buildkite-agent (systems)
- /var/log/buildkite-agent.log (older systems)
Running multiple agents :
You can run as many parallel agent workers on one machine as you wish with the spawn variable in a configuration file, or by passing the --spawn flag in the buidkite-agent start command.
# Start 3 workers. Each one independently fetches and executes jobs.
spawn=3
Creating a new queue for the buidkite agent :
Open the config file with the below command,
sudo vim /etc/buildkite-agent/buildkite-agent.cfgAdd the below variable in the config file:
tags="queue=aws-ec2-agent"
Agent Queue
Note: To apply any changes done in buildkite-agent.cfg , you must execute the below command:
sudo systemctl reload-or-restart buildkite-agentIf all steps are done correctly, you will see your agent in the buildkite dashboard.

Agent Queues
Pipeline Demonstration
Pipelines are how Buildkite represents a CI/CD workflow. You define each pipeline with a series of steps to run. When you trigger a pipeline, you create a build, and steps are dispatched as jobs to run on agents. Jobs are independent of each other and can run on different agents.
Step 1: Let’s create a new pipeline in Buildkite.
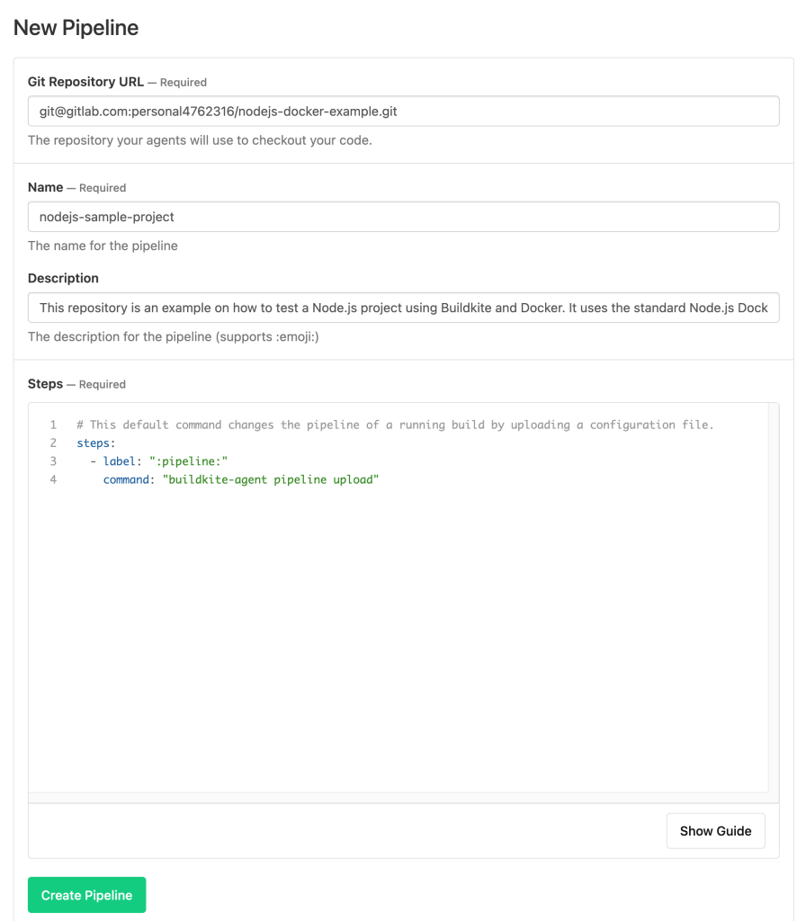
New Buildkite Pipeline
You will need to provide your Git repository URL, Pipeline Name, Description and we will leave the Steps section as default.
Step 2: GitLab Webhook Integration
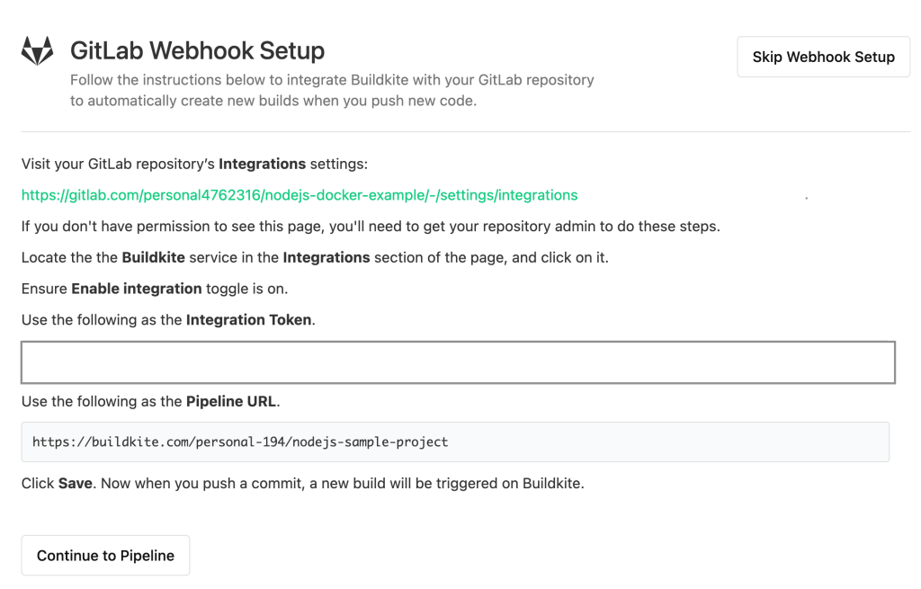
Gitlab Webhook Integration
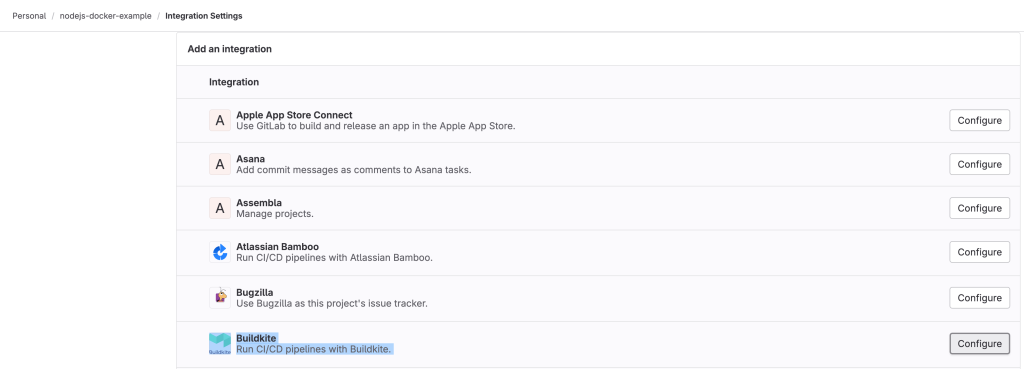
Gitlab Webhook Integration
We can verify the webhook integration test, check the below sample for reference.
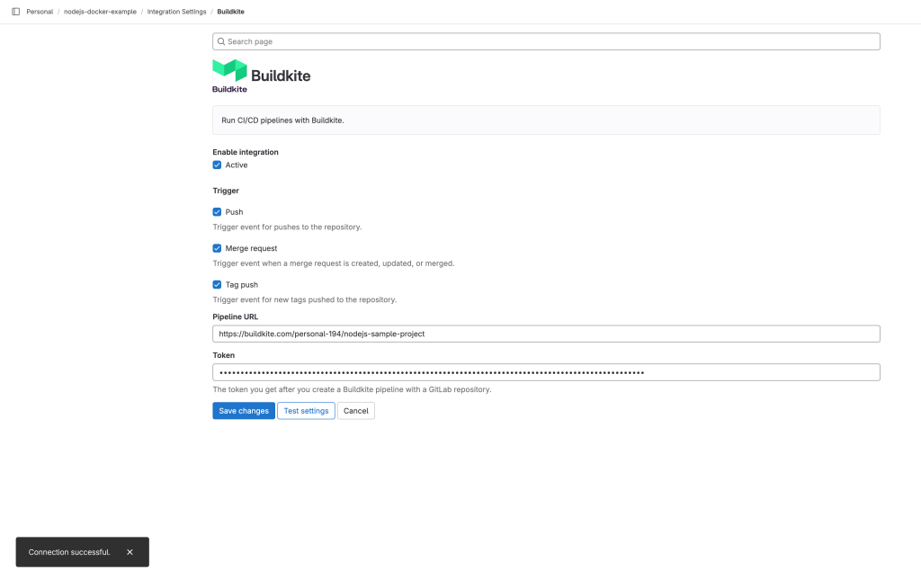
Webhook Integration Test
This integration triggers new builds whenever new code is pushed. Check the sample below,
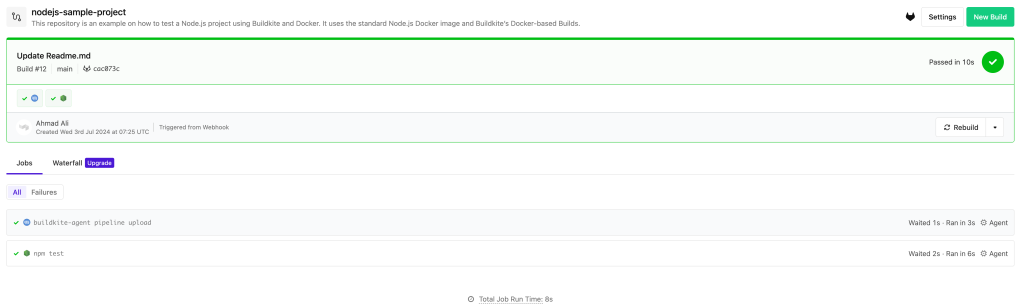
Pipeline Trigger
Conclusion
There it is, we have successfully installed the buildkite agent on the EC2 Machine and also demonstrated setting up the sample pipeline. In Part 2 of this blog series, we will dig deeper into buidlkite pipeline & we will setup nodejs application build with the Snyk Vulnerability scan.


