AWS CodeGuru
Introduction
AWS CodeGuru utilizes Machine Learning and Automated Reasoning to identify security and quality issues in your application code, offering guidance on addressing and resolving them.
It provides a comprehensive offering of functionalities like:
● Code Review with Amazon CodeGuru Reviewer: This tool Profiler visualizes your application performance, showing you the methods that take the most time and CPU capacity to execute. This helps you diagnose and isolate the root causes of application issues during operational events much faster.
● Performance Profiling with Amazon CodeGuru Profiler: This tool Profiler visualizes your application performance, showing you the methods that take the most time and CPU capacity to execute. This helps you diagnose and isolate the root causes of application issues during operational events much faster.
● Code Testing with CodeGuru Security: This feature functions as a static application security testing (SAST) tool, leveraging the power of Machine Learning and Automated Reasoning. It detects vulnerabilities in your code, offers recommendations for addressing them, and monitors the status of these vulnerabilities until they are resolved.
Scenario
In this article, we will be implementing how we can use CodeGuru to perform the following:
- Code review
- Performance Profiling
- Code Testing
Implementation
CloudGuru Security
It detects vulnerabilities in your code, offers recommendations for addressing them, and monitors the status of these vulnerabilities until they are resolved. Follow the below steps to perform the scan:
1. Integrate GitHub or any Version Control System.
To do so, go to the integration section.
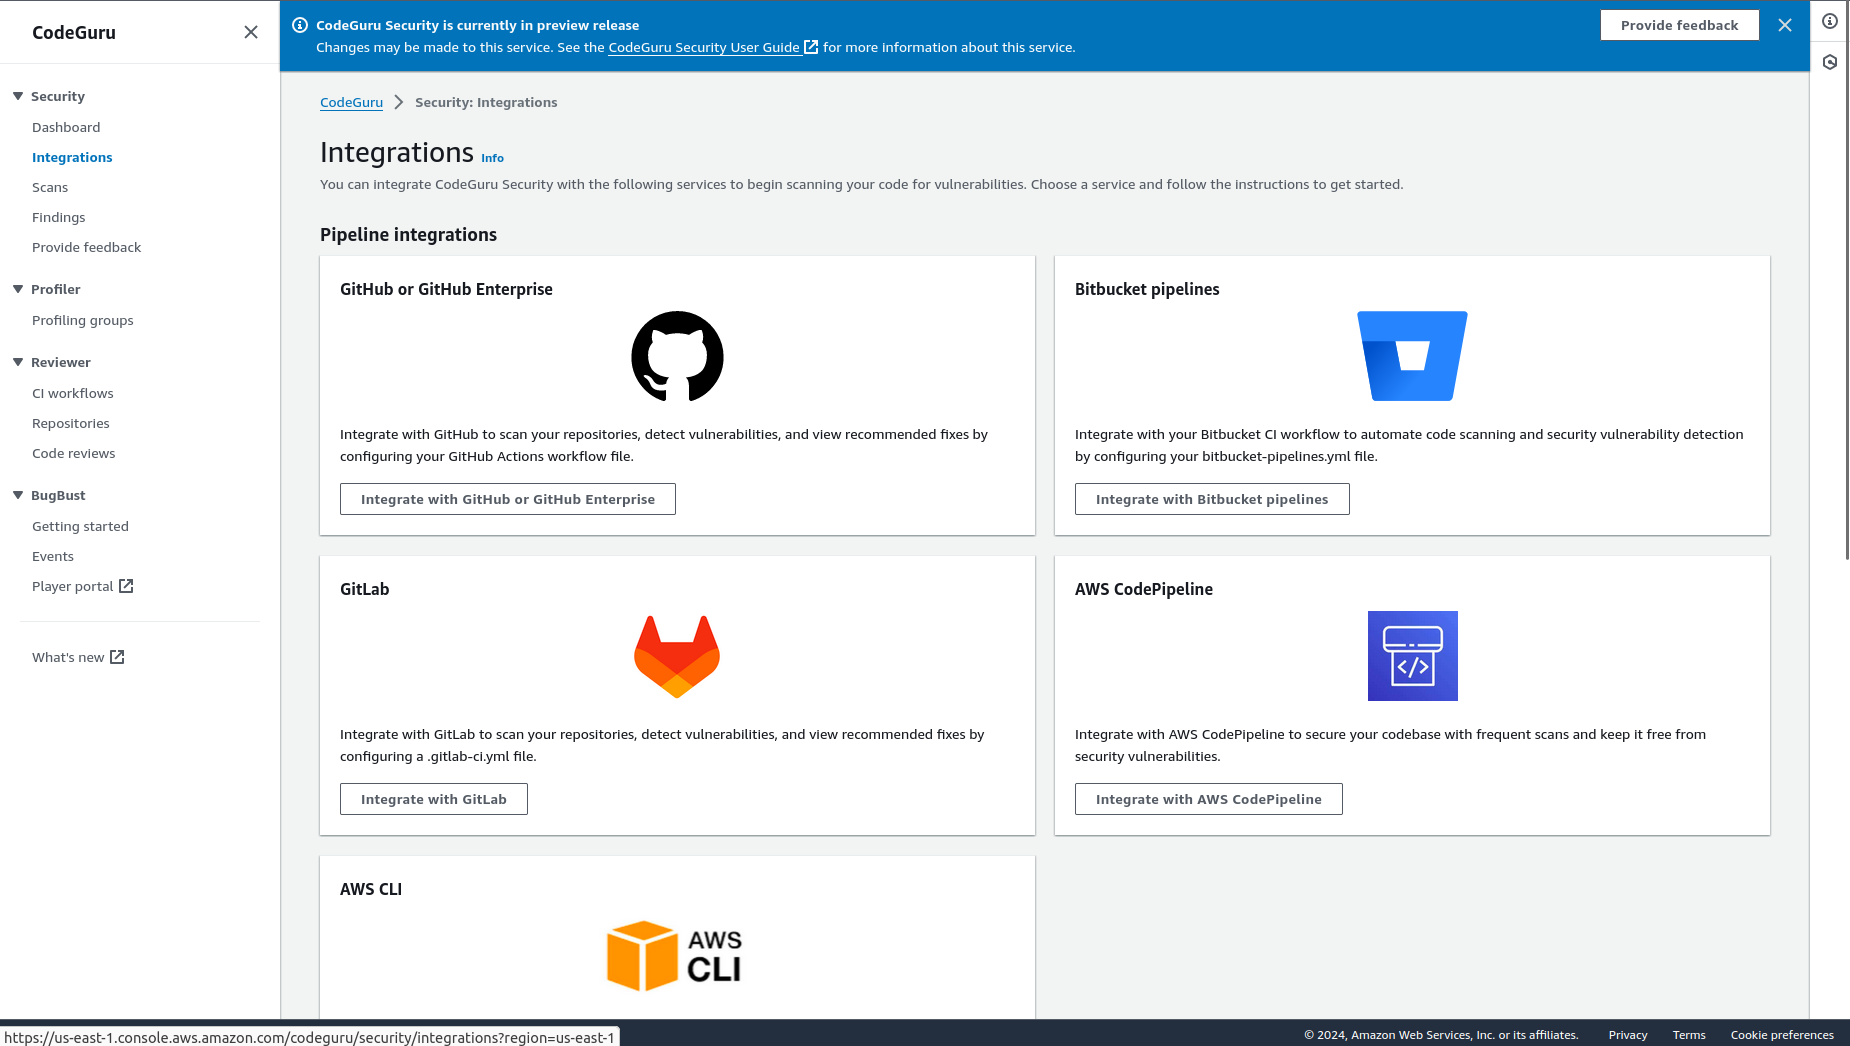
As you see, the above image has an option for GitHub. Click on integrate with GitHub, and you will see the option to integrate GitHub. Fill in the details by following the given steps.
Step 1
● Create an IAM role: It creates a CloudFormation stack that automatically sets up an IAM role with the required permissions for your workflow to run security scans. After creating the stack, come back to this page to continue setting up your pipeline integration, or we can create it manually.
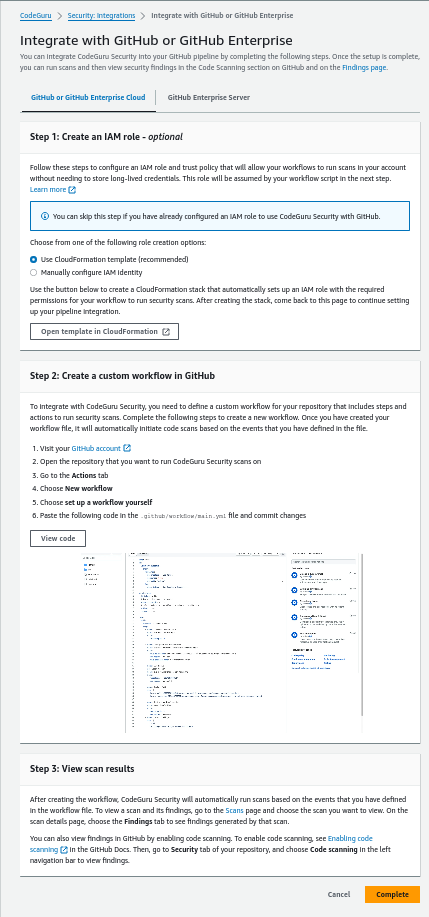
Step 2
● Create a Custom workflow in GitLab: You’ll need to craft a custom workflow for your repository. Think of it as your personalized roadmap with steps and actions to make those security scans happen. Once your workflow file is in place, CodeGuru will automatically roll out code scans whenever the events outlined in the file come into play. It’s like having your own security guardian for your code. The process to create workflow is given in the integration process.
Step 3
● View scan results: After creating the workflow, CodeGuru Security will automatically run scans based on the events that you have defined in the workflow file. To view a scan and its findings, go to the Scans page and choose the scan you want to view. On the scan details page, choose the Findings tab to see the findings generated by that scan.
● Then click on complete.
2. How to Setup Scans
● First, click on the Scan option.
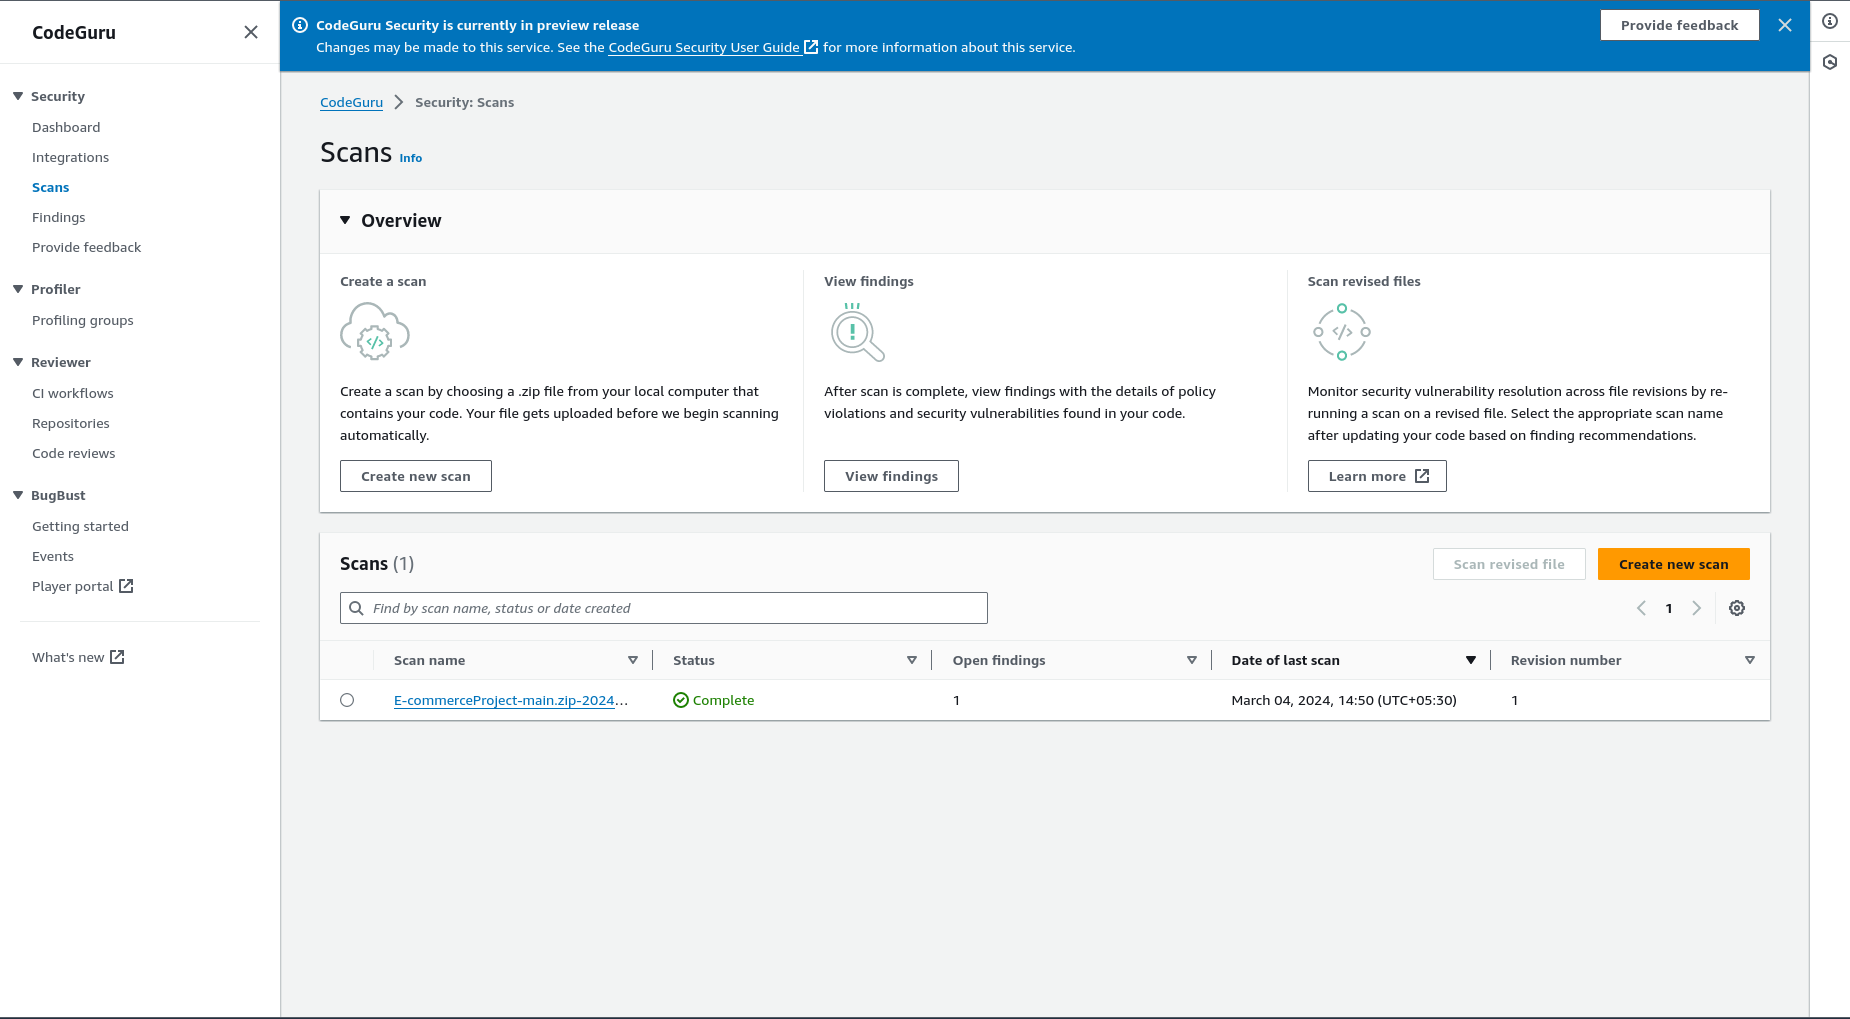
● Then click on Create new scan.
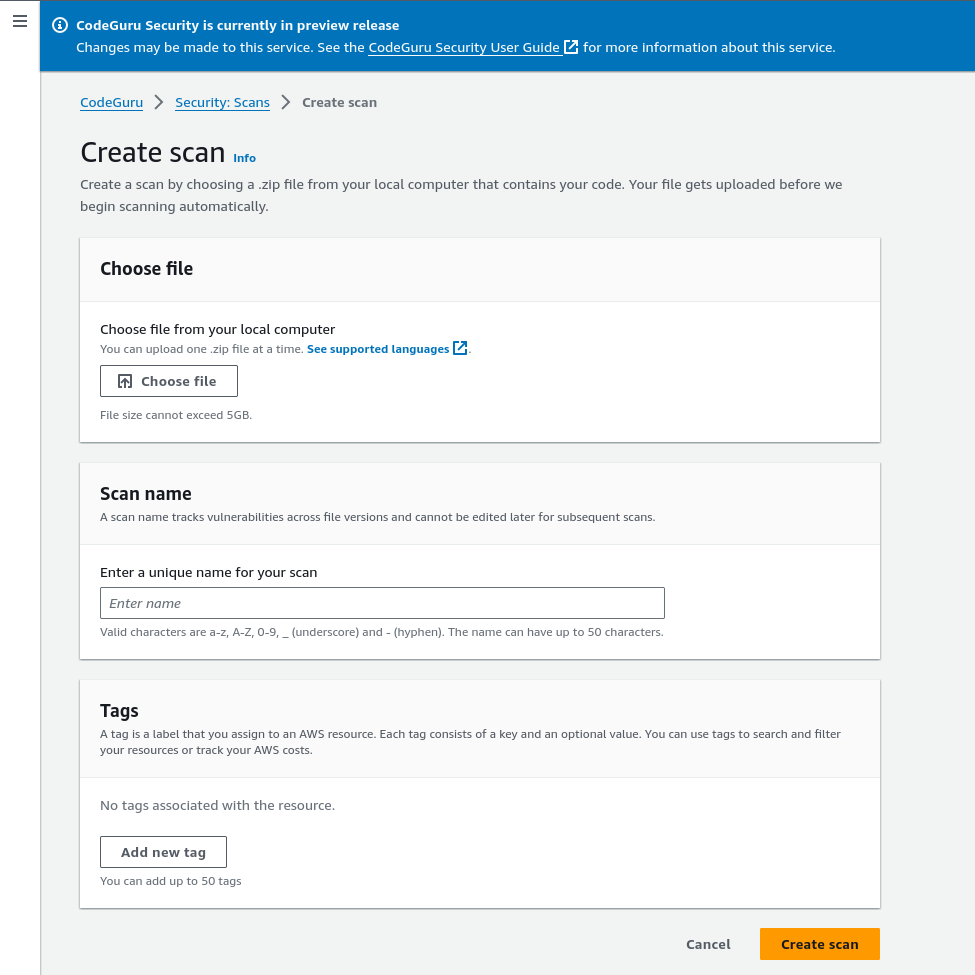
● Upload the zip file of your code.
● Enter the scan name.
● Then click on Create Scan.
● After some time, you will see your scan has been created.

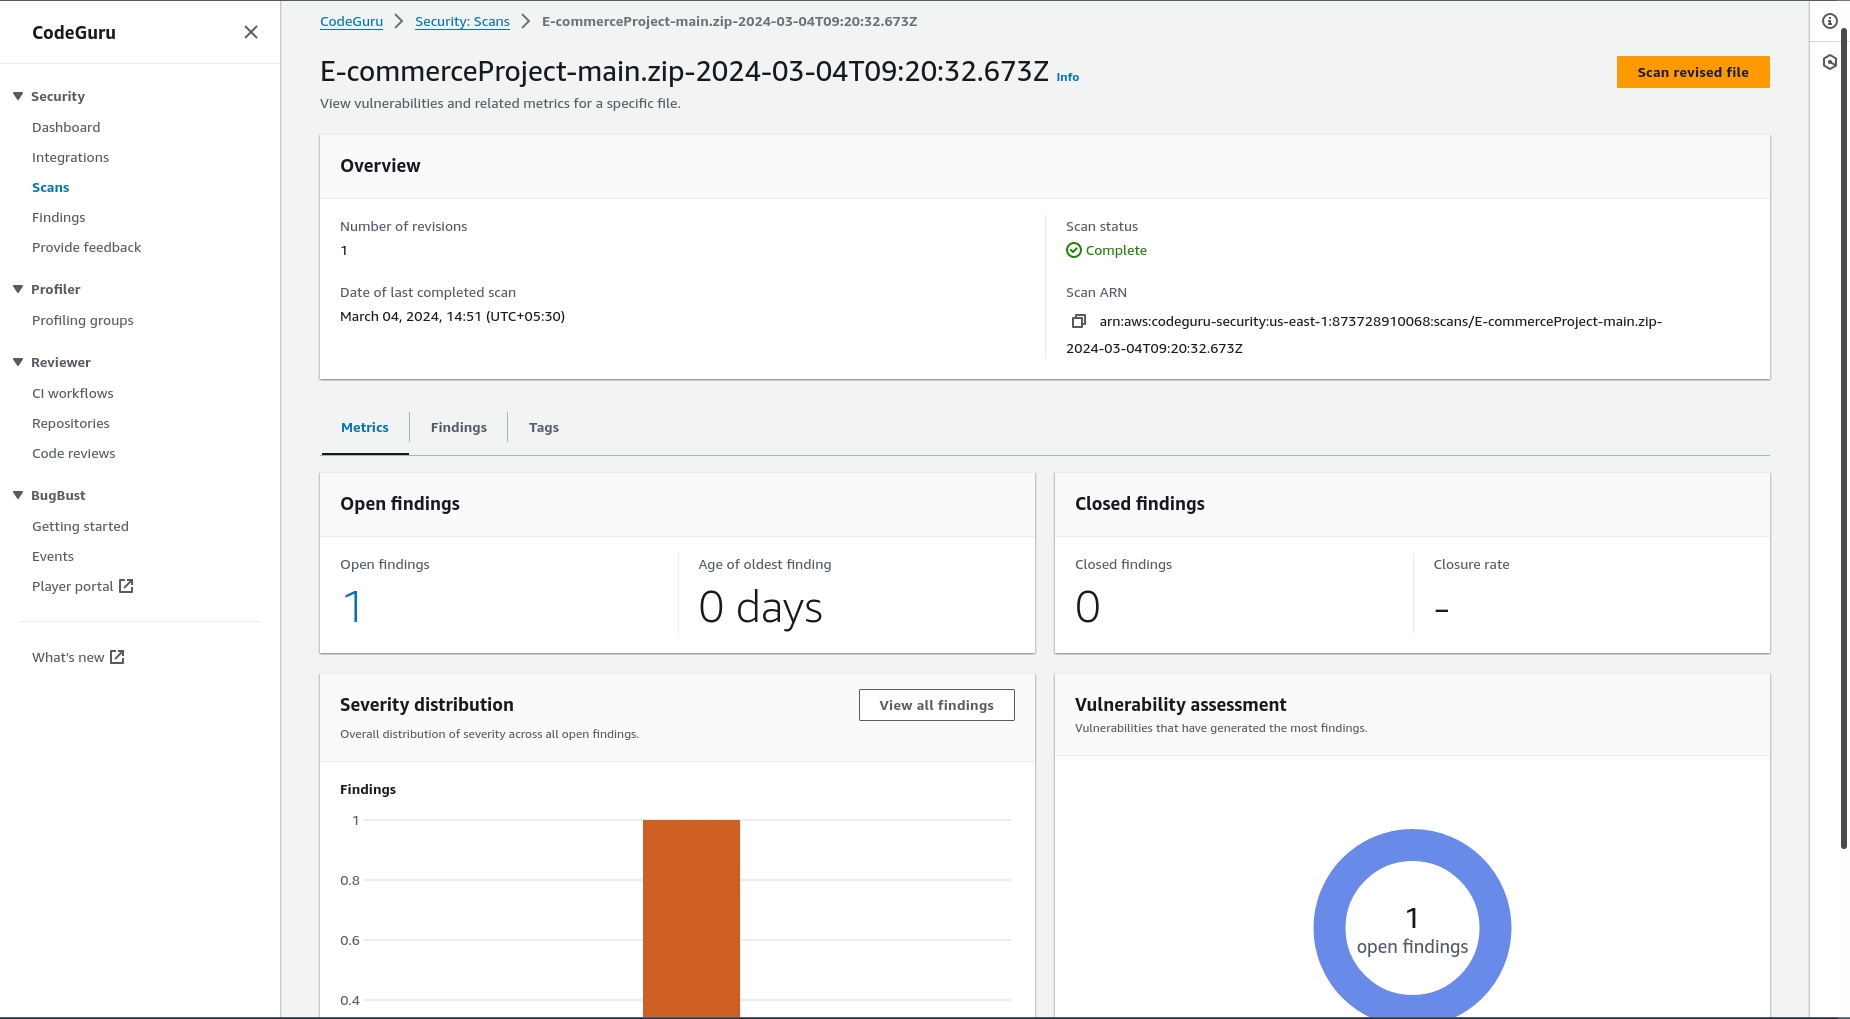
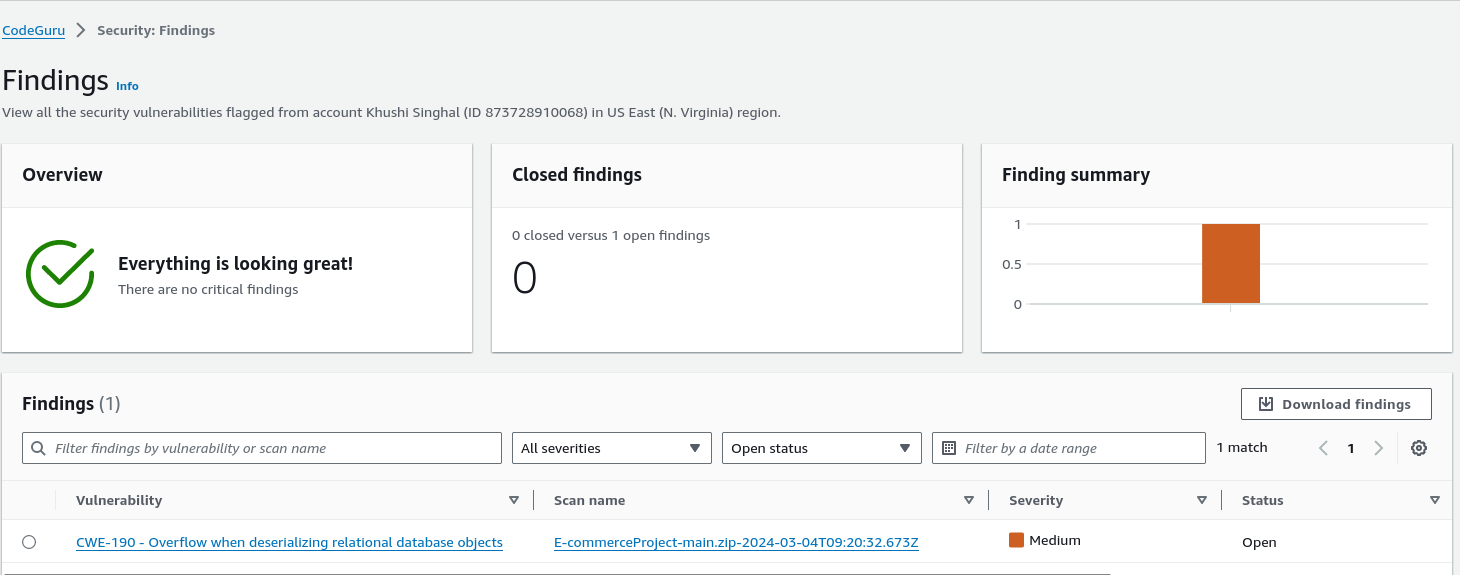
Now click on that scan, and you will see the overview and findings of your uploaded code. As you see in below screenshot in my code, I got one finding Overflow when deserializing relational database objects in Java code, which says, “Deserializing objects from relational databases should allocate a 64-bit, not 32-bit, type for the auto-incremented identifier” and if click on your finding, it gives you full details of the vulnerability and also it’s recommendations.
CloudGuru Reviewer
We will find issues in the Java and Python code and see recommendations on how to remediate them using CloudGuru Reviewer by following the below steps:
1. Click on repositories.

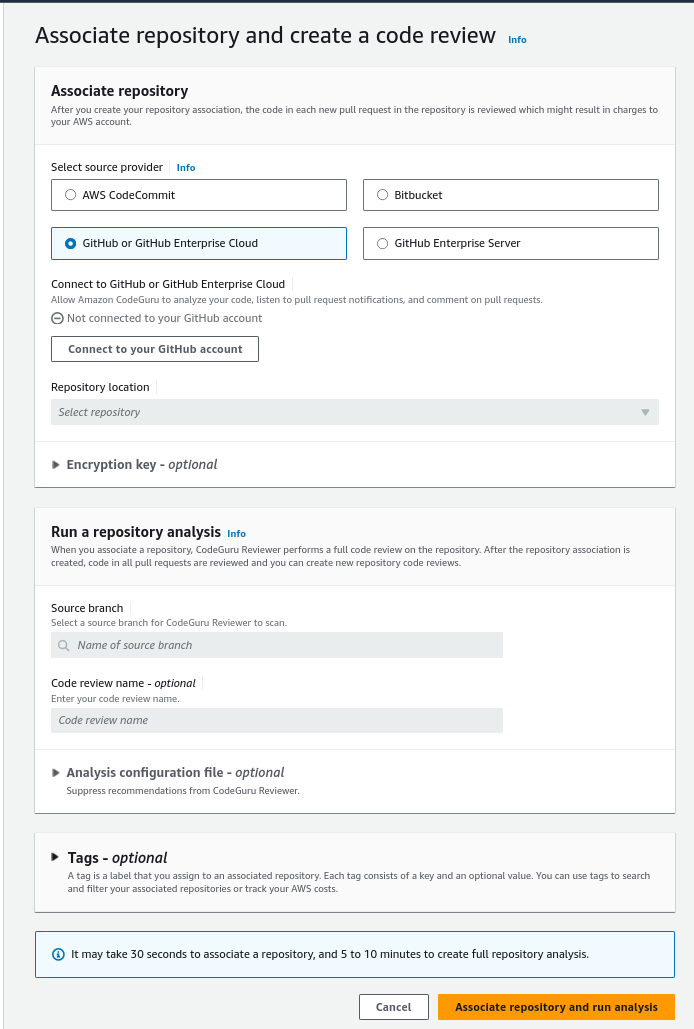
2. Then click on the Associate repository and run analysis.
3. Click on Connect to your Github account, it automatically connects with your account as you have already integrated your Github account in previous steps.
4. Then select the repository.
5. Enter the name of your branch where your code is pushed.
6. Lastly click on Associate repository and run analysis
Now go to the Code Review option.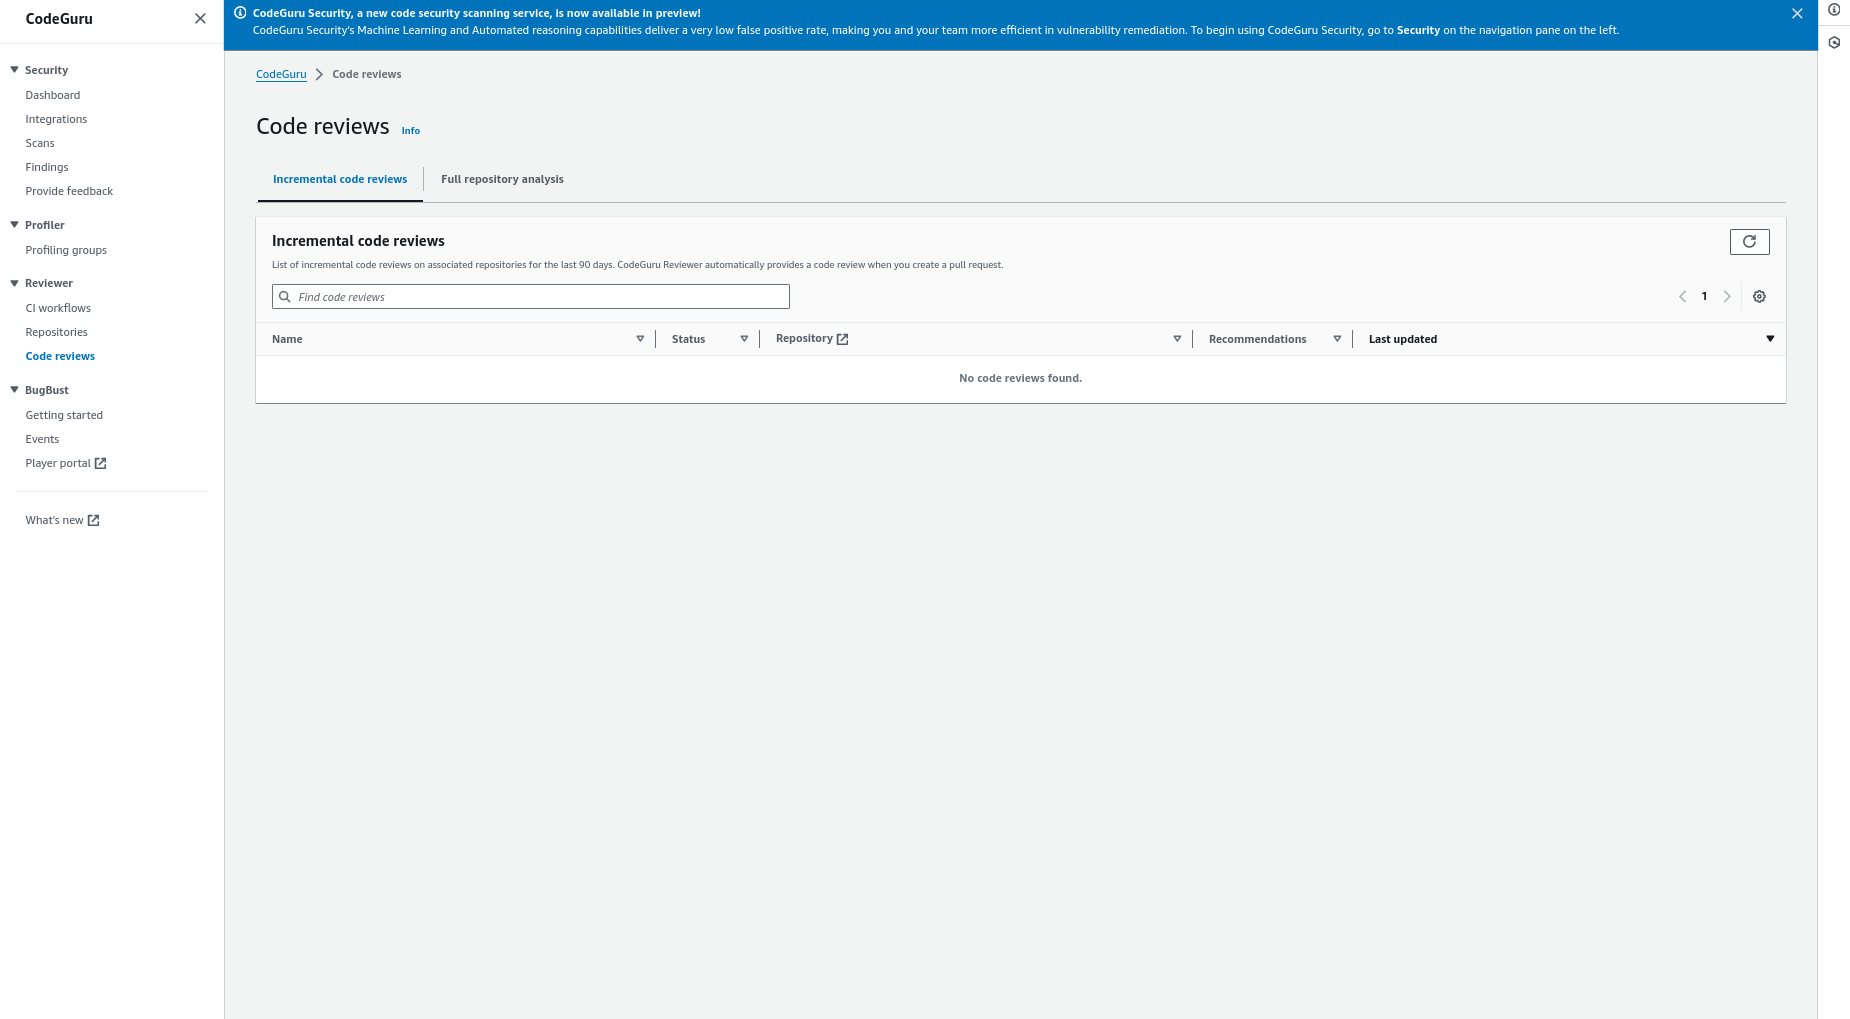
7. Then Click on the Full repository analysis.
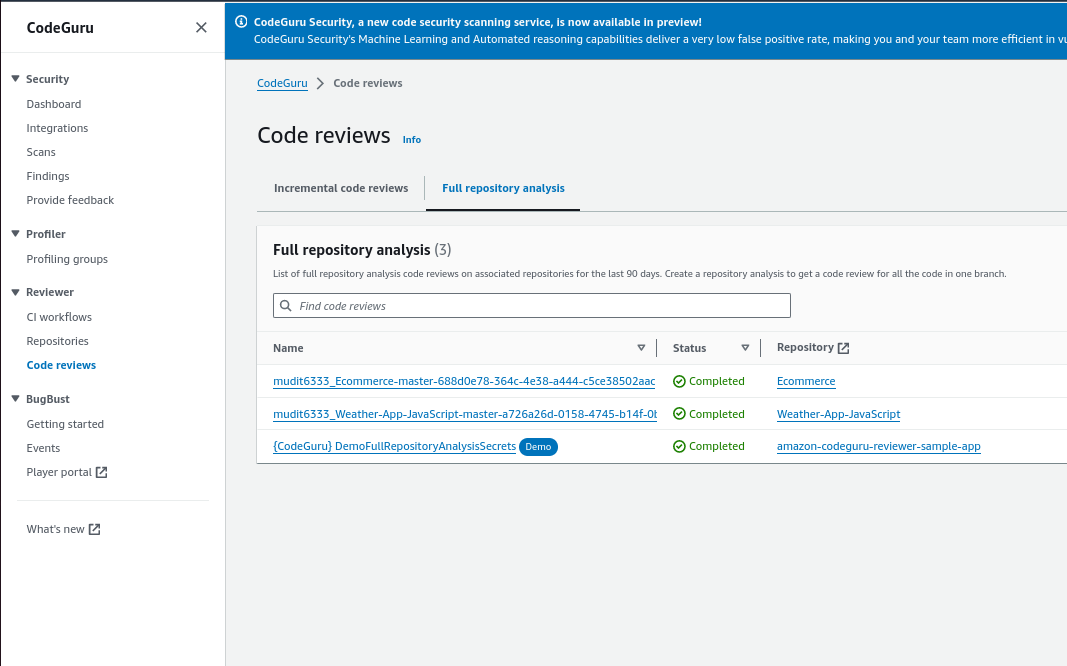
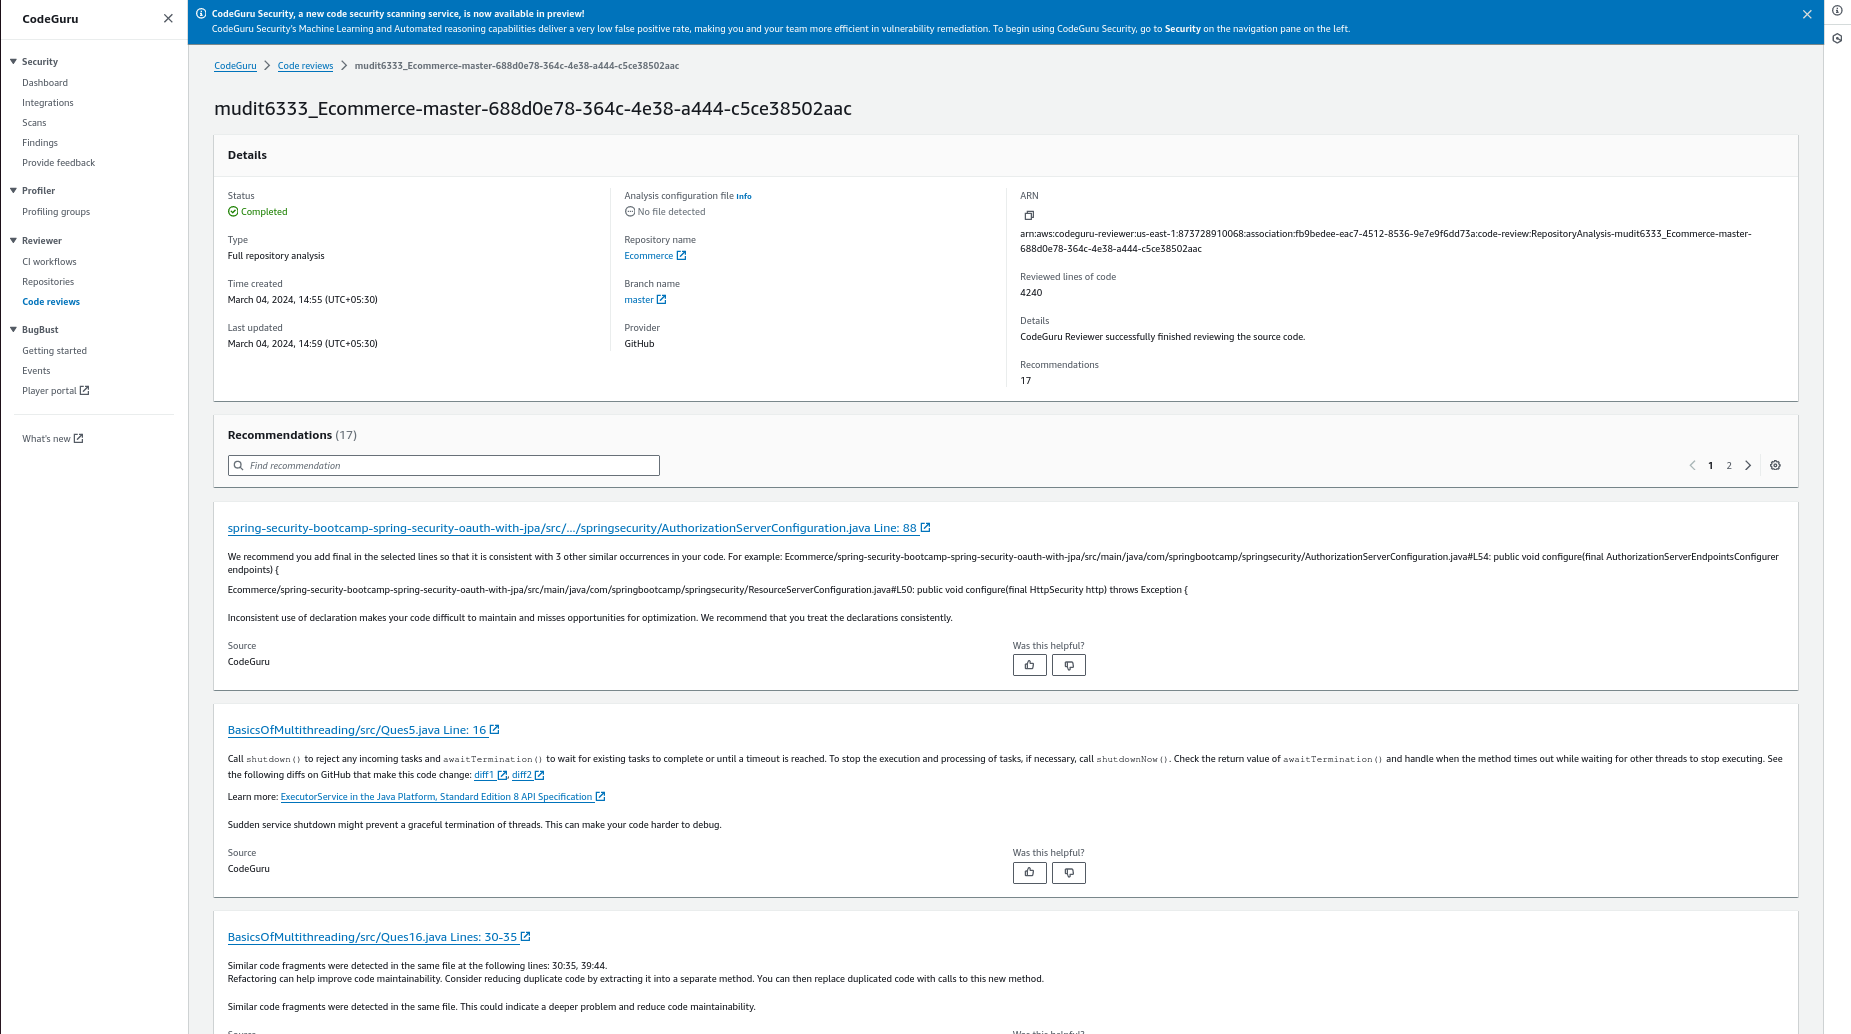
8. Click on Name of repository, you will see reviews of your code as you can see in below screenshot it gives a review at a particular code of line which recommends that you add final in the selected lines so that it is consistent with 3 other similar occurrences in your code. So that’s how you will get recommendations of each particular line in your code where it sees there is a scope of improvement.
CloudGuru Profiles
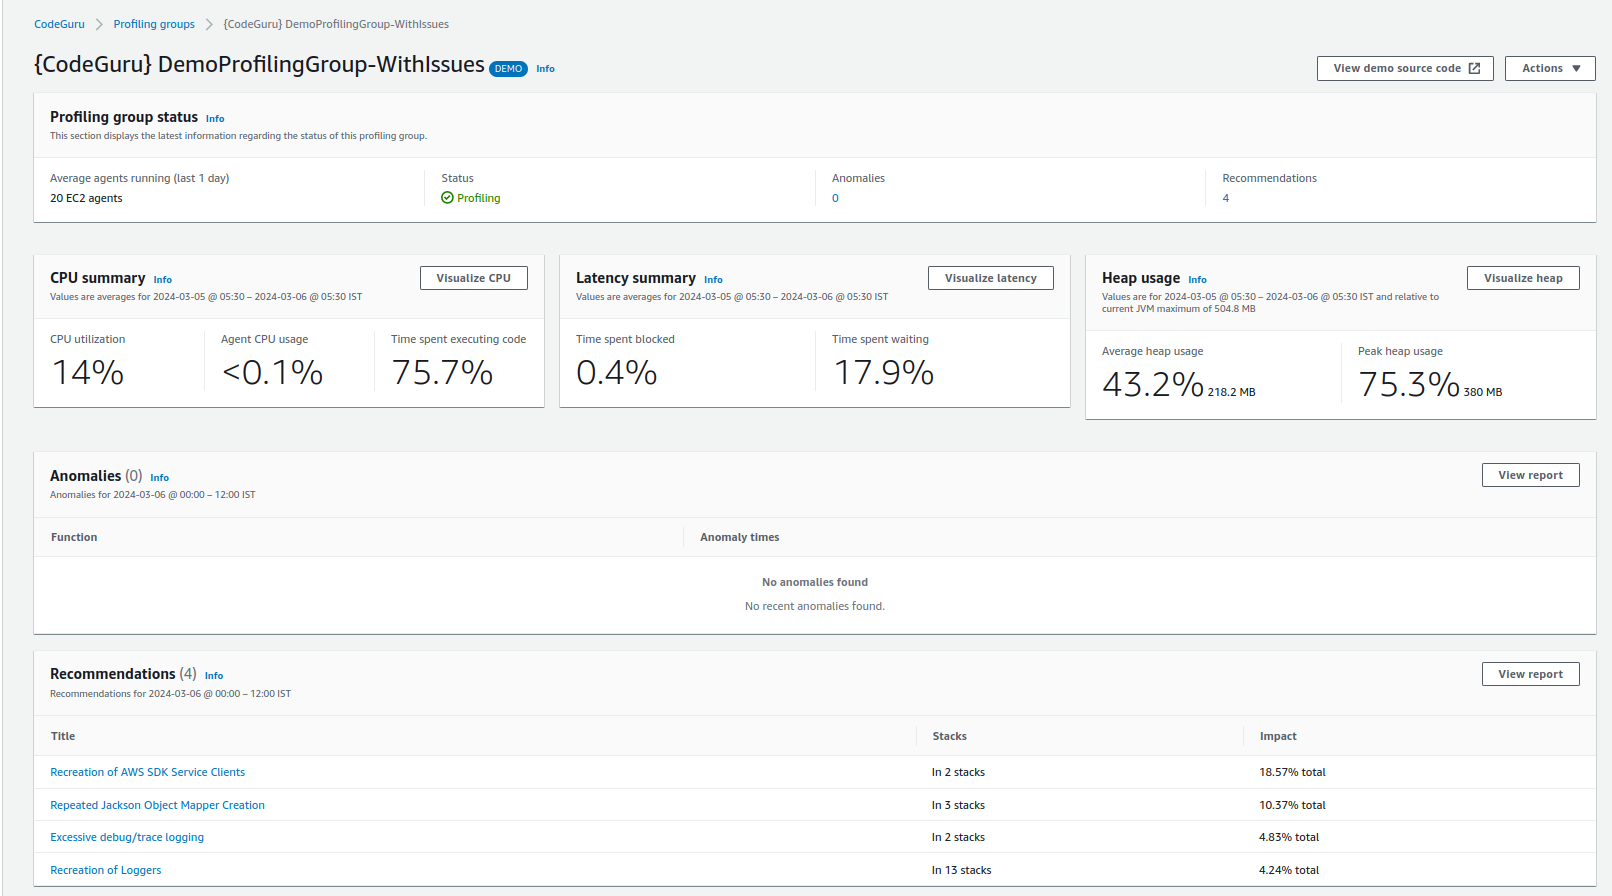
Here we will visualize the application performance, by checking the methods that take the most time and CPU capacity to execute by following below steps:
Process to create profile groups.
1. Click on Profile Groups
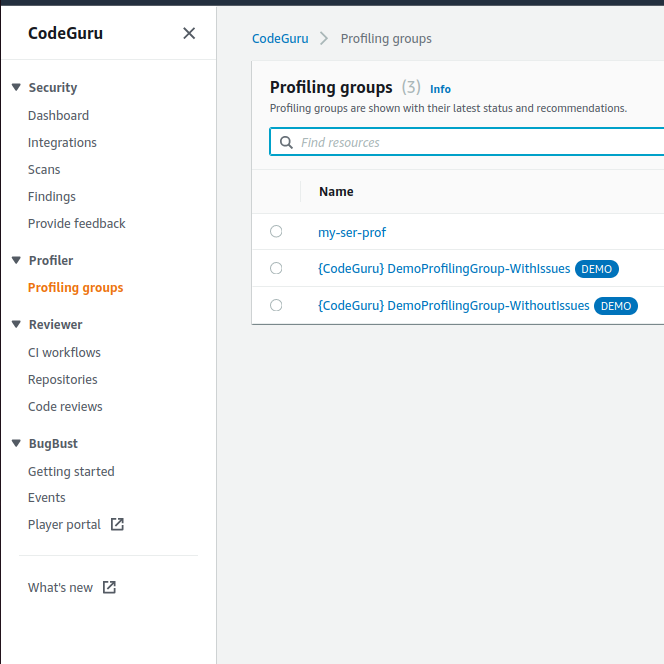
2. Then click on create profiling groups.
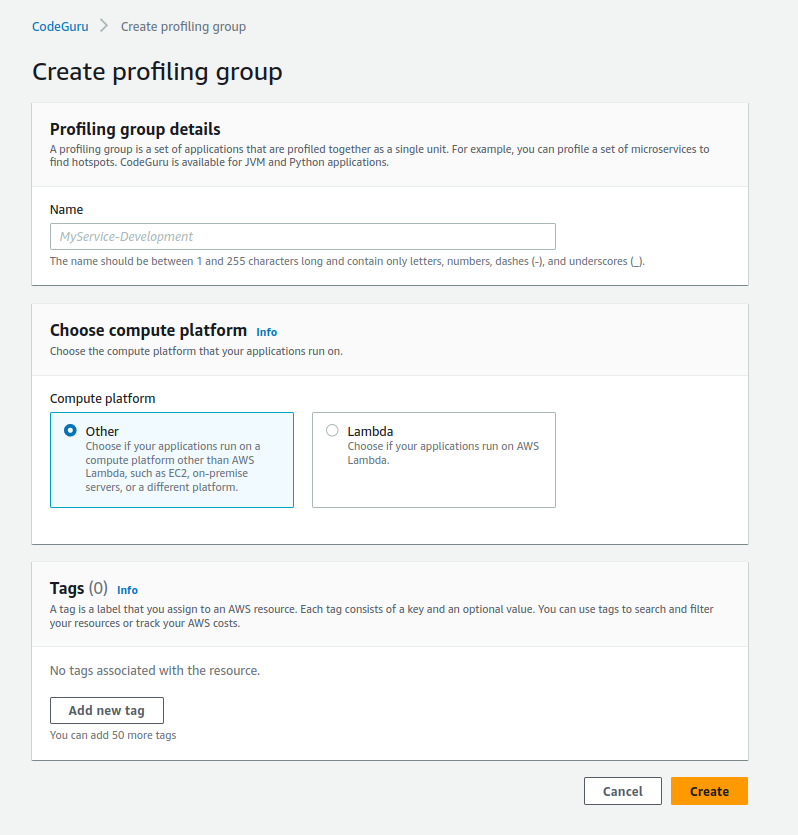
3. Enter Profile name and select the option where your application is running as you see in above screenshot.
4. Then click on create, you will see your profile has been created.
5. Now click on your created profile
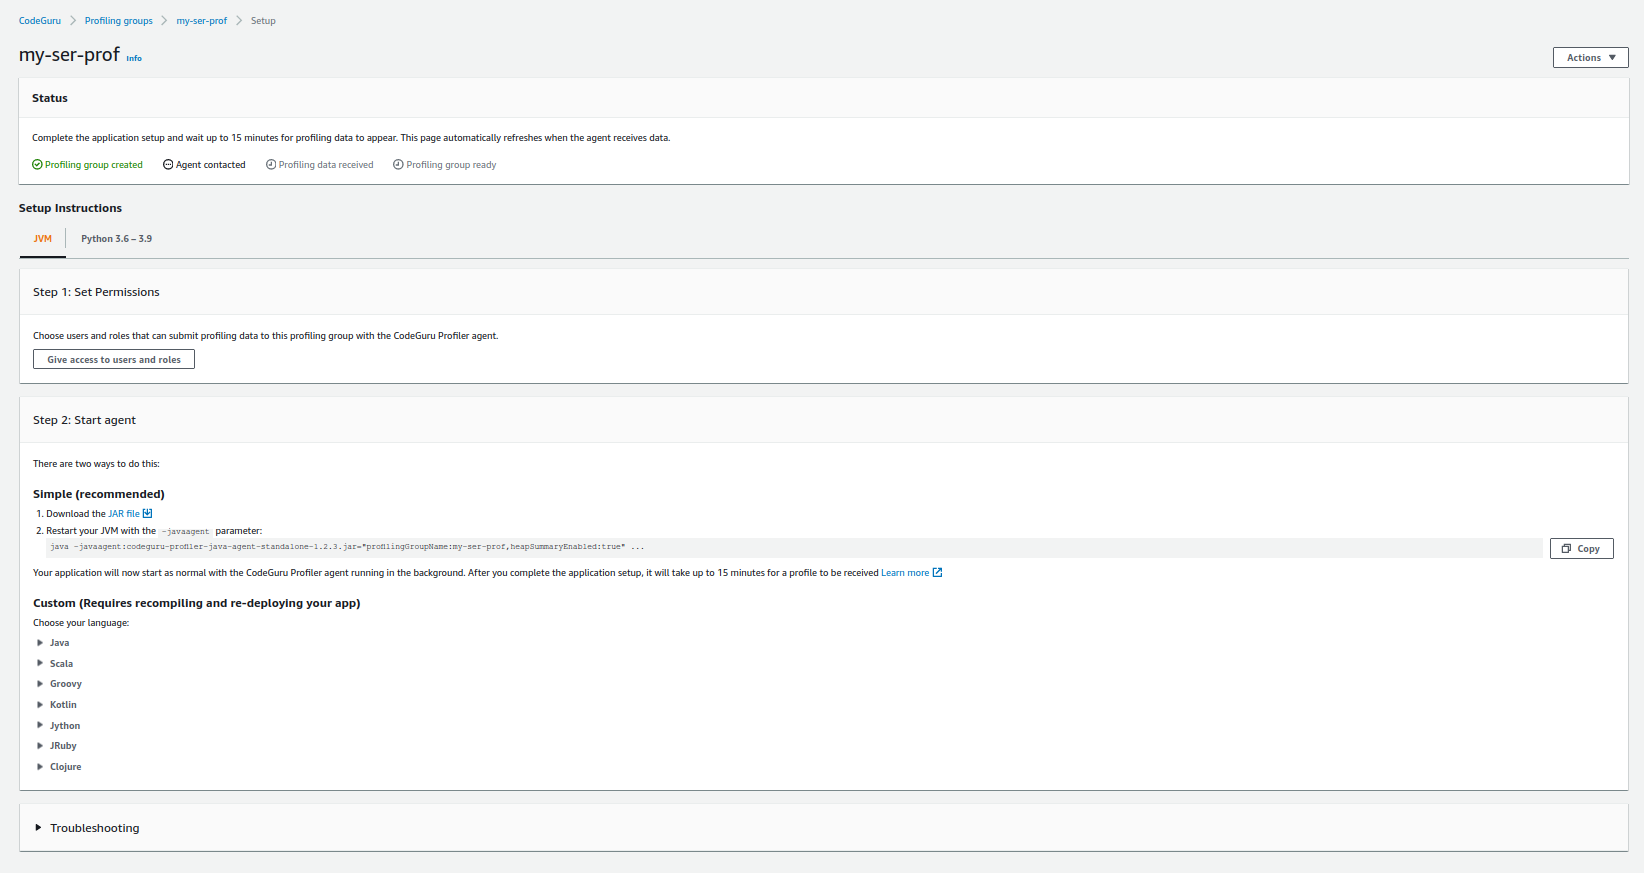
6. Follow the instructions given in the above screenshot and connect with your agent i.e your server where the application is running.
7. Wait for 10-15 minutes until your profile will be completed.
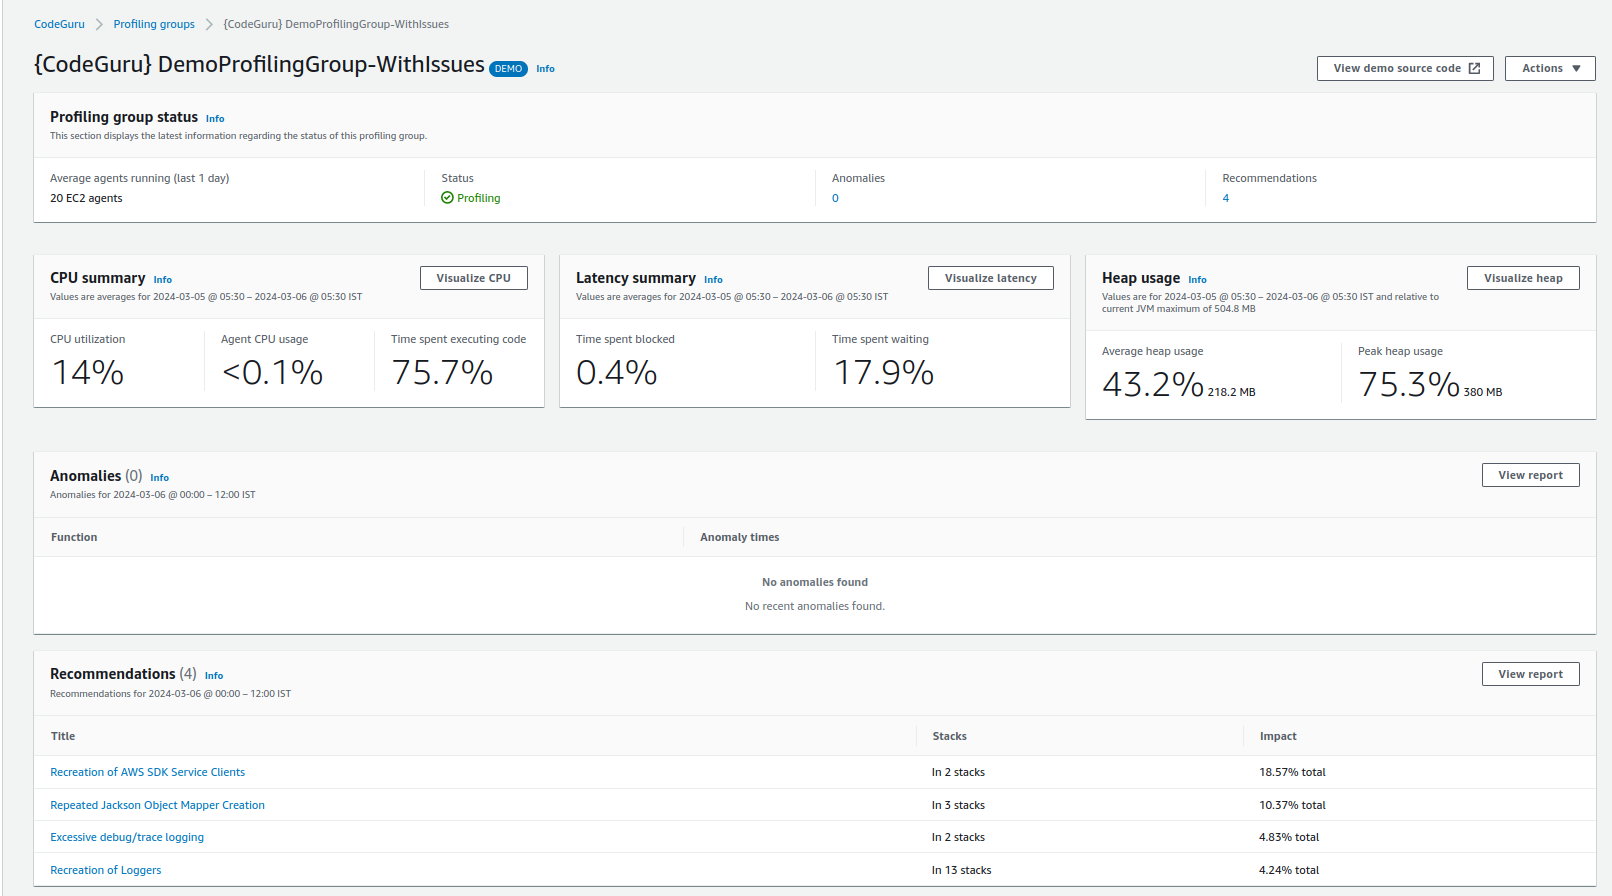
8. After that you will see that your profile has been created.
9. Click on any profile to see the outcome with recommendations to improve your application server.
Key Features
● Machine Learning: CodeGuru Security goes beyond traditional SAST tools by incorporating machine learning algorithms. This enables it to understand your code’s context, making the detection of potential security issues more accurate and insightful.
● Automated Reasoning: The tool employs automated reasoning, adding a layer of intelligent analysis to identify complex vulnerabilities that might be overlooked by conventional static analysis tools. This ensures a comprehensive and robust security assessment.
● Actionable Recommendations: CodeGuru Security doesn’t stop at pointing out weaknesses. It excels in offering clear, actionable recommendations on how to address identified vulnerabilities. This empowers developers with the knowledge and guidance needed to enhance the security posture of their applications.
● Vulnerability Tracking: Keeping tabs on the status of identified vulnerabilities is crucial. CodeGuru Security simplifies this process by providing a streamlined approach to track vulnerabilities from their discovery through to closure. This aids in maintaining a proactive and organized security response.
Supported environments or Integrations
-
CodeGuru Security (Preview)
- Java, Python, JavaScript, TypeScript, C#, CloudFormation, and Terraform
- GitHub, Bitbucket, GitLab, AWS CodePipeline, AWS CLI, IDE, JupyterLab Notebooks, SageMaker Studio Notebooks, Amazon Inspector
- You will find detailed information about CodeGuru’s security and code quality detectors in the provided link below. https://docs.aws.amazon.com/codeguru/detector-library/
-
CodeGuru Profiler
- Java and other JVM languages, Python
- EC2, EKS, ECS, Fargate, Lambda, or on-premises
CodeGuru Reviewer
- Java, Python
- GitHub, GitHub Enterprise, CodeCommit, Bitbucket
Conclusions
AWS CodeGuru integrates machine learning and automated reasoning to enhance code security, performance, and quality. CodeGuru Security employs ML and automated reasoning for accurate vulnerability detection, providing actionable recommendations and streamlined vulnerability tracking. CodeGuru Profiler visualizes application performance, and CodeGuru Reviewer automates code review with language support for Java and Python. The tool’s versatility extends to various languages, version control systems, and cloud environments, offering a comprehensive solution for developers seeking intelligent insights and improvements in their applications.
Follow us for more such blogs on trending topics like GitHub.


