
Building Custom Components in AEM SPA Editor with ReactJS: A Step-by-Step Guide
Introduction
Adobe Experience Manager (AEM) is a comprehensive content management solution for building websites, mobile apps, and forms. It makes it easy to manage your marketing content and assets. One of the powerful features of AEM is the Single Page Application (SPA) Editor, which allows developers to create more fluid and responsive user experiences. In this blog, we will walk through the process of creating a custom component in AEM SPA Editor using ReactJS.
Prerequisites
Before we start, make sure you have the following:
- A running instance of AEM 6.4 or later.
- Basic understanding of AEM, ReactJS, and JavaScript.
- Node.js and npm installed on your machine.
Step 1: Setting Up Your Project
First, we need to set up our AEM project. You can use the AEM Project Archetype to generate a new project. Run the following command in your terminal:
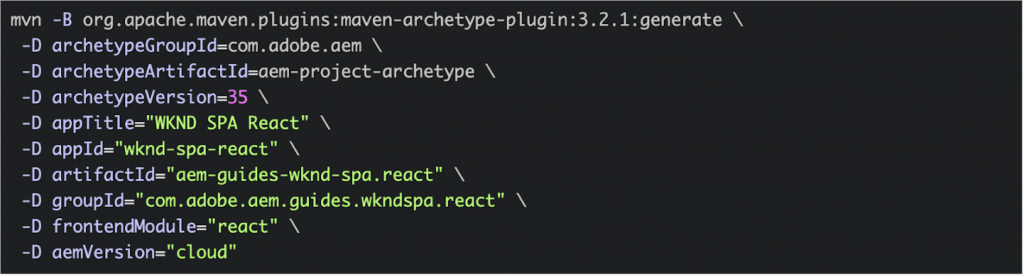
This will create a new AEM project with a React frontend module.
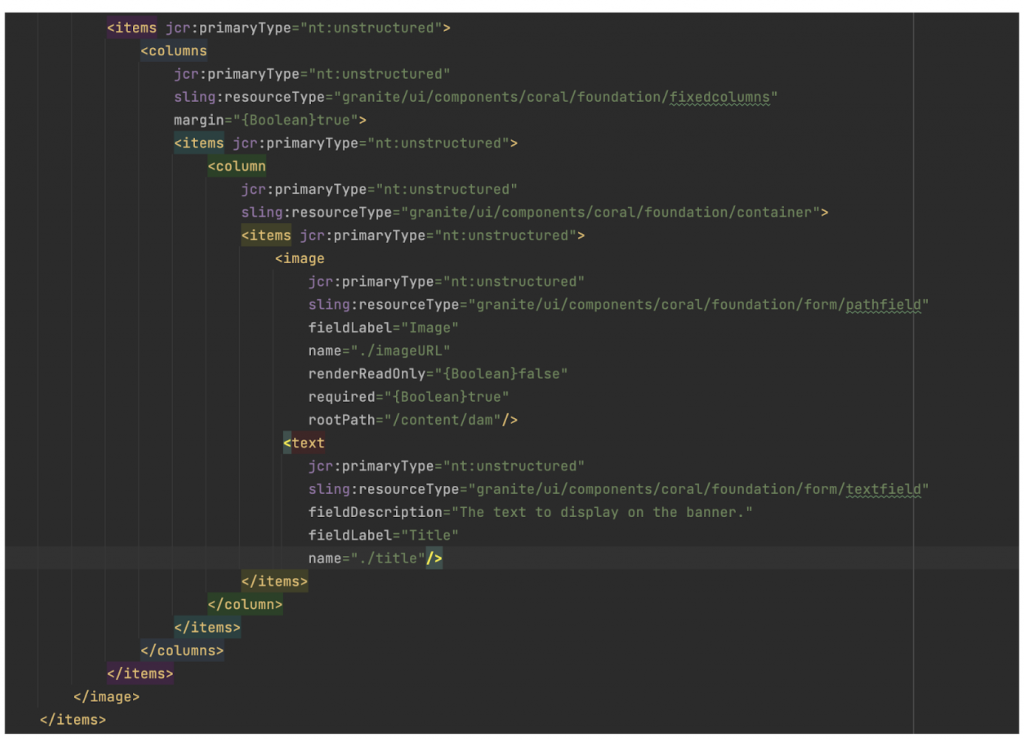
Step 2: Creating the Dialog
In your project’s core module, navigate to the components directory and create a new directory for your component. Inside this directory, create a file named _cq_dialog/.content.xml and define the dialog for your component. Here’s a simple example:
Step 3: Creating the Java Model
In the core module of your project, navigate to src/main/java/com/mycompany/myspa/core/models and create a new Java class named CustomBanner.java. This class will serve as the Sling Model for your component. Here’s a simple example:
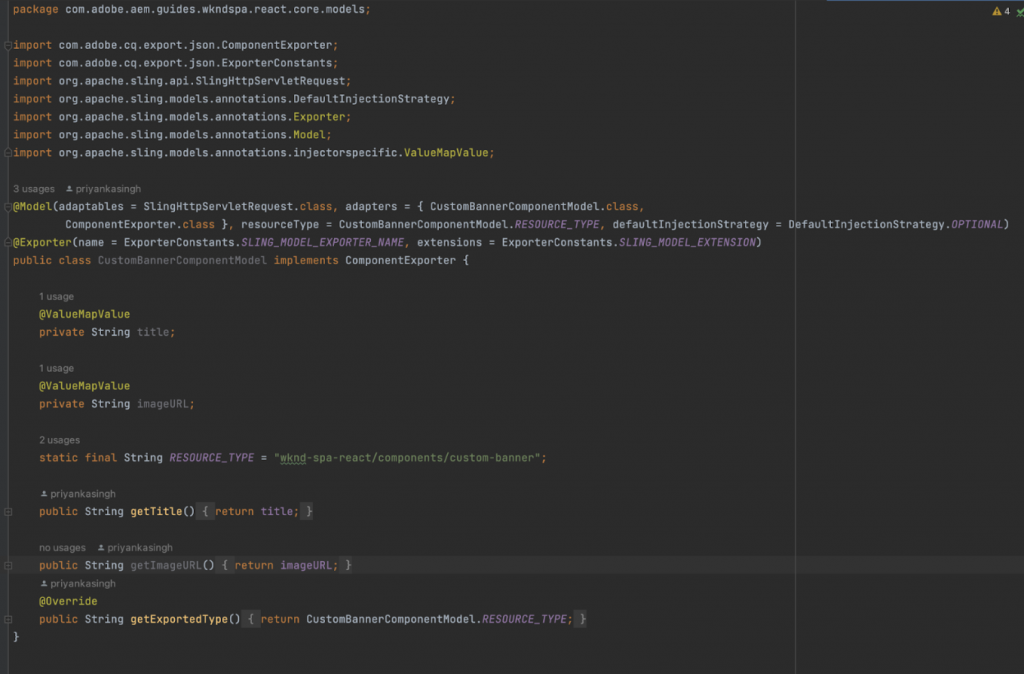
To ensure the Sling Model is automatically recognized by the JSON model API, it’s necessary to implement the ComponentExporter interface.
You need to modify the RESOURCE_TYPE static variable to refer to the AEM component wknd-spa-react/components/custom-banner created in the previous step. The resource type of the component is the key that links the Sling Model to the AEM component and eventually maps it to the React component.
Incorporate the getExportedType() method into your component. This method reveals the resource type, allowing the mapping to the React component.
Step 4: Creating the React Component and Mapping it with AEM Component
Navigate to the components directory in your project. Create a new directory for your custom component, and inside this directory, create file: customBanner.js
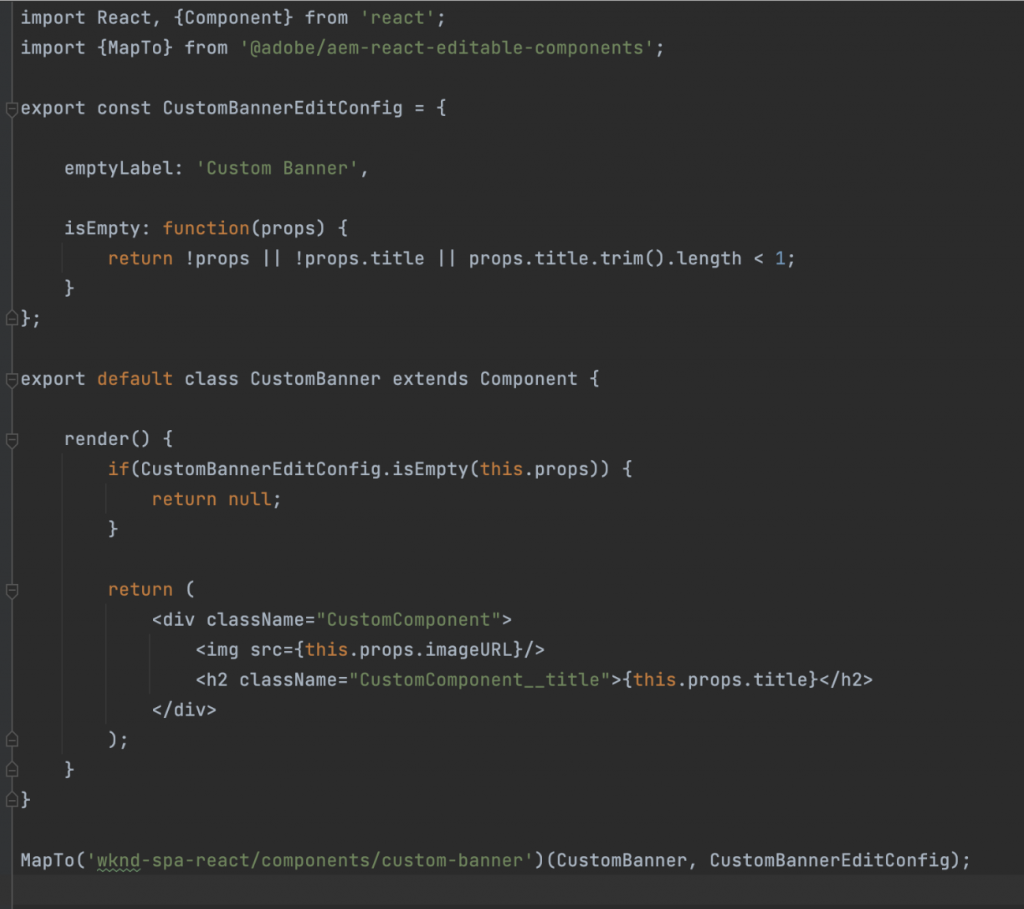
In this example, the MapTo function from the @adobe/aem-react-editable-components package is used to map the React component to the corresponding AEM component in the SPA Editor. The first argument of MapTo is the React component itself, and the second argument is the resource type of the AEM component.
By wrapping your React component with the MapTo function and specifying the resource type, the SPA Editor can recognize and render your component in the AEM authoring environment.
Finally, navigate to the src directory in your project’s spa module and open the import-components.js file. Add the following lines:

Step 5: Deploying the project
Deploy all of the updates to a local AEM environment from the root of the project directory using Maven commands.

Conclusion
Congratulations! You’ve successfully created a custom component to be used with the SPA Editor using ReactJS. Now, you can use this component in your AEM pages to create more interactive and personalized user experiences. The SPA Editor and ReactJS together provide a powerful toolset for creating dynamic and responsive UIs in your AEM projects. Happy coding!
